Table of Contents
Advertisement
EN
TUMBLE DRYER
Dryer
Read all instructions and explanations for
the installation before use. Follow the
instructions carefully. Keep the operation
instructions handy for later use. If the
appliance is sold or passed on, ensure
that the new owner always receives this operation instructions.
delete installation before use. Follow the
instructions carefully. Keep the operation
instructions handy for later use. If the
product is sold or passed on then ensure
that the new owner always receives this
manual.
MODEL:
MDG09EH80
Advertisement
Table of Contents

Related Manuals for Midea MDG09EH80


Summary of Contents for Midea MDG09EH80
- Page 1 Follow the instructions carefully. Keep the operation instructions handy for later use. If the product is sold or passed on then ensure that the new owner always receives this manual. MODEL: MDG09EH80...
-
Page 2: Table Of Contents
CONTENTS SAFETY INSTRUCTIONS Safety Instructions ..........INSTALLATION Product Description ..........Installation ............OPERATION Quick Start ............. Before each Drying ..........Control Panel ............Option..............Drying Programmes Table ........MAINTENANCE Cleaning and Care ..........Trouble Shooting ............ Technical Specifications ......... Product Fiches............ -
Page 3: Safety Instructions
SAFETY INSTRUCTIONS Safety Instructions CAUTION: RISK OF FIRE ! ! Warning! To prevent any damages to your and others' life or property, you have to follow the safety notes. Intended use • This heat pump dryer is intended for drying typical amounts of household laundry, which have been washed with water. - Page 4 SAFETY INSTRUCTIONS • The electrical safety of this tumble dryer can only be guaranteed when correctly earthed. It is essential that this standard safety requirement is met. If in any doubt, please have the household wiring system tested by a qualified electrician.
- Page 5 SAFETY INSTRUCTIONS • Warning: The appliance must not be supplied through an external switching device, such as a timer, or connected to a circuit that is regularly switched on and off by a utility. • Do not connect the appliance to the mains electricity supply by an extension lead, multi-socket adapter or similar.
- Page 6 SAFETY INSTRUCTIONS • Do not operate the dryer without the door filter. • Do not dry the clothes before being spun. • Do not expose the dryer directly under the sun. • Do not install the dryer in humid and drenching environment. •...
- Page 7 SAFETY INSTRUCTIONS • Items such as foam rubber (latex foam), shower caps, waterproof textiles, rubber backed articles and clothes or pillows fitted with foam rubber pads should not be dried in the tumble dryer. • Fabric softeners, or similar products, should be used as specified by the fabric softener instructions.
- Page 8 SAFETY INSTRUCTIONS Safety with children • This appliance can be used by children aged from 8 years and above and persons with reduced physical, sensory or mental capabilities or lack of experience and knowledge if they have been given supervision or instruction concerning use of the appliance in a safe way and understand the hazards involved.
- Page 9 The packaging materials are environmentally friendly and should be recycled. Recycling the packaging can reduce the use of raw materials in the manufacturing process and the amount of waste in landfill sites. Rated capacity Model 8.0kg MDG09EH80...
-
Page 10: Installation
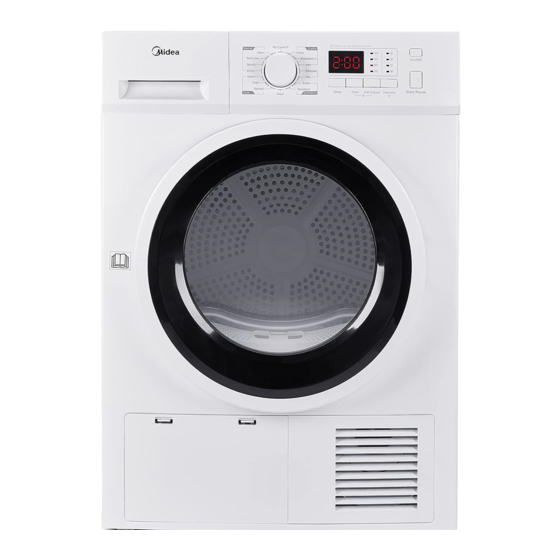
INSTALLATION Product Description Power cord Top board Control panel Water container Door Drum Door filter Air inlet Maintenance cover Note: The actual model you purchased might differ. Please see the product you purchased in kind prevail. Accessories The following parts are optional for specific models. If your dryer has following parts, please wear gloves to install them... - Page 11 INSTALLATION Transport Move cautiously. Do not grasp any salient parts of machine. The machine door cannot be used as the handle for transport. If the dryer can't be transported erectly, the dryer can be tilted to right less than 30°. Risk of injury and damage! Improper handling of the appliance may result in injury.
- Page 12 INSTALLATION 4. To keep vibration and noise within minimum level when the dryer is in use, it must be placed on a firm and level surface. 5. The feet must never be removed. Level Adjusting Once in its permanent operating position, check that the dryer is absolutely level with the aid of a spirit level.
-
Page 13: Operation
OPERATION Quick Start Note! Before using, make sure the tumble dryer is installed correctly. Before Drying plug in load close the door Drying select program select function start or default After Drying Buzzer beep and " :00"on display. open the door and pull out the pour out clean the filter... -
Page 14: Before Each Drying
OPERATION Before Each Drying Note! • Leave it to stand for 2 hours after transporting. Before first use, please use the soft fabric to clean the inside drum. . Put some clean rags into the drum. Plug the power, press 【On/Off 】 Select the 【Refresh】... - Page 15 OPERATION The reference weight of dry clothes (weight per item) Sweater Jacket Jeans Bath Towel (mixed 800g) cotton 800g ) (800g) cotton 900g ) Shirt Single bedsheet Work clothes Pyjamas cotton 300g ) cotton 600g ) ( 1120g) ( 200g) Socks T-Shirt Underwear...
-
Page 16: Control Panel
OPERATION Control Panel Display On/Off Product is switched on or off. The display shows the setting, estimated program time remaining and status messages of your dryer. Start/Pause Press the button to start or pause the Programmes drying cycle. Different drying cycles can be selected according to the users need and the type of Option laundry to be dried. - Page 17 OPERATION Option Delay Delay This function is used for delaying the start of the drying programme up to 24 hours. When the delayed programme starts, the time starts to countdown on the display and the delay icon blinks. 1.Load your laundry and make sure the machine door is closed. 2.Press the 【On/Off】button,then use the programme selector knob to select the desired programme.
- Page 18 OPERATION Anti-Crease Anti-Crease 、90、 At the end of the drying cycle, the anti-crease time is 60 minutes (default) or 30 120 minutes (selected). This function prevents the laundry from creases. The laundry can be removed during the anti-crease phase. Except【Cool】,【Wool】and【Refresh】, all the other programmes have this function. My Cycle My Cycle Used to define and save your favourite programme, which is used frequently.
- Page 19 OPERATION Programmes Programme selector 1.When the LED display screen brightens up, rotate the programme knob to select the desired programme. 2.Select the【Delay】,【Time】,【Intensity】,【Anti-Crease】 functions for additional options. 3.Press the【Start/Pause】button. 4.Press the【On/Off】button after the programme has comlpeted. Programme start The drum will rotate after the programme starts. The cycle phase LED in the display will light up and the remaining programme time will be displayed.
-
Page 20: Drying Programmes Table
OPERATION Drying Programmes Table Programme Delay Time Application/Properties Load Extra For single or multi-layer cotton laundry to be dried completely Standard direct storage. 8.0kg Cotton For single layer cotton laundry to remain damp ironing. Iron For delicate laundry that is suitable for drying or laundry 1.0kg Delicate adviced... - Page 21 Program Capacity Residual Model Consumption Time Humidity 1000rpm / 60% Cotton Standard 175min 1.90 MDG09EH80 1000rpm / 60% Cotton Standard 105min 1.10 Synthetic Standard 3.5kg 800rpm / 40% 60min 0.60 Note! • Thick or multi-layered fabrics, e.g. jackets etc., are not easy to dry. You had better choose Cotton Extra programme or use “Intensity”...
-
Page 22: Maintenance
MAINTENANCE Cleaning and Care Empty the water container 1. Pull out and hold the water container with two hands. 2. Tilt the water container, pour out the condensate water into the basin. 3. Install the water container. ! Warning! • Empty the water container after each use. Once the water container is filled completely, the programme will be paused and the "... - Page 23 MAINTENANCE Clean the heat exchanger ! Warning! Do not touch the heat exchanger with your hand, which may cause an injury. • As necessary, approx. once every 6 months, remove the fluff from the heat exchanger using a vacuum cleaner with a dusting brush attached. •...
- Page 24 MAINTENANCE Clean Tumble dryer ! Warning! • Disconnect the power cord before cleaning! • Clean the dryer with a wet cloth which is only damped by clean water. • Do not use solvents, abrasive cleaners, glass cleaners or all-purpose cleaners. These could damage plastic surfaces and other parts.
-
Page 25: Trouble Shooting
MAINTENANCE Trouble Shooting Many malfunctions and faults that might occur in daily operation can be easily remedied. Time and money will be saved because a service call won't be needed. The following guide may help you to find the reason for a malfunction and correct it. Display Reason Solutions... - Page 26 MAINTENANCE Problem Solution • Check if the power supply works. •Display is not on • Check if the mains plug is inserted. • Check the selected programme . • Press the 【On/Off】button. • Check the water container. If it's full, please pour out the condensate water and restart the dryer.
-
Page 27: Technical Specifications
MAINTENANCE Technical Specifications Model MDG09EH80 Parameter Dimension(L*W*H) 650*595*845(mm) +5°C ~ +35°C Ambient temperature Rated input power 800W Rated voltage 220-240V~ Rated frequency 50Hz Refrigerant R290 49kg Weight of product Rated capacity 8.0kg CO - eq 0.00t Quantity of refrigerant 150g Contains fluorinated greenhouse gases covered by the Kyoto Protocol. -
Page 28: Product Fiches
MAINTENANCE Product Fiches Model MDG09EH80 Rated Capacity 8.0kg Dryer Type Condenser Energy efficiency class Weighted annual energy consumption (AE ) ❶ 234.2kWh/year Automatic or non-automatic Automatic EU Ecolabel Energy consumption of the standard cotton programme Weighted energy consumption of the standard cotton programme at full and partial load 1.44kWh... - Page 29 16138100A33205...
Need help?
Do you have a question about the MDG09EH80 and is the answer not in the manual?
Questions and answers