Table of Contents
Advertisement
Available languages
Available languages
Quick Links
Style Selections
is a registered trademark
®
of LF, LLC. All Rights Reserved.
ATTACH YOUR RECEIPT HERE
Serial Number
Questions, problems, missing parts? Before returning to your retailer, call our customer
service department at 1-877-888-8225, 8 a.m. - 8 p.m., EST, Monday - Friday.
EB14151
Purchase Date
1
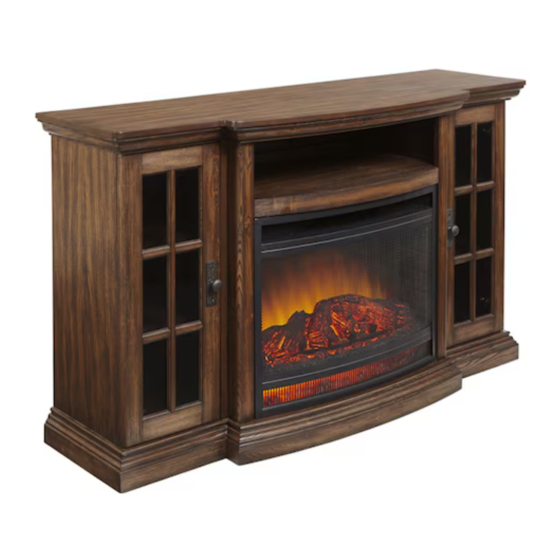
ELECTRIC FIREPLACE
AND MEDIA MANTEL
MODEL #F13-I-002-045A
ITEM #0574320
Français p. 18
Español p. 35
Lowes.com
Advertisement
Table of Contents

Related Manuals for Style selections F13-I-002-045A


Summary of Contents for Style selections F13-I-002-045A
- Page 1 ELECTRIC FIREPLACE AND MEDIA MANTEL Style Selections is a registered trademark ® of LF, LLC. All Rights Reserved. MODEL #F13-I-002-045A Français p. 18 Español p. 35 ATTACH YOUR RECEIPT HERE Serial Number Purchase Date Questions, problems, missing parts? Before returning to your retailer, call our customer service department at 1-877-888-8225, 8 a.m.
-
Page 2: Package Contents
PACKAGE CONTENTS PART DESCRIPTION QUANTITY PART DESCRIPTION QUANTITY Top Frame Right Side Panel Center Back Panel Adjustable Shelf Shelf Door Bottom Frame Back Rail Left Middle Panel Electric Insert Right Middle Panel Remote Control Side Back Panel Leveler (Preassembled Left Side Panel To Bottom Frame (D)) Lowes.com... - Page 3 HARDWARE CONTENTS (shown actual size) Spring Washer Flat Washer Qty. 22 Wood Dowel Qty. 22 Short Allen Bolt Qty. 6 Qty. 18 Allen Wrench Qty. 1 Screw Qty. 8 Knob Knob Bolt Qty. 2 Qty. 2 Long Allen Bolt Qty. 4 Touch-up Pen Qty.
-
Page 4: Safety Information
SAFETY INFORMATION Please read and understand this entire manual before attempting to assemble, operate or install the product. When using electrical appliances, basic precautions should always be followed to reduce the risk of fire, electric shock and injury to persons including the following: •... - Page 5 WARNING • Do not fully tighten the bolts on the assembly until mantel is completed. Positioning of the mantel pieces during assembly will be easier if there is some flexibility between the different pieces. Tighten all bolts after the assembly is complete and before the insert is set inside. •...
- Page 6 ASSEMBLY INSTRUCTIONS Note: Do not fully tighten the bolts on the assembly until mantel is completed. 1. Turn over left middle panel (E), right middle panel (F) and shelf (C). Attach left middle panel (E) and right middle panel (F) to shelf (C) using short Allen bolts (BB), spring washers (CC) and flat washers (DD).
- Page 7 ASSEMBLY INSTRUCTIONS 3. Insert wood dowels (AA) into bottom frame (D). Line up holes on left side panel (H) and right side panel (I) with wood dowels (AA) and attach to bottom frame (D) using short Allen bolts (BB), spring washers (CC) and flat washers (DD).
- Page 8 ASSEMBLY INSTRUCTIONS 5. Set top frame (A) gently on top of the assembly. Secure top frame (A) to left middle panel (E) and right middle panel (F) from underneath using short Allen bolts (BB), spring washers (CC) and flat washers (DD). Secure top frame (A) to left side panel (H) and right side panel (I) from underneath using long Allen bolts (JJ), spring washers (CC) and flat washers (DD).
- Page 9 ASSEMBLY INSTRUCTIONS 7. Insert knob bolts (HH) through backside of doors (K), then attach knobs (GG). Tighten with Phillips screwdriver. Insert adjustable shelves (J) into desired locations in cabinets of mantel. Hardware Used Knob Knob Bolt 8. From the backside of the assembly, insert the electric insert (M) into the opening.
- Page 10 ASSEMBLY INSTRUCTIONS 9. Attach back rail (L) to shelf (C) and bottom frame (D) using short Allen bolts (BB), spring washers (CC) and flat washers (DD). Tighten with Allen wrench (EE). Hardware Used Short Allen Bolt Spring Washer Flat Washer Allen Wrench 10.
- Page 11 OPERATING INSTRUCTIONS 1. Ensure all controls are in the “OFF” position before plugging the appliance into a properly grounded electrical outlet. This appliance is for use on 120 volts. The appliance has a 3-prong grounded plug. If your electrical outlet has only 2 slots, you will have to use an adapter to convert from the 3-prong power cord to a Matel Screw 2-slot receptacle.
-
Page 12: Control Panel
OPERATING INSTRUCTIONS CONTROL PANEL 4a. Power: Push button to turn on or turn off. If OFF, all functions (except timer) will be restored at the next power ON. Note: Unplugging the unit will reset all functions. 4b. Flame: Press to activate the flame function. This button controls the brightness of flame and ember effect. - Page 13 OPERATING INSTRUCTIONS 4d. Timer: Press once to activate the TIMER. Press UP and DOWN button to adjust the timer. The choices are 0.5H, 1H, 1.5H, 2H, and 8H. Once the timer is on and the desired setting is reached, the system will shut down after the chosen time.
-
Page 14: Remote Control
OPERATING INSTRUCTIONS 4g. Up: Use to turn up the heat, brightness of flame or timer. REMOTE CONTROL 5. Buttons on the remote control (N) have the same functions as those on the control panel except Heater and Child Lock. Using the remote control (N), the Heater button can perform all the same functions as the control panel button except it can not switch the temperature display from Fahrenheit to Celsius. -
Page 15: Troubleshooting
TROUBLESHOOTING POSSIBLE CAUSE SOLUTION PROBLEM 1. Dimmer control button 1. Push flame button to increase light. is set too low. 2. Contact customer service center. 2. LED strip not Simulated flame 3. Remove screws holding back panel functioning. effect is dim or not in place and remove back panel. -
Page 16: Replacement Parts List
REPLACEMENT PARTS LIST For replacement parts, call our customer service department at 1-877-888-8225, 8 a.m. - 8 p.m., EST, Monday - Friday. PART PART # DESCRIPTION Remote Control 2014-411003 Control Panel 2014-412003 Front Frame 2014-413003 Display Screen 2014-414002 LED Light Board A 2014-415005 Mother Board 2014-416003... - Page 17 REPLACEMENT PARTS LIST For replacement parts, call our customer service department at 1-877-888-8225, 8 a.m. - 8 p.m., EST, Monday - Friday. Printed in China Style Selections ® is a registered trademark of LF, LLC. All Rights Reserved. Lowes.com...
- Page 18 MANTEAU MULTIMEDIA Style Selections ® est une marque déposée de LF, LLC. Tous droits réservés. MODÈLE #F13-I-002-045A JOIGNEZ VOTRE REÇU ICI Numéro de série Date d’achat Des questions, des problèmes, des pièces manquantes? Avant de retourner l’article au détaillant, communiquez avec notre service à la clientèle au 1 877 888-8225, entre 8 h et 20 h (HNE), du lundi au vendredi.
- Page 19 CONTENU DE L’EMBALLAGE PIÈCE DESCRIPTION QUANTITÉ PIÈCE DESCRIPTION QUANTITÉ Cadre supérieur Panneau latéral droit Panneau arrière central Tablette amovible Tablette Porte Cadre inférieur Traverse arrière Panneau central gauche Foyer électrique encastrable Panneau central droit Télécommande Panneau arrière latéral Patin réglable Panneau latéral gauche (préassemblé...
- Page 20 QUINCAILLERIE INCLUSE (grandeur réelle) Rondelle à ressort Rondelle plate Qté. 22 Goujon en bois Boulon Allen court Qté. 22 Qté. 6 Qté. 18 Clé hexagonale Qté. 1 Qté. 8 Poignée Boulon de la poignée Qté. 2 Qté. 2 Boulon Allen long Qté.
-
Page 21: Consignes De Sécurite
CONSIGNES DE SÉCURITE Assurez-vous de lire et de comprendre l’intégralité du présent manuel avant de tenter d’assembler, d’utiliser ou d’installer l’article. Lorsque vous utilisez un appareil électrique, respectez les mesures de sécurité élémentaires suivantes afin de réduire les risques d’incendie, de choc électrique et de blessure : •... - Page 22 aux codes locaux et au code national de l’électricité, ANSI/NFPA nº 70. • Cet appareil doit être utilisé sous surveillance et ne doit pas être laissé sans surveillance. • Il est fortement recommandé de réserver l’utilisation de la prise de 15 ampères complète à la cheminée électrique.
-
Page 23: Instructions Pour L'assemblage
INSTRUCTIONS POUR L’ASSEMBLAGE Remarque : Ne serrez pas complètement les boulons avant d’avoir terminé l’assemblage du manteau de cheminée. 1. Retournez le panneau central gauche (E), le panneau central droit (F) et la tablette (C). Fixez le panneau central gauche (E) et le panneau central droit (F) à... - Page 24 INSTRUCTIONS POUR L’ASSEMBLAGE 3. Insérez les goujons en bois (AA) dans le cadre inférieur (D). Alignez les trous du panneau latéral gauche (H) et du panneau latéral droit (I) aux goujons en bois (AA) et fixez-les au cadre inférieur (D) à l’aide de boulons Allen court (BB), de rondelles à...
- Page 25 INSTRUCTIONS POUR L’ASSEMBLAGE 5. Installez le cadre supérieur (A) doucement sur le dessus de l'ensemble. Fixez le cadre supérieur (A) au panneau central gauche (E) et au panneau central droit (F) par le dessous à l’aide de boulons Allen courts (BB), de rondelles à ressort (CC) et de rondelles plates (DD).
- Page 26 INSTRUCTIONS POUR L’ASSEMBLAGE 7. Insérez les boulons des poignées (HH) à l’arrière des portes (K) et fixez la poignée (GG). Serrez-les fermement à l’aide d’un tournevis cruciforme. Insérez les tablettes amovibles (J) là où vous le désirez dans les armoires du manteau de cheminée. Quincaillerie utilisée Poignée Boulon de la...
- Page 27 INSTRUCTIONS POUR L’ASSEMBLAGE 9. Ensuite, fixez la traverse arrière (L) à la tablette (C) et au cadre inférieur (D) à l’aide des boulons Allen court (BB), des rondelles à ressort (CC) et des rondelles plates (DD). Serrez le tout à l’aide de la clé hexagonale (EE).
-
Page 28: Instructions De Fonctionnement
INSTRUCTIONS DE FONCTIONNEMENT 1. Vérifiez que toutes les commandes sont à la position « OFF » (arrêt) avant de brancher l’appareil sur une prise de courant correctement mise à la terre. Cet appareil est conçu pour être utilisé sur un circuit de 120 volts. Cet appareil est muni d’une fiche à... - Page 29 INSTRUCTIONS DE FONCTIONNEMENT Panneau de commande 4a. Alimentation : appuyez sur ce bouton pour mettre l’appareil en marche ou pour l’éteindre. S’il est éteint, toutes les fonctions (sauf la minuterie) seront reprises lors de la prochaine mise en marche. Remarque: Débrancher l’appareil réinitialisera toutes les fonctions.
- Page 30 INSTRUCTIONS DE FONCTIONNEMENT 4d. Minuterie : appuyez une fois pour activer la minuterie. Appuyez sur le bouton PLUS ou MOINS pour régler la minuterie. Les choix possibles sont 30 min, 1 h, 1 h 30, 2 h ou 8 h. Une fois la minuterie en marche au réglage désiré, le système s’éteindra après le délai sélectionné.
-
Page 31: Entretien
INSTRUCTIONS DE FONCTIONNEMENT 4g. Plus : utilisez ce bouton pour augmenter la température, l’intensité de la flamme ou la durée de la minuterie. Télécommande 5. Les boutons de la télécommande (N) possèdent les mêmes fonctions que celles du panneau de contrôle. Le bouton du foyer de la télécommande (N) permet d’activer les mêmes fonctions que le bouton du panneau de commande, sauf qu’il ne permet pas de... -
Page 32: Dépannage
DÉPANNAGE CAUSE POSSIBLE SOLUTION PROBLÈME 1. Appuyez sur le bouton flamme pour 1. Le réglage du gradateur accroître l’intensité de la flamme. est trop faible. 2. Communiquez avec le service à la 2. La barrette de DEL ne clientèle. L’effet de flamme fonctionne pas. - Page 33 LISTE DES PIÈCES DE RECHANGE Pour obtenir des pièces de rechange, communiquez avec le service à la clientèle au 1 877 888-8225, entre 8 h et 20 h (HNE), du lundi au vendredi. PIÈCE DESCRIPTION NO DE PIÈCE Télécommande 2014-411003 Panneau de commande 2014-412003 Cadre avant...
- Page 34 Pour obtenir des pièces de rechange, communiquez avec le service à la clientèle au 1 877 888-8225, entre 8 h et 20 h (HNE), du lundi au vendredi. Imprimé en Chine Style Selections ® est une marque déposée de LF, LLC. Tous droits réservés.
- Page 35 Style Selections es una marca registrada ® de LF, LLC. Todos los derechos reservados. MODELO #F13-I-002-045A ADJUNTE SU RECIBO AQUI Número de serie Fecha de compra ¿Preguntas, problemas, piezas faltantes? Antes de volver a la tienda, llame al Servicio al Cliente al 1-877-888-8225, de lunes a viernes de 8 a.m.
-
Page 36: Contenido Del Paquete
CONTENIDO DEL PAQUETE PIEZA DESCRIPCIÓN CANTIDAD PIEZA DESCRIPCIÓN CANTIDAD Estructura superior Panel lateral derecho Panel posterior central Repisa ajustable Repisa Puerta Estructura inferior Riel posterior Accesorio eléctrico Panel central izquierdo Control remoto Panel central derecho Nivelador (preensamblado Panel posterior lateral en la estructura inferior (D)) Panel lateral izquierdo Lowes.com... - Page 37 ADITAMENTOS (se muestran en tamaño real) Arandela de resorte Arandela plana Cant. 22 Espiga de madera Perno Allen corto Cant. 22 Cant. 6 Cant. 18 Llave Allen Cant. 1 Tornillo Cant. 8 Perilla Perno de perilla Cant. 2 Cant. 2 Perno Allen largo Cant.
-
Page 38: Información De Seguridad
INFORMACIÓN DE SEGURIDAD Lea y comprenda completamente este manual antes de intentar ensamblar, usar o instalar el producto. Cuando utilice electrodomésticos, siempre tome medidas de precaución básicas para reducir el riesgo de incendios, descargas eléctricas y lesiones personales, incluidas las siguientes: •... - Page 39 • Compartir la salida con otros artículos electrónicos podría crear sobrecarga y dañar la salida y los artículos electrónicos con el tiempo. GUARDE ESTAS INSTRUCCIONES ADVERTENCIA • No apriete completamente los pernos en el ensamble hasta que la repisa para chimenea esté terminada.
-
Page 40: Instrucciones De Ensamblaje
INSTRUCCIONES DE ENSAMBLAJE Nota: No apriete completamente los pernos en el ensamble hasta que la repisa para chimenea esté terminada. 1. Voltee el panel central izquierdo (E), el panel central derecho (F) y la repisa (C). Fije el panel central (E) y el panel central derecho (F) a la repisa (C) con los pernos Allen cortos (BB), las arandelas de resorte (CC) y las arandelas planas (DD). - Page 41 INSTRUCCIONES DE ENSAMBLAJE 3. Coloque las espigas de madera (AA) en la estructura inferior (D). Alinee los orificios en el panel lateral izquierdo (H) y el panel lateral derecho (I) con las espigas de madera (AA) y fije a la estructura inferior (D) con pernos Allen corto (BB), arandelas de resorte (CC) y arandelas planas (DD).
- Page 42 INSTRUCCIONES DE ENSAMBLAJE 5. Coloque la estructura superior (A) con cuidado en la parte superior del ensamble. Asegure la estructura superior (A) al panel central izquierdo (E) y al panel central derecho (F) desde debajo con pernos Allen cortos (BB), arandelas de resorte (CC) y arandelas planas (DD).
- Page 43 INSTRUCCIONES DE ENSAMBLAJE 7. Introduzca los pernos de perilla (HH) a través del lado posterior de las puertas (K) e instale la perilla (GG). Apriete firmemente con un destornillador Phillips (no se incluye). Coloque las repisas ajustables (J) en las ubicaciones deseadas dentro del gabinete de la repisa para chimenea.
- Page 44 INSTRUCCIONES DE ENSAMBLAJE 9. Luego, fije el riel posterior (L) a la repisa (C) y a la estructura inferior (D) con los pernos Allen court (BB), las arandelas de resorte (CC) y las arandelas planas (DD). Apriete con la llave Allen (EE). Aditamentos utilizados Perno Allen court Arandela de resorte...
- Page 45 INSTRUCCIONES DE USO 1. Compruebe que todos los controles estén en posición “OFF” (apagado) antes de enchufar el electrodoméstico en un tomacorriente con la debida puesta eléctrica a tierra. Este electrodoméstico está diseñado para su uso en 120 voltios. Este electrodoméstico tiene un enchufe con puesta a tierra de 3 clavijas.
-
Page 46: Instrucciones De Uso
INSTRUCCIONES DE USO Panel de control 4a. Encendido: Presione el botón para encender o apagar. Si está en la posición OFF (Apagado), todas las funciones (a excepción del temporizador) se restablecerán la próxima vez que se encienda. Nota: Desenchufar la unidad restablecerá todas las funciones. - Page 47 INSTRUCCIONES DE USO 4d. Temporizador: Presione una vez para activar el TEMPORIZADOR. Presione los botones UP (Arriba) y DOWN (Abajo) para regular el temporizador. Las opciones son 0,5H, 1H, 1,5H, 2H, y 8H. Una vez que el temporizador esté encendido y obtenga la configuración deseada, el sistema se apagará...
-
Page 48: Cuidado Y Mantenimiento
INSTRUCCIONES DE USO 4g. Arriba: Úselo para aumentar el calor, la intensidad de la llama o el temporizador. Control remoto 5. Los botones del control remoto (N) tienen las mismas funciones del panel de control, excepto Calentador y dispositivo de seguridad para niños. Usando el control remoto (N), el botón del calentador puede realizar las mismas funciones que el botón en el panel de control, con la excepción que no puede cambiar la... -
Page 49: Solución De Problemas
SOLUCIÓN DE PROBLEMAS LAS POSIBLES RAZONES SOLUCIÓN PROBLEMA 1. Presione el botón “llama” para aumentar la intensidad de la luz. 1. El botón°regulador°se 2. Póngase en contacto con el Centro ajustó°demasiado°bajo. de Servicio al Cliente. 2. La tira°del LED°no El efecto de 3. -
Page 50: Lista De Piezas De Repuesto
LISTA DE PIEZAS DE REPUESTO Para obtener piezas de repuesto, llame al Servicio al Cliente al 1-877-888-8225, de lunes a viernes de 8 a.m. a 8 p.m., hora estándar del Este. PIEZA PIEZA # DESCRIPCIÓN Control remoto 2014-411003 Panel de control 2014-412003 Estructura frontal 2014-413003... - Page 51 Para obtener piezas de repuesto, llame al Servicio al Cliente al 1-877-888-8225, de lunes a viernes de 8 a.m. a 8 p.m., hora estándar del Este. Impreso en China Style Selections ® es una marca registrada de LF, LLC. Todos los derechos reservados.
Need help?
Do you have a question about the F13-I-002-045A and is the answer not in the manual?
Questions and answers