Table of Contents
Advertisement
Quick Links
Advertisement
Table of Contents

Subscribe to Our Youtube Channel
Related Manuals for Gaggenau CX 482


Summary of Contents for Gaggenau CX 482
- Page 1 Gaggenau en Information for Use CX 482 Full surface induction cooktop...
-
Page 2: Table Of Contents
en Safety Table of contents ¡ Keep the instructions, the appliance and the product information safe for future refer- Safety .............. 2 ence or for the next owner. ¡ Do not connect the appliance if it has been Avoiding material damage........ 4 damaged in transit. Environmental protection and saving en- ergy .............. 5 1.2 Intended use... -
Page 3: Safety
Safety en 1.4 Safe use WARNING ‒ Risk of electric shock! Incorrect repairs are dangerous. WARNING ‒ Risk of fire! ▶ Repairs to the appliance should only be Leaving fat or oil cooking on an unattended carried out by trained specialist staff. hob can be dangerous and may lead to fires. ▶... -
Page 4: Avoiding Material Damage
en Avoiding material damage The wireless temperature sensor is equipped WARNING ‒ Danger: Magnetism! with a battery, which may become damaged if The wireless temperature sensor is magnetic it is exposed to high temperatures. and can damage electronic implants, e.g. ▶ Remove the sensor from the cookware and heart pacemakers or insulin pumps. -
Page 5: Environmental Protection And Saving En- Ergy
Environmental protection and saving energy en ATTENTION! A fan is located on the underside of this hob. If a drawer is located on the underside of the hob, ▶ do not store any small or pointed objects, paper or tea towels in it. These objects may be sucked in and damage the fan or impair the cooling. - Page 6 en Suitable cookware Cookware bases that contain aluminium. These cookware bases reduce the ferromag- netic area, which means that less power is emitted to the cookware. This cookware may not be sufficiently detected or may not be de- tected at all, and therefore does not heat suf- ficiently.
-
Page 7: Familiarising Yourself With Your Appliance
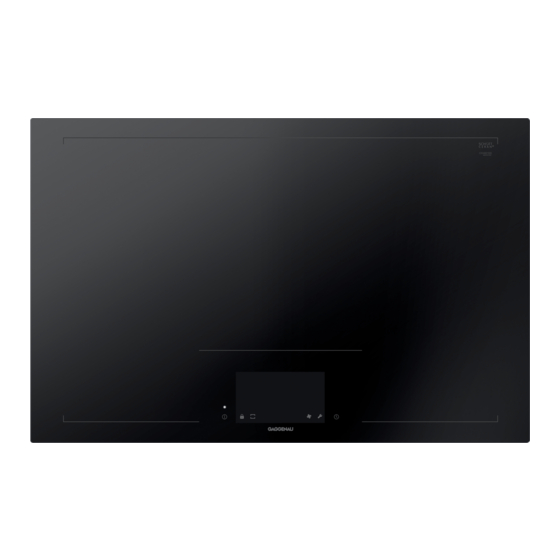
Familiarising yourself with your appliance en Familiarising yourself with your appliance 5 Familiarising yourself with your appliance 5.1 Cooking surface Button Function Time menu The entire cooking surface of the hob supplies induc- Timer ¡ tion heating. Place the cookware on any position within ... -
Page 8: Cooking Sensor
en Familiarising yourself with your appliance Function bar Opening the info menu Enables access to certain functions and additional Touch in the function bar. ▶ menus. a The touch field is visible when the function is avail- The following options are shown in the function bar: able. - Page 9 6.3 Cookware You can find a list of recommended cookware on the 6.1 Initial cleaning official website www.gaggenau.com. Further information on suitable cookware. Remove any leftover packaging from the hob surface and wipe the surface with a damp cloth. You can find a list of recommended detergents on the official website 6.4 Initial start-up...
- Page 10 en Basic operation QuickStart If you place cookware on the cooking surface be- ▶ fore you switch on the appliance, it is detected when the main switch is pressed and the cooking zone display appears on the touchscreen. Changing the power level and switching off the cooking zone Select the cooking zone.
- Page 11 Dynamic cooking en Boiled potatoes 4.5 - 5.5 15 - 30 Fish, breaded and frozen, e.g. 6 - 7 8 - 15 fish fingers Pasta 6 - 7 6 - 10 Prawns and scampi 7 - 8 4 - 10 Stew 3.5 - 4.5 120 - 180 Sautéing fresh vegetables and 7 - 8 10 - 20 mushrooms Soups 3.5 - 4.5 15 - 60 Stir-fry, vegetables, meat cut in 7 - 8 15 - 20 Vegetables...
- Page 12 en Professional cooking Note: If the cookware is not the right size for this func- 8.2 Activating dynamic cooking tion, the symbol lights up on the cooking zone dis- Touch . play. For information, touch . To return to the main Touch ...
- Page 13 Time-setting options en To do this, touch one of the vertical edges of the To separate the combined areas again, touch one middle area and swipe left or right with your finger of the vertical edges of the area and swipe left or to the end of the adjacent area.
- Page 14 en Booster for pots Activating the stopwatch function a The set time begins to count down. a When the time has elapsed, a signal sounds. Press . Select . a 00.00. flashes in the short-term timer display. Touch to confirm the selection. Press ...
- Page 15 Booster for pans en Booster for pans 12 Booster for pans You can use this function to heat up the cookware 12.1 Recommended applications faster than with power level 9.0. ¡ Only use cold cookware. After deactivating the function, select the appropriate ¡...
- Page 16 en Cooking sensor The settings for the cooking zone are retained for Touch to confirm the transfer of settings. 30 seconds. a The power level is displayed in the new cooking When you place the cookware back in this position, the zone. same settings are used.
- Page 17 Cooking sensor en Then touch the centre of the wireless cooking sensor. Rice 25-35 Select the corresponding temperature level for the Parboiled rice 25-35 food you want to cook. The temperature symbol next to the cooking zone lights up in stages until the Brown rice 45-55 selected temperature has been reached.
- Page 18 You can purchase the wireless cooking sensor from located at this height above sea level, do not set the customer service, in our online shop or in a specialist boiling point. Select the setting that matches your shop www.gaggenau.com. home's height above sea level.
- Page 19 Note: If the silicone patch comes loose, use a new customer service, in our online shop or in a specialist one. If required, you can purchase a set with five silic- shop www.gaggenau.com. one patches from specialist retailers, from our cus- tomer service or on our official website www.gag- genau.com by quoting the article number 17007119.
- Page 20 en Dynamic cooking for an item of cookware Open the cooking sensor lid and remove the battery 16.5 Cleaning from the base. Cooking sensor Clean with a damp cloth. Do not place in the dish- washer and do not get it wet. When you are not using the cooking sensor, remove it from the cookware and store it in a clean, secure loca- tion, away from any heat sources.
- Page 21 Teppanyaki function en Notes ¡ If the function is not available, the cookware may be too large. In this case, use a smaller item of cook- ware. ¡ - If the function is not activated, the maximum power of the appliance may have been reached. ¡...
- Page 22 en Childproof lock Press . Select the required power level in the settings area. 18.3 Changing the power level for the a The alignment of the teppanyaki grill with the selec- teppanyaki function ted power levels is shown in the display. If no power Touch the set power level.
- Page 23 Individual safety switch-off en ¡ If you move the cookware on the cooking surface Notes ¡ If the function does not switch itself off, the hob while the function is activated, all the settings may switches off automatically after 30 minutes. be lost. Individual safety switch-off 21 ...
- Page 24 en Power limitation Power limitation 23 Power limitation You can use this function to set the total power of the While the PowerManager function is activated, the out- hob. put of a cooking zone may temporarily fall below the The hob is set at the factory. You can find the max- nominal value.
- Page 25 Home Connect en To do this, you must be a registered Home Con- 24.4 Wi-Fi symbols nect user, have installed the app on your mobile device The Wi-Fi indicator on the main control panel changes and be connected to the Home Connect server. depending on the status of the connection and the As soon as a software update is available, you will be availability of the Home Connect server.
- Page 26 en Hob-based hood control Hob-based hood control 25 Hob-based hood control If the hob and the extractor hood are Home Connect- Fan off. compatible, connect the appliances in the Home Con- 1, 2, 3 Fan settings: Low, Medium, nect app. To do this, connect the two appliances to High Home Connect and follow the instructions in the app.
- Page 27 Remove heavy soiling using a glass scraper. ATTENTION! Clean the hob with a cleaning agent for glass Unsuitable cleaning products may damage the sur- ceramic.
- Page 28 en FAQs 27.2 Noises Question Answer Why can I hear noises ¡ Noises may be generated while using the hob depending on the base material of while I'm cooking? the cookware. These noises are normal for induction technology. They do not in- dicate that there is a fault.
- Page 29 FAQs en Question Answer One item of cookware is on ¡ The base of the cookware may be deformed or embossed, or the cookware is not the cooking surface, but suitable for induction cooking. two or more are shown on Check the flatness of the cookware and place it back on the cooking surface. the touch display.
-
Page 30: Customer Service
en Troubleshooting 27.5 Home network Question Answer Why can I not connect the ¡ Press the WPS button on the router within 2 minutes after selecting the connect hob to the WiFi after the automatically option. WPS button has been Once this time has elapsed, start the connection set-up again. If the problems per- pressed on the router? sist, restore the appliance to the factory settings. - Page 31 Troubleshooting en Fault Cause and troubleshooting The hob is respond- A fault has occurred in the electronics. ing in an unusual Switch off the appliance using the mains fuse or the circuit breaker in the fuse box. manner or can no Wait a few seconds before reconnecting the appliance.
- Page 32 2014/53/EU. A detailed Declaration of Conformity can be found on- A detailed RED Declaration of Conformity can be found line at www.gaggenau.com/gb among the additional online at www.gaggenau.com among the additional documents on the product page for your appliance.
- Page 33 Customer Service en This statement of compliance is prepared by the manu- 30.1 Statement of Compliance for Great facturer. Britain The manufacturer, BSH Hausgeräte GmbH deems that it has complied with Product type ¡ provision 5.1-1 of ETSI EN 303 645 v2.1.1 and, This statement of compliance covers the products de- where relevant, provision 5.1-2 of ETSI EN 303 645 scribed in this information for use whose model identi-...
- Page 36 BSH Hausgeräte GmbH Carl-Wery-Straße 34 81739 München, GERMANY www.gaggenau.com Valid within Great Britain: Imported to Great Britain by BSH Home Appliances Ltd. Grand Union House Old Wolverton Road Wolverton, Milton Keynes MK12 5PT United Kingdom...
Need help?
Do you have a question about the CX 482 and is the answer not in the manual?
Questions and answers