Table of Contents
Advertisement
Quick Links
Advertisement
Table of Contents

Related Manuals for Promaster CHRONICLE


Summary of Contents for Promaster CHRONICLE
- Page 1 U S E R M A N U A L E N G L I S H...
-
Page 2: Table Of Contents
TA B L E O F C O N T E N T S I N T R O D U C T I O N ..............3 P A R T S D I A G R A M . -
Page 3: I N T R O D U C T I O N
Be sure to refer to the main parts diagram as well as each of the figures throughout the pages as you read. When a specific part of the Chronicle is referred to in green, you will find it shown on the main parts diagram and/or in the referenced figure. -
Page 4: Part S D I A G R A M
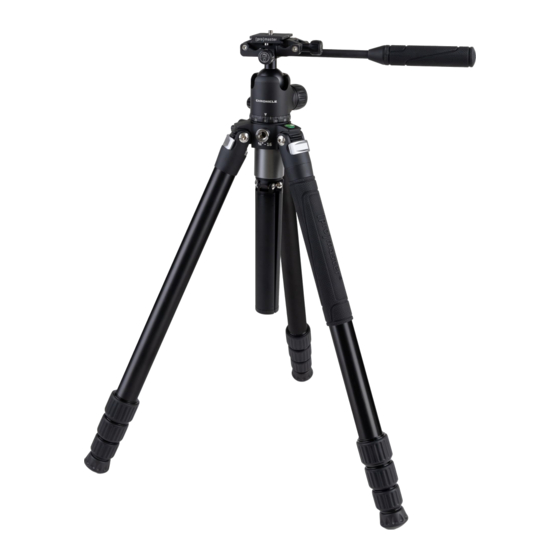
P A R T S D I A G R A M Camera / Phone Control Handle Knob Ball Head Tripod Collar Bullseye Level Leg Angle Locks Monopod Leg Soft Leg Grip Flexor Leg Locks Removable Feet... - Page 5 P A R T S D I A G R A M B A L L H E A D QR Plate QR Knob QR Plate Control Control Handle Camera / Handle Phone Ball Friction Knob Bolt Knob Pan Lock Knob Panning Scale T R I P O D C O L L A R 1/4”-20 Attachment Port...
-
Page 6: I N I T I A L S E T U P
I N I T I A L S E T U P When you first unbox the Chronicle, it will be stored in its fabric bag. This bag is a great way to store and transport the tripod. It is also a good place to keep the tripod’s tools, and parts which you may not be using at the time. -
Page 7: At Ta C H I N G Y O U R C A M E R A
AT TA C H I N G Y O U R C A M E R A (USING THE QUICK RELEASE PLATE) The Chronicle comes with its ball head set to camera mode. To learn more about how to change it to phone mode and then back to camera mode, please refer to the “Attaching Your Phone”... -
Page 8: At Ta C H I N G Y O U R P H O N E
AT TA C H I N G Y O U R P H O N E One of the Chronicle’s premier features is its ability to switch from a camera to a phone mount in seconds without the need for any additional accessories or tools. -
Page 9: R E M O V I N G A N D M O U N T I N G T H E H E A D
This screw is reversible. The larger side is a 3/8”-16 thread, which works with the Chronicle head as well as most other photographic heads. The opposite side of the screw is a 1/4”-20 thread, which is compatible with some other brands of lightweight heads. -
Page 10: O P E R A T I N G T H E B A L L H E A
O P E R AT I N G T H E B A L L H E A D Your Chronicle tripod kit includes a precision machined aluminum ball head. It is a double-action design, meaning there is a control for the ball tension and separate control for the panning motion. -
Page 11: A D J U S T I N G L E G A N G L E
A D J U S T I N G L E G A N G L E S The Chronicle tripod has 3 working angles for the legs: 22º, 50º, & 80º. Each leg angle can be adjusted independently. Most of the time, you will set all 3 legs to the same angle. - Page 12 Leg Angle Position #1 Leg Angle Position #3...
-
Page 13: E X T E N D I N G A N D C O L L A P S I N G T H E L E G
C O L L A P S I N G T H E L E G S The Chronicle tripod has 4 sections per leg. This means you have 3 extendable leg sections and one fixed section which is connnected to tripod collar. -
Page 14: C O N V E R T I N G T O A H A N D H E L D S T A B I L I Z E
C O N V E R T I N G T O A H A N D H E L D S TA B I L I Z E R The middle assembly of the Chronicle is called the Flexor. The Flexor... -
Page 15: C O N V E R T I N G T O A T A B L E T O P / G R O U N D - L E V E L T R I P O
C O N V E R T I N G T O A M O N O P O D Your Chronicle tripod can be converted to a monopod with either a single foot or 3-leg base. Begin by removing the... - Page 16 To add a 3-leg base to the monopod, unscrew the removable foot from the monopod’s base. You may choose to store this foot in the 3/8”-16 attachment port in the tripod collar or place it in the tripod’s fabric bag for safekeeping. Now take mini tripod / 3-leg base which you previously removed from the Flexor.
-
Page 17: U S I N G T H E L E V E L
U S I N G T H E L E V E L S Your Chronicle tripod has 2 levels. Both are bullseye-style levels. One can be found in tripod collar, and the other is found in the top of the ball head. -
Page 18: R E M O V A B L E F E E
R E M O V A B L E F E E T All three feet on the Chronicle tripod are removable. These removable feet connected to the legs of the tripod using a common 3/8”-16 thread. Each foot has a small o-ring in its threads. - Page 19 3/8”-16 attachment port is also particularly handy for storing one of the Chronicle’s feet when it is converted to a monopod with 3-leg base. See the section “Converting to a Monopod” in this manual for more information. The two ports found in the ball head’s top platform...
-
Page 20: T I P S F O R B E S T O P E R A T I O
(and your camera) fall over. 4) EXTEND THE THICKEST LEG SECTIONS FIRST When you are using the Chronicle without all 4 leg sections fully extended, be sure to use the largest legs first and avoid using the thinner leg sections unless necessary. -
Page 21: P R E C A U T I O N
2) The Chronicle is not water resistant. Do not submerge it or expose it to heavy rain or snow. If the tripod does get very wet, you may need to disassemble the legs to dry and clean them.
Need help?
Do you have a question about the CHRONICLE and is the answer not in the manual?
Questions and answers