
Related Manuals for Asus RT-AC66W


Summary of Contents for Asus RT-AC66W
- Page 1 RT-AC66W Dual Band 3x3 802.11AC Gigabit Router Quick Start Guide E9178/ First Edition / March 2014...
- Page 2 NOTE: For more details, refer to the user manual included in the support CD.
-
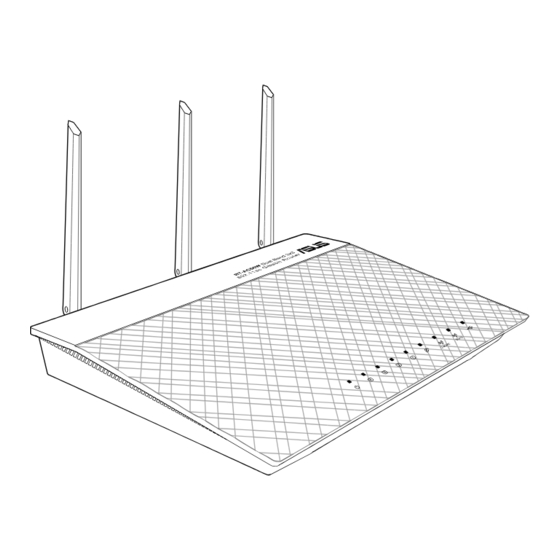
Page 3: Package Contents
Support CD (User Manual/utilities) Warranty card Stand NOTE: If any of the items is damaged or missing, contact your retailer. A quick look RT-AC66W Dual Band 3x3 802.11ac Gibabit Router 1) Power LED 5) 5GHz LED USB 2.0 ports 2) LAN LED 6) USB 2.0 LED... - Page 4 NOTES: USB External HDD/Flash disk: 3TB and supports read-write access for FAT16, FAT32, EXT2, EXT3, and NTFS. (http://192.168.1.1 or http://router.asus.com), then in the Network Map page's upper right corner, click the USB icon and click Eject USB 1. http://event.asus.com/networks/disksupport http://event.asus.com/networks/printersupport...
-
Page 5: Positioning Your Wireless Router
Positioning your wireless router For the best wireless signal transmission between the wireless router and the shown in the drawing below. http://www.asus.com 90° 45° 45°... -
Page 6: Mounting To The Stand
Mounting to the stand Before you proceed a: Unplug the AC adapter from the power outlet and disconnect it from your cable/ADSL modem. b: Disconnect the network cable from your cable/ADSL modem. c: Reboot your computer (recommended). - Page 7 WARNING! Before disconnecting the wires/cables, ensure that your cable/ADSL modem has been turned off for at least two minutes. If your Wall Power Outlet RT-AC66W Power Modem Computer Power power outlet. b: Using the bundled network cable, connect your computer to your wireless IMPORTANT! Ensure that the WAN and LAN LEDs are blinking.
-
Page 8: Getting Started
3. Disable some settings on your computer. A. Disable the proxy server, if enabled. B. Set the TCP/IP settings to automatically obtain an IP address. C. Disable the dial-up connection, if enabled. NOTE: For more details on disabling your computer settings, refer to Frequently Asked Questions (FAQs). - Page 9 NOTE: If QIS does not launch automatically, follow these steps to manually launch QIS: http://192.168.1.1 or default domain name: http://router.asus.com and run the Quick Internet Setup (QIS) Wizard again. settings to automatically obtain an IP address. For more details, refer to the FAQs section or use the Setup Wizard in the support CD for auto-diagnosis.
-
Page 10: Frequently Asked Questions (Faqs)
Frequently Asked Questions (FAQs) After following the steps, I still cannot access the wireless router’s web graphics user interface (web GUI) to configure the wireless router settings. A. Disable the proxy server, if enabled. Windows® 7/8 1. Click Start > Internet Explorer to launch the web browser. - Page 11 MAC OS 1. From your Safari browser, click Safari > Prefer- ences > Advanced > Change Settings... 2. From the Network screen, deselect FTP Proxy and Web Proxy (HTTP). 3. Cllick Apply Now when done. NOTE: Refer to your browser's help feature for details on disabling the B.
- Page 12 Obtain an IP address automatically. 4. Click OK when done. MAC OS 1. Click the Apple icon located on the top left of your screen. 2. Click System Preferences > Network > Configure... 3. From the TCP/IP tab, select Using DHCP in the Configure IPv4 dropdown list.
- Page 13 C. Disable the dial-up connection, if enabled. Windows® 7/8 1. Click Start > Internet Explorer to launch the browser. 2. Click Tools > Internet options > Connections tab. 3. Tick Never dial a connection. 4. Click OK when done. NOTE: Refer to your browser's help feature for details on disabling the dial-up connection settings.
- Page 14 - the Router is unable to establish a connection with the ADSL network. utes, then reconnect the cord. Network name or encryption keys are forgotten. again. User name / Password: IP address: SSID: admin / admin 192.168.1.1 ASUS...
-
Page 15: Support Hotline
Where can I find more information about the wireless router? http://support.asus.com/faq http://support.asus.com SUPPORT HOTLINE Area Hotline Number Support Availability Languages USA/ 1-812-282-2787 English Mon. to Fri. Canada 8:30-12:00am EST (5:30am-9:00pm PST) Sat. to Sun. 9:00am-6:00pm EST (6:00am-3:00pm PST) Brazil 4003 0988 (Capital) Português... - Page 16 ASUS Recycling/Takeback Services ASUS recycling and takeback programs come from our commitment to the solutions for you to be able to responsibly recycle our products, batteries, other components, as well as the packaging materials. Please go to http://csr.asus. com/english/Takeback.htm for the detailed recycling information in different regions.
-
Page 17: Important Note
WARNING! operate the equipment. Prohibition of Co-location tion with any other antenna or transmitter. IMPORTANT NOTE: Radiation Exposure Statement: This equipment complies with FCC radia- follow operation instruction as documented in this manual. WARNING! This equipment must be installed and operated in least 20 cm from all persons and must not be co-located or operating in Declaration of Conformity for R&TTE directive 1999/5/EC Essential requirements –... - Page 18 Canada, Industry Canada (IC) Notices This Class B digital apparatus complies with Canadian ICES-003 and RSS-210. Radio Frequency (RF) Exposure Information be used in such a manner such that the potential for human contact during normal operation is minimized. Absorption Rate (“SAR”) limits when installed in speci c host products operated address: http://www.ic.gc.ca/app/sitt/reltel/srch/nwRdSrch.do?lang=eng following web...
- Page 19 http://www.ic.gc.ca/app/sitt/reltel/srch/nwRdSrch.do?lang=eng http://www.ic.gc.ca/eic/site/smt-gst.nsf/eng/sf08792.html NCC 警語 經型式認證合格之低功率射頻電機,非經許可,公司、商號或使用者均不得 擅自變更頻率、加大功率或變更原設計之特性及功能。 低功率射頻電機之使用不得影響飛航安全及干擾合法通信;經發現有干擾現 象時,應立即停用,並改善至無干擾時方得繼續使用。 前項合法通信,指依電信法規定作業之無線電通信。 低功率射頻電機須忍受合法通信或工業、科學及醫療用電波輻射性電機設備 之干擾。...
-
Page 20: Networks Global Hotline Information
00351-707500310 09:00-18:00 Mon-Fri 00421-232162621 08:00-17:00 Mon-Fri Czech Republic 00420-596766888 08:00-17:00 Mon-Fri Switzerland-German 0041-848111010 09:00-18:00 Mon-Fri Switzerland-French 0041-848111014 09:00-18:00 Mon-Fri Switzerland-Italian 0041-848111012 09:00-18:00 Mon-Fri 0044-8448008340 09:00-17:00 Mon-Fri Ireland 0035-31890719918 09:00-17:00 Mon-Fri Russia and CIS 008-800-100-ASUS 09:00-18:00 Mon-Fri Ukraine 0038-0445457727 09:00-18:00 Mon-Fri... - Page 21 Networks Global Hotline Information Region Country Hotline Numbers Service Hours Australia 1300-278788 09:00-18:00 Mon-Fri New Zealand 0800-278788 09:00-18:00 Mon-Fri 09:00-18:00 Mon-Fri 0800-1232787 09:00-17:00 Sat-Sun 09:00-18:00 Mon-Fri 0081-473905630 ( Non-Toll Free ) 09:00-17:00 Sat-Sun 0082-215666868 09:30-17:00 Mon-Fri Thailand 0066-24011717 09:00-18:00 Mon-Fri 1800-8525201 Singapore 0065-64157917...
- Page 22 09:30-18:30 Mon-Fri 00359-29889170 09:30-18:00 Mon-Fri Balkan Countries Croatia 00385-16401111 09:00-17:00 Mon-Fri Montenegro 00382-20608251 09:00-17:00 Mon-Fri Serbia 00381-112070677 09:00-17:00 Mon-Fri 00368-59045400 08:00-16:00 Mon-Fri 00368-59045401 Estonia 00372-6671796 09:00-18:00 Mon-Fri 00371-67408838 09:00-18:00 Mon-Fri Lithuania- 00370-37329000 09:00-18:00 Mon-Fri 00370-522101160 09:00-18:00 Mon-Fri nius NOTE: http://support.asus.com...
- Page 23 Manufacturer ASUSTeK Computer Inc. Tel: +886-2-2894-3447 TAIWAN Authorised ASUS Computer GmbH representative in Europe GERMANY Authorised distributors BOGAZICI BIL GISAYAR SAN. VE TIC. A.S. in Turkey Tel: +90 212 3311000 CIZGI Elektronik San. Tic. Ltd. Sti. Tel: +90 212 3567070 Address: CEMAL SURURI CD.
- Page 24 150200172200MAS R01...
Need help?
Do you have a question about the RT-AC66W and is the answer not in the manual?
Questions and answers