CKD Xeroaqua GX Series Instruction Manual
Refrigerated compressed air dryer
Hide thumbs
Also See for Xeroaqua GX Series:
- Instruction manual (52 pages) ,
- Instruction manual (17 pages) ,
- Instruction manual (20 pages)
Table of Contents
Advertisement
Quick Links
INSTRUCTION MANUAL
REFRIGERATED COMPRESSED AIR DRYER
Xeroaqua GX Series
GX8000 Series
GX8004,GX8006,GX8008,GX8011,
GX8015,GX8022,GX8037
GX8100Series
GX8155,GX8175
●This product is "industrial use." Be careful of handling enough.
●Be sure to read this manual before installing and operating your
dryer.
● The end of a book serves as a CKD WARRANTY. Please save
carefully.
SM−13235−A
OCT-07 6th Edition
CKD Corporation
Advertisement
Table of Contents

Related Manuals for CKD Xeroaqua GX Series


Summary of Contents for CKD Xeroaqua GX Series
- Page 1 GX8155,GX8175 ●This product is "industrial use." Be careful of handling enough. ●Be sure to read this manual before installing and operating your dryer. ● The end of a book serves as a CKD WARRANTY. Please save carefully. OCT-07 6th Edition CKD Corporation ...
-
Page 2: Safety Instrauction
Safety instructions This dryer must be operated by a person who has basic knowledge of electric, compressed air,liquid, piping, refrigerant, etc. We are not responsible for any accidents caused when a person who does not have the basic knowledge or who is not well trained installation, operation, repair, etc. -
Page 3: Table Of Contents
Table of Contents Safety instrauction ・・・・・・・・・・・・・・・・・・・・・・・・・・・・・・・・・・・・・・ 1 1. Introduction ・・・・・・・・・・・・・・・・・・・・・・・・・・・・・・・・・・・・・・・・・・ 3 2. Certificate of pressure vessl ・・・・・・・・・・・・・・・・・・・・・・・・・ 3 3. Cautions ・・・・・・・・・・・・・・・・・・・・・・・・・・・・・・・・・・・・・・・・・・・・・・ 4 3.1 Transportation ・・・・・・・・・・・・・・・・・・・・・・・・・・・・・・・・・・・・・・・・・・・・・・・・・ 4 3.2 Operation environment ・・・・・・・・・・・・・・・・・・・・・・・・・・・・・・・・・・・・・・・・・・ 4 3.3 Cautions at operation ・・・・・・・・・・・・・・・・・・・・・・・・・・・・・・・・・・・・・・・・・・ 5 4. Installation ・・・・・・・・・・・・・・・・・・・・・・・・・・・・・・・・・・・・・・・・・・ 6 4.1 Confirm the following ・・・・・・・・・・・・・・・・・・・・・・・・・・・・・・・・・・・・・・・・・・ 6 4.2 The name of each part ・・・・・・・・・・・・・・・・・・・・・・・・・・・・・・・・・・・・・・・・・・ 7 4.3 Operation panel ・・・・・・・・・・・・・・・・・・・・・・・・・・・・・・・・・・・・・・・・・・・・・・・・ 4.4 Electric component ・・・・・・・・・・・・・・・・・・・・・・・・・・・・・・・・・・・・・・・・・・・・・ 9 4.5 Installation features ・・・・・・・・・・・・・・・・・・・・・・・・・・・・・・・・・・・・・・・・・ 11 ... -
Page 4: Introduction
1.Introduction Thank you very much for purchasing CKD Product. This manual explains basic points of installation, operation, etc. to have our refrigerated air dryer, Xeroaqua GX Series perform at their best. Be sure to read this manual before using your dryer. Keep this manual together with the dryer. 2.Certificate of pressure vessel 1.Keep the certificate of pressure vessel This machine is installed a pressure vessel that is applied the second class pressure vessel of boiler and pressure vessel safety regulation by the Japan Ministry of Labor. The machine is ... -
Page 5: Cautions
3.Cautions 3.1 Transportation 1) D o not fall down the dryer. Also do not give vibration or impact to the dryer. *Internal parts could get damaged. 2) D o not climb up on the dryer or put objects on the dryer. *Workers could get hurt. 3) M ove the product with a fork lift as shown in the drawing. Put something soft between air dryer and the fork lift to prevent damage on dryer panel. Dryer Extrude claws. Since there is no fork hole, please carry GX8000 series the whole bottom material of packing. -
Page 6: Cautions At Operation
3.3 Cautions at operation 1) D o not use the dryer to remove humidity of except compressed air. Break-down, explosion, or fire may result. 2) I nstall an earth leakage breaker at power supply. *Electric shock may result. 3) G round to earth. *Causes of an electric shock or a fire. 4) U se the dryer within specifications. *Operation may stop abnormally, or the productʼs service life may be shortened. 5) D o not frequent start and stop the dryer. Hold frequency of starting/shutting off within 6 times/hour, keep it running for at least 5 minutes before shutting it off and hold restarting it for 3 minutes or longer. *Break-down or shorter service life of the product may result. 6) D o not turn on the power supply without the panel on. *Electric shock or heat injury may result, or rotation parts could hurt workers. 7) R emove drain before it enters the dryer when drain flows into the dryer with compressed air. *Drain could leak to the secondary side of the dryer. 8) D on't carry out reconstruction of this machine. *It becomes an unexpected accident and the cause of a life fall. 9) D o not use the dryer for pneumatic caisson shield or respiratory medical equipment. *It could cause an accident includes injury. ... -
Page 7: Installation
9.6 230 GX8155-AC415V 3φAC415V50Hz 5.2 R-407C, *1 1.0 9.6 230 GX8175-AC380V 3φAC380V50Hz 7.2 R-407C, *1 1.0 10.5 235 GX8175-AC400V 3φAC400V50Hz 6.9 R-407C, *1 1.0 10.5 235 GX8175-AC415V 3ΦAC415V50Hz 6.6 R-407C, *1 1.0 10.5 235 *1 The amount of refrigerant is indicated. 【Note】If the contents are not clear or there are any questions, please contact CKD or distributors before using the dryer. 2) Confirm damage or transformation that is made during the transportation. 3) Attachment list. Check whether there are all accessories. (Refer to above.) <SM-13235-A>... -
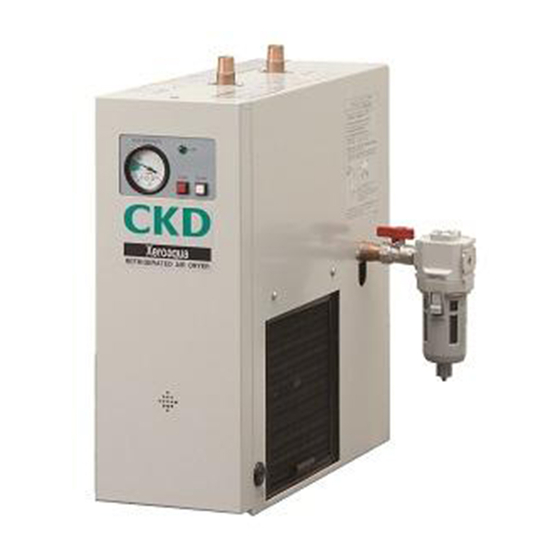
Page 8: The Name Of Each Part
4.2 The name of each part (1) GX8004 Name Q’ty Note Compressor Condenser Fan, fan motor Heat exchanger unit Solenoid valve For drain discharge Capacity control valve Strainer Capillary tube Solenoid valve For liquid injection Capillary tube For liquid injection ... -
Page 9: Operation Panel
(4) GX8155 Name Q’ty Air inlet Air outlet Drain port Manual drain port Solenoid valve Heat exchanger Compressor Condenser Fan motor Fan blade Capacity control valve Dew point gauge ... -
Page 10: Electric Component
4.4 Electric component (1) GX8004,GX8006,GX8008,GX8011 Rear side Left side ... - Page 11 (4) GX8155 (5) GX8175 ...
-
Page 12: Installation Features
4.5 Installation features 1) Do not install the dryer outdoor or high humidity place. *This product does not have waterproof structure. Water or rain splashing, high humidity (=85% RH or over) could cause leak or fire to electrical systems. 2) Operating ambient temperature should be 2 to 43℃ with no condensation. *Drain freeze under the temperature of 2℃ or below, and this could cause breakdown. Operation under the temperature of 43℃ or above could stop the operation abnormally or could shorten the service life of the product. 3) Install the dryer without direct sunlight, powder dust, heating elements, corrosive gas, explosive gas, inflammable gas or combustibles. *Breakdown, explosion or ignition may result. 4) The installation floor should have a solid concrete foundation with level and flat surface. ... -
Page 13: Air Piping
4.7 Air piping 1) C onfirm which is Air inlet or Air outlet before piping. 2) M ount the attached Y-type strainer by nipple or by other pipes.(GX8000 Series) 【CAUTION】 If use is carried out without attaching Y type strainer in an air inlet, it will become failure and the cause of garbage clogging. Do not mistake direction of Y type strainer. R e a r s i d e Pipe size 3 GX8004 8 1 GX8006 2 3 GX8008 4 3 GX8011 4 GX8015 ... -
Page 14: Drain Piping
4.8 Drain Piping 1) C onfirm the drain outlet location before piping. R e a r s i d e GX8000 series GX8100 series Connect the drain pipe to the drain outlet (Rc1/4) using enclosed items. Have its end open atmosphere. Fit a nut and a sleeve to the transparent vinyl tube as shown in figure below. Insert a insert-ring in the drain tube until it hits the drain tube (end). Then tighten the nut by hand. ... -
Page 15: Electrical Wiring
4.9 Electrical Wiring 1) U se proper voltage. * Voltage must be within +/- 10% of rated voltage. 1) M ount an earth leakage breaker with over-load protection (sensitivity current 30mA or less) to power supply. 2) H ow to connect power supply code GX8000 series Make a hole for wiring on the rubber bushing at the upper back part of the dryer. Connect the terminal block L1 and L2 (L1, L2, L3 if three phase type) and the earth leakage breaker by wire. ... - Page 16 GX8100 series Make a hole for wiring on the rubber bushing ・ at the upper back part of the dryer. ・Remove the front panel. Procedure ① The front panel is lifted upwards. ② The attachment guide is removed from the right-and-left side panel. ③ The front panel is lifted upwards and it extracts from the plug part of the base. Connect the terminal block L1, L2, L3, and the earth leakage breaker by wire. ・ 3) H ow to connect earth wire supply As power code connection, connect the earth wire to the terminal box PE and the earth terminal in the panel.(The D sort grounding construction by the electric construction contractor is required.) ...
-
Page 17: Functional Explanation
5.Functional explanation 5.1 Functional explanation 1)Air circuit The compressed air which became wet warmly is beforehand cooled by precooler, and then, it goes into an evaporator, heat exchange is carried out with cold freon gas, and it is cooled to the dew point. Reheat of the compressed air cooled and dehumidified is carried out by reheater, and it turns into warm dry air. 2)Refrigerant circuit It is, and the freon gas which became high temperature high pressure with the compressor (refrigerant ... -
Page 18: System Diagram
5.2 System Diagram 1) GX8004 2) GX8006,GX8008,GX8011,GX8015,GX8022,GX8037 ... - Page 19 3) GX8155,GX8175 -18- <SM-13235-A>...
-
Page 20: Preparation & Operation
6.Preparation for operation & Operation 6.1 Preparation for operation 1) C onfirm that air piping, electrical wiring and drain piping are properly connected. 2) C onfirm that the gate valves next to the dryer and the gate valve of by-pass piping are closed. Confirm that the air pressure in the pipes is zero. 3) I n Xeroaqua GX series, it can operate and stop by remote control. Refer to the following, when use is carried out by remote control. <Remote operation> Connect the momentary switch (NO) between terminal number 20 and 21. ... -
Page 21: When Safety Device Turns On And The Dryer Stops Running
6.3 When safety device turns on and the dryer stops running 6.3.1 Safety device (Refer to P28 Electrical Circuit ) 1) W hen a compressor becomes hot or when over current flows, safety device turns on, and the dryer stops running. Moreover, if refrigerant high-pressure pressure rises, a high-pressure pressure switch will work and a drier will stop. 2) T he control circuit fuse has clung to this machine. 3) S etting value list RETURN MARK MODEL PARTS LIST APPLICATIONS SETTING VALUE METHOD GX8004 1.6A at100℃ Temperature of GX8006 the compressor 2.1A ... -
Page 22: Maintenance And Check Point
7.Maintenance and check point 7.1 Items of maintenance and check point Check following items for full performance and longer service life of the dryer. Checking cycle Checking Contents Daily Weekly Monthly item ○ “POWER”lamp “POWER”lamp is on. ○... -
Page 23: Consumables And Maintenance Parts
7.2 Consumables and maintenance parts (Note: pcs/set is use quantity per 1 set of these devices.) ●Consumables (The parts which will be exchanged if the state exhausting was checked periodically and it has exhausted.) Inspect the following parts periodically, and exchange it based on Exchange judgment standard. Parts name pcs/set Inspection frequency Exchange judgment standard※ ... -
Page 24: Storage
GX8000 series GX8100 series Open the pet cock to discharge drain; then, close the pet cock. ③Put sheet. etc. over the dryer. Keep the dryer in a place where environment is the same as the operating environment. ④When you run the dryer again, inspect each part of the dryer and run it as instructed in this manual. 8.After Sales Service Contact your distributor or CKD to request the repair service. 1) Provide the following information when requesting the repair service. 2) * model number of the dryer * serial number * date of installation * name of the store where you purchased the dryer * conditions of your dryer We will repair your dryer even after the warranty period expires (charged). We 3) will supply parts for 7 years after production of your dryer is terminated. -23- <SM-13235-A>... -
Page 25: Troubleshooting
9.Troubleshooting Condition Causes Measures Power supply did not turn on. Turn on the power supply. Power supply voltage is abnormal. Adjust the voltage. “POWER” does not turn on Connection of harness is bad. Repair the harness. "POWER" lamp is off. Replace "POWER" lamp. ”START” switch was failed. Replace the ”START” switch Safety device is on. Reset the safety device. The dryer does “RUN” lamp does not not start when Safety device is bad. Reset the safety device. tturn on. “START”switch is Power supply voltage is abnormal. Adjust the voltage. pushed. ... - Page 26 Condition Causes Measures Stop valve before/after the dryer is Fully open the valve. closed. Screen for Y-type strainer at the Clean the screen. dryer inlet is closed. (GX8000) Treated flow rate is too large. Make 1.3 or less times of rated flow Pressure drop before/after the dryer is too large. Congelation in the drayer. Prevent congelation. ・ ・ A mbient temperature is low. R aise the ambient temperature. ・ ・ I nlet temperature is low. R aise the inlet temperature. ・ ・ C ooling wind directly blow to the D o not let cooling wind directly blow dryer. ...
-
Page 27: S Pecifications
- - - - 10.1 13.9 22.8 27.8 50.3 Three phase AC415V - - - - 13.4 21.3 − − 60Hz Refrigerant R-22 R-407C 0.59 0.83 Exhaust heat kW 11.2 12.8 /0.66 /0.94 /1.5 /2.0 /3.7 /5.0 /8.5 Note : Consult with CKD for max. working temperature. -26- <SM-13235-A>... -
Page 28: D Imensions & Weight
11.Dimensions 11.1 GX8004,GX8006,GX8008,GX8011,GX8015,GX8022,GX8037 -27- <SM-13235-A>... - Page 29 11.2 GX8155,GX8175 -28- <SM-13235-A>...
-
Page 30: E Lectrical Circuit
12.Electrical Circuit 12.1 GX8004 -29- <SM-13235-A>... - Page 31 12.2 GX8006 -30- <SM-13235-A>...
- Page 32 12.3 GX8008 -31- <SM-13235-A>...
- Page 33 12.4 GX8011 -32- <SM-13235-A>...
- Page 34 12.5 GX8015 -33- <SM-13235-A>...
- Page 35 12.6 GX8022 -34- <SM-13235-A>...
- Page 36 12.7 GX8037 -35- <SM-13235-A>...
- Page 37 12.8 GX8155 -36- <SM-13235-A>...
- Page 38 12.9 GX8175 -37- <SM-13235-A>...
-
Page 39: Ckd Warranty
This warranty applies only if the product was used and applied correctly under normal operating conditions and good engineering practice; was installed, operated and maintained in accordance with all instructions issued or published by CKD; was used within stated pressure, media and operating limitations published by CKD and in effect on the date of shipment; and was not subject to abuse, misuse or unauthorized modification. THIS WARRANTY IS THE ONLY AUTHORIZED CKD WARRANTY AND IN LIEU OF ALL OTHER ... - Page 40 TEL(03)5402 3620 FAX(03)5402-0120 ●奈良営業所 〒639-1123 奈良県大和郡山市筒井町460-15(オッシェム・ロジナ 1 階) TEL(0743)57-6831 FAX(0743)57-6821 喜開理(上海)機器有限公司 CKD THAI CORPORATION LTD. CKD(SHANGHAI)CORPORATION ●SALES HEADQUARTERS-BANGKOK OFFICE ●営業部/上海事務所 CKD USA CORPORATION Suwan Tower, 14/1 Soi Saladaeng 1, North Sathorn Rd., Bangrak, (SALES HEADQUARTERS / SHANGHAI OFFICE) ●HEADQUARTERS Bangkok 10500 Thailand 中国上海市黄浦区九江路 333 号金融廣場 19 楼 1903 室 4080 Winnetka Avenue, Rolling Meadows, IL 60008 USA PHONE +66-(0)2-267-6300 FAX +66-(0)2-267-6305 Room 1903, 333 Jiujiang Road, Shanghai, 200001, China ...
Need help?
Do you have a question about the Xeroaqua GX Series and is the answer not in the manual?
Questions and answers