Advertisement
Available languages
Available languages
Quick Links
IN221000583V02 FR DE IT
_
_
_
824-039V90
EN_IMPORTANT, RETAIN FOR FUTURE REFERENCE: READ CAREFULLY.
FR_IMPORTANT : A LIRE ATTENTIVEMEN ET A CONSERVER POUR VOUS Y REFERER
ULTERIEUREMENT
DE_WICHTIG! SORGFÄLTIG LESEN UND FÜR SPÄTER NACHSCHLAGEN AUFBEWAHREN.
IT_IMPORTANTE! CONSERVARE IL PRESENTE MANUALE PER FUTURO RIFERIMENTO E
LEGGERLO ATTENTAMENTE.
Advertisement

Related Manuals for HOMCOM 824-039V90


Summary of Contents for HOMCOM 824-039V90
- Page 1 IN221000583V02 FR DE IT 824-039V90 EN_IMPORTANT, RETAIN FOR FUTURE REFERENCE: READ CAREFULLY. FR_IMPORTANT : A LIRE ATTENTIVEMEN ET A CONSERVER POUR VOUS Y REFERER ULTERIEUREMENT DE_WICHTIG! SORGFÄLTIG LESEN UND FÜR SPÄTER NACHSCHLAGEN AUFBEWAHREN. IT_IMPORTANTE! CONSERVARE IL PRESENTE MANUALE PER FUTURO RIFERIMENTO E...
-
Page 2: Structure Chart
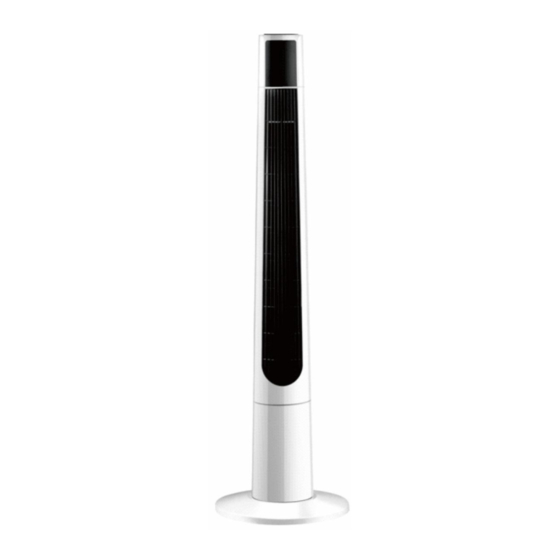
Structure chart Display panel Air outlet Back cover Front shell Rotating column Chassis Technical parameters Model Voltage Power Class remark Ⅱ BL-FS2-D 220-240V Electronic Installation method 1. Open the packing box and place the product on a flat surface or table. Check whether the goods in the box are in line with packing list. - Page 3 3. Pass the power cord through the bottom panel, and insert the base plate with four screws and the main body of the product.
- Page 4 Usage 1. Electronic mode of use a. Plug it in.The buzzer emits a "di" and the digital screen displays the ambient temperature.Products standby. b. ON/OFF :press the first time, product the first plastic seal the normal way to send the wind, the first plastic seal icon bright.By the second time, the product is reworking.
- Page 5 3. It is forbidden to use in places where serious dust is found. 4. Products can not be placed in high temperature and low temperature. 5. The use of wire and other foreign objects shall be prohibited to insert any pores in this product, Avoid electric shock or damage to the product.
-
Page 6: Paramètres Techniques
Schéma Panneau d’affichage Sortie d’air Coque arrière Coque frontal Colonne rotative Socle Paramètres techniques Modè le Tension Puissance Classe Remarque BL-FS2-D 220-240V Électronique... - Page 7 Méthode d’installation 1. Ouvrez la boîte d’emballage et placez le produit sur une surface plane ou une table. Vérifiez si les marchandises contenues dans la boî te sont conformes à la liste de colisage. 2. Retirez deux moitiés du socle et assemblez une moitié comme indiqué sur la figure.
- Page 8 Usage 1.de d’utilisation électronique Oscil Minu terie latio Vites Vent Minuterie Oscillation Naturel Vitesse élevé e Vitesse moyenne Sommeil Vitesse faible a. Branchez-le. Le buzzer émet un « di » et l’écran numérique affiche la température ambiante. Le produit est en veille. b.
- Page 9 Attention 1. Retirez l’étui de protection et veillez à ce que le produit est déconnecté de l’alimentation électrique. 2. Éloignez-le de toute source de feu. 3. Il est interdit d'utiliser l'appareil dans des endroits où se trouvent des poussières importantes. 4.
- Page 10 Strukturdiagramm Das Anzeigefeld Luftauslass Rückseitige Abdeckung Vorderes Gehä use Drehsäule Untergestell Technische Parameter Modell Spannung Leistung Klasse HINWEIS BL-FS2-D Ⅱ 220-240V 50 W Elektronisch Installationsmethode 1. Öffnen Sie den Verpackungskarton und legen Sie das Produkt auf eine ebene Flä che oder einen Tisch.
- Page 11 2. Entfernen Sie die beiden Bodenplatten und bauen Sie eine Scheibe wie abgebildet zusammen. Schrauben Sie die Seiten der Scheibe mit vier Schrauben fest. 3. Führen Sie das Stromkabel durch die Bodenplatte und setzen Sie die Bodenplatte mit vier Schrauben und das Hauptgehäuse des Geräts ein.
- Page 12 Anwendung 1. Elektronische Betriebsart Timer Oszillation Wind Geschwindigke Timer Oszillation Natürlich Hohe Geschwindigkeit Mittlere Schlaf Geschwindigkeit Niedrige Geschwindigkeit a. Stecken Sie den Stecker ein. Der Summer gibt ein „di“ von sich und der digitale Bildschirm zeigt die Umgebungstemperatur an. Produkt im Standby. b.
- Page 13 Achtung 1. Entfernen Sie die Schutzhülle und stellen Sie sicher, dass das Produkt von der Stromversorgung getrennt ist. 2. Von der Wä rmequelle fernhalten. 3. Es ist verboten, das Gerät an Orten zu verwenden, an denen starker Staub vorhanden ist. 4.
- Page 14 Struttura Display digitale Presa d’aria anteriore Protezione posteriore Cassa anteriore Girante Base portante Specifiche Modello Voltaggio Wattaggio Classe Note BL-FS2-D Ⅱ 220-240V 50 W Elettronico Metodo d’installazione 1. Aprire la confezione di imballaggio e collocare il prodotto su una superficie piana o su un tavolo.
- Page 15 2. Estrarre le due piastre inferiori e assemblarle a forma disco come mostrato in figura. Avvitare i lati della base a forma di disco con quattro viti. 3. Far passare il cavo di alimentazione attraverso il pannello inferiore e installare la base alla cassa principale del prodotto utilizzando quattro viti.
- Page 16 Utilizzo 1. Metodo d’uso elettronico Timer Oscillazione Aria Velocità Timer Oscillazione Naturale Alta velocita’ Media velocita’ Riposo Bassa velocita’ a. Collegare alla corrente. Il prodotto emetterà un "bip" e il display digitale visualizzerà la temperatura ambiente. Il prodotto è in stato di standby. b.
- Page 17 Attenzione 1. Rimuovere l’involucro protettivo e assicurarsi che il prodotto sia scollegato dalla corrente. 2. Tenere lontano da fiamme vive. 3. È vietato l'uso in luoghi molto polverosi. 4. Non collocare il prodotto in ambienti dalle temperature troppo alte o troppo basse. 5.
Need help?
Do you have a question about the 824-039V90 and is the answer not in the manual?
Questions and answers