Table of Contents
Advertisement
Quick Links
Advertisement
Table of Contents
Troubleshooting

Related Manuals for Grundig GWP810616MW


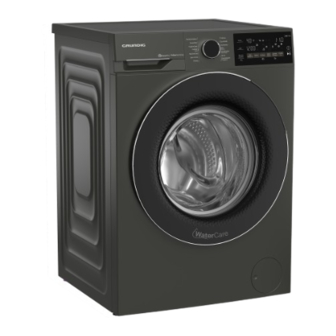
Summary of Contents for Grundig GWP810616MW
- Page 1 Washing Machine User Manual GWP810616MW 2820529962/ EN/ / 28/01/2022 11:02...
-
Page 2: Table Of Contents
Symbols on the Display....21 Programme and Consumption Table ..........1 Safety Instructions ......Programme Selection ....23 Intended Use ........ Programmes ........23 Safety of Children, Vulnerable Per- Temperature Selection ....27 sons and Pets ......Spin Speed Selection..... 27 Electrical Safety ...... - Page 3 Please read this user manual first! Dear Customer, Thank you for choosing Grundig product. We hope that you get the best results from your product which has been manufactured with high quality and state-of-the-art technology. Therefore, please read this entire user manual and all other accompanying documents care- fully before using the product.
-
Page 4: Safety Instructions
1 Safety Instructions This section includes the safety – Personnel kitchens of instructions necessary to pre- stores, offices and other vent the risk of personal injury or work environments; material damage. – Ranches, Our company shall not be held – By customers of hotels, mo- responsible for damages that tels and other accommoda- may occur if these instructions... -
Page 5: Electrical Safety
with, climb on top or inside the • If the power cable is dam- product. Check inside the aged, it must be replaced by product before use. the authorised service in order • Use child lock to prevent chil- to avoid possible risks. dren from intervening with the •... -
Page 6: Handling Safety
make sure the electrical Handling Safety mains, clean water mains and • Unplug the product before water outlet are suitable. If not, moving, remove the water out- call a qualified electrician and let and water main connec- plumber to have them make tions. -
Page 7: Operational Safety
• Connect the product to a valve should be fitted. The grounding plug protected by a maximum allowed temperat- fuse suitable to the current val- ure is 25°C. ues on the type label. Make • Fit the end of the water dis- sure the grounding is carried charge hose to the dirty water out by an expert electrician. - Page 8 • Do not use chemical solvents • Do not force open the locked on the product. These materi- loading door. The door will als contain an explosion risk. open once the washing is • Do not operate defective or completed. If the door does damaged products.
-
Page 9: Maintenance And Cleaning Safety
• Take the following precautions • Do not use sharp or abrasive to prevent formation of biofilm tools to clean the product. Do and malodours: not use household cleaners, soap, detergent, gas, gasol- – Make sure the room where ine, thinner, alcohol, varnish, the washing machine is etc. -
Page 10: Package Information
2.2 Package Information Packaging materials of the product are man- ufactured from recyclable materials in ac- cordance with our National Environment Regulations. Do not dispose of the pack- aging materials together with the domestic or other wastes. Take them to the packaging material collection points designated by the local authorities. -
Page 11: Technical Specifications
3 Technical Specifications Supplier’s name or commercial brand Grundig GWP810616MW Model name 7177882100 Nominal Capacity (kg) Maximum spin speed (cycle/min) 1600 Built-In Height (cm) Width (cm) Depth (cm) Single Water inlet / Double Water inlet + / - Electrical input (V/Hz) -
Page 12: Installation
4 Installation • Total weight of the washing machine and Please read the “Safety Instructions” the dryer -with full load- when they are section first! placed on top of each other reaches to approx. 180 kilograms. Place the product Your washing machine automatically on a solid and flat floor that has sufficient detects the amount of laundry load carrying capacity. -
Page 13: Removing Transportation Safety
a. Tighten all hose nuts by hand. Never use 4.3 Removing Transportation a tool when tightening the nuts. Safety Bolts b. Open the taps completely after making a. Loosen all transportation safety bolts with the hose connection to check for water an appropriate wrench until they turn leaks at the connection points. -
Page 14: Adjusting The Stands
4.7 Electrical Connection Connect the product to a grounded outlet protected by a 16 A fuse. Our company shall d. To prevent the waste water to go back not be responsible for the damages that into the product again and to ensure easy shall be incurred due to using the product drainage, do not immerse the end of the without grounding according to local regula-... -
Page 15: Preliminary Preparation
Some water has remained in the product due to the quality control processes in the production. It is not harmful for the product. 5 Preliminary Preparation • Tough stains must be treated properly be- Please read the “Safety Instructions” fore washing. section first •... -
Page 16: Correct Load Capacity
b. Put the laundry items into the product in Detergent, Softener and Other Cleaning a loose manner. Agents c. Push the loading door to close until you hear a locking sound. Ensure that no items are caught in the door. The loading door is locked while a programme is run- ning. -
Page 17: Automatic Dosing
• Please review the programme descriptions part for suggested programme for different textiles. • All recommendations about detergents are valid for selectable temperature range of programmes. Only detergents, softeners and ad- ditives suitable for washing ma- chines should be used. Do not use liquid detergents or other cleaning agents to soften the laundry. -
Page 18: Dosage Selections, Cancellation Or Use Of Powder Detergent
If the detergent symbol is flashing even Machine measures the load and determines though the detergent compartments are the right amount of detergent depending on filled, the detergent drawer is not seated the load amount and the selections made properly. Push the drawer so that it is fully previously. -
Page 19: Filling Detergent Or Softener Into The Wrong Compartment
dosing tank. The product will be able to 5.6.4 Filling Detergent or Softener dose enough for 2-3 more cycles from the into the Wrong Compartment first moment the symbol flashes. In case you fill the detergent or the softener in the wrong compartment, see "Cleaning the Detergent Drawer". -
Page 20: Operating The Product
will be adjusted accordingly and programme duration increased automatically. You can follow this change on the display. 6 Operating the Product Please read the “Safety Instructions” section first! 6.1 Control Panel 1 Programme Selection Button 2 Spin Speed Adjustment Button 3 Temperature Setting Button 4 Display 5 ON/OFF Button... -
Page 21: Symbols On The Display
6.2 Symbols on the Display 1 Temperature Indicator 2 Wireless Connection Indicator 3 Remote Control Indicator 4 Programme follow-up indicator 5 Duration information 6 Programme Start Indicator 7 Delayed Start Enabled Indicator 8 Door Lock Engaged Indicator 9 Auxiliary Function Indicators 5 10 Child Lock Engaged Indicator 11 Auxiliary Function Indicators 4 12 No Water indicator... -
Page 22: Programme And Consumption Table
6.3 Programme and Consumption Table Auxiliary Functions Programme Temperature °C 2,75 1600 • • • • • Cold - 90 Cottons 2,00 1600 • • • • • Cold - 90 1,10 1600 • • • • • Cold - 90 60** 1,15 1600... -
Page 23: Programme Selection
6.4 Programme Selection Please read Installation section of the manual before first use. a. Determine the programme suitable for the The auxiliary functions in the table type, quantity and soiling level of the may vary according to the model of laundry in accordance with "Programme your machine. - Page 24 and temperature selection. In certain pro- • HygieneCare+ grammes, spraying system will be activated Applying a steam step at the beginning of at the beginning of the cycle. The spraying the programme allows to soften the dirt eas- system starts within 3 to 10 minutes in these ily.
- Page 25 shirts, there may be differences on the Do not load more than 1 double fibre wrinkle levels and humidity on shirts at the duvet (200 x 200 cm). end of cycle. Do not wash your duvets, pillows and etc. that contain cotton filling in •...
- Page 26 quantity of the laundry to automatically ad- special washing programme for which dura- just water consumption and programme tion of rinse hold, washing action, washing time. and rinsing duration are modified. Below you can find the soil groups that WARNING can be selected with the “Quick/ Do not wash your woollen and delic- Intense”...
-
Page 27: Temperature Selection
ning profile, the soft toys programme pro- If you scroll to cold wash option and tects the toys during washing. It is recom- press Temperature Adjustment but- mended to use liquid detergent. ton again, the recommended max- imum temperature for the selected Fragile toys with hard surfaces must programme appears on the display. -
Page 28: Auxiliary Function Selection
You can change the spin speed after the When an auxiliary function button washing starts if the washing steps allow it. that cannot be selected with the cur- Changes cannot be made if the steps do not rent programme is pressed, the allow it. -
Page 29: Functions/Programmes Selected By Pressing The Function Keys For 3 Seconds
mode is selected as default. When you press • Remote Control the button once, the LED shall be turned off You can use this auxiliary function key to and you shall access the proper programme connect your product to smart devices. For period for your normally soiled laundry. - Page 30 • Automatic Dosage Setting • Child Lock Activates by pressing down the related auxil- Use Child Lock function to prevent children iary function key (Automatic Dosage) for 3 from tampering with the machine. Thus you seconds. Liquid Detergent or Softener can avoid any changes in a running pro- dosage amount can be changed with this gramme.
-
Page 31: End Time
To deactivate wireless connection: Press and hold Remote Control button for 3 seconds. Countdown “3-2-1” will be dis- played, and then “Off” symbol will appear on the display. In order for the End Time function to be ac- To be able to enable wireless con- tivated and the programme to be completed nection, machine setup should be at the end of the specified time, you must... -
Page 32: Starting The Programme
Additional laundry can be added into The door will be locked if Remote the machine during the End Time Control Function is selected. In order countdown. At the end of the count- to open the door you must deactiv- down, End Time indicator turns off, ate Remote Start Function by either washing cycle starts and the time of pressing the Remote Start button or... -
Page 33: Changing The Selections After Programme Has Started
Changing the programme selection after programme has started: Programme cannot be changed when a pro- gramme is running. You need to pause the operating programme if the Child Lock is not 6.12 Changing the Selections After active and select a new programme. This Programme has Started action will cancel the current programme. -
Page 34: End Of Programme
You can touch the “Appliances” tab in the If you turn the programme selection HomeWhiz application to view appliances button when the Child Lock is en- paired with your account. Following the in- abled, the programme will not be stallation of the application, HomeWhiz func- cancelled. - Page 35 PLIANCE” (touch here for setting up a Your washing machine will automat- new appliance) button in the upper right ically turn off if you cannot realize the corner. Perform the setup by following setup successfully within 5 minutes. both the steps below and the steps in the In this case, you have to start the HomeWhiz Application.
-
Page 36: Setting Up A Washing Machine Connected To Someone Else's Account
After this operation, you cannot use the 6.15.2 Setting up a Washing HomeWhiz function of your washing ma- Machine Connected to chine until you do another setup. Someone Else's Account Your product does not need to be connec- If the washing machine that you want to use ted to the internet in order to delete an ac- has been previously registered to the system count matching. -
Page 37: Troubleshooting
When you want to control your washing ma- In certain cases, it deactivates itself for safety chine remotely, after the front lid is closed, reasons: you need to activate the Remote Control • When your washing machine undergoes a function by pressing the Remote Control power interruption. -
Page 38: Cleaning The Detergent Drawer
Cleaning: 7.1 Cleaning the Detergent Drawer Before starting cleaning, unplug your appli- When to clean ance by pressing the On/Off button. • When you open the dosing tank cover and see a thickened non-fluid detergent or It is recommended to wear a suit- softener, able glove so that you do not come •... -
Page 39: Cleaning The Loading Door And The Drum
After every washing make sure that no for- eign substance is left in the product. If the holes on the door gasket shown in the figure is blocked, open the holes using a toothpick. Foreign metal substances will cause rust stains in the drum. -
Page 40: Draining Remaining Water And Cleaning The Pump Filter
propriate brush. If the filters are too dirty, Temperature of the water inside the remove them from their places with a pli- product may rise up to 90 ºC. To ers and clean in this way. avoid the risk of scalding, clean the filter after the water inside the c. -
Page 41: Troubleshooting
8 Troubleshooting • A hard substance has entered into the Please read the “Safety Instructions” pump filter. >>> Clean the pump filter. section first! • Transportation safety bolts are not re- moved. >>> Remove the transportation Programmes do not start after the safety bolts. - Page 42 • Loading door may be stuck because of • Timer may stop during spinning step. >>> the pressure it is subjected to. >>> Grab Automatic unbalanced load detection sys- the handle and push and pull the loading tem is activated due to the unbalanced door to release and open it.
- Page 43 Washing performance is poor: Stains • A higher temperature was selected. >>> persist or the laundry is not whitened. Select the proper programme and temper- (**) ature according to the type and soiling de- gree of the laundry. • Insufficient amount of detergent is used. >>>...
- Page 44 step. Wash and clean the drawer with hot • Detergent was stored under improper water. Put the detergent in the correct conditions. >>> Store detergent in a compartment. closed and dry location. Do not store in • Detergent was mixed with the softener. excessively hot places.
- Page 45 Check the HomeWhiz section for the relevant troubleshooting information. EN / 45...
- Page 46 This certificate is issued by DEFY APPLIANCES (PTY) LIMITED manufacturers and suppliers of Grundig products, hereinafter the Company, to the original purchaser only, of the appliance described on the certificate and shall constitute the only warranty given in respect of this ap- pliance.
- Page 47 Before requesting service please check the trouble-shooting guide in the Operating Instruc- tions as a charge may be levied where no fault is found even though your product may still be under guarantee. Please contact the Grundig Customer help-line for service or any other queries on 0861 478634 EN / 47...
Need help?
Do you have a question about the GWP810616MW and is the answer not in the manual?
Questions and answers
Здравствуйте. Как заменить сливной насос? Не могу к нему добраться.