
Subscribe to Our Youtube Channel
Related Manuals for Grundig GWPE89E6168WW


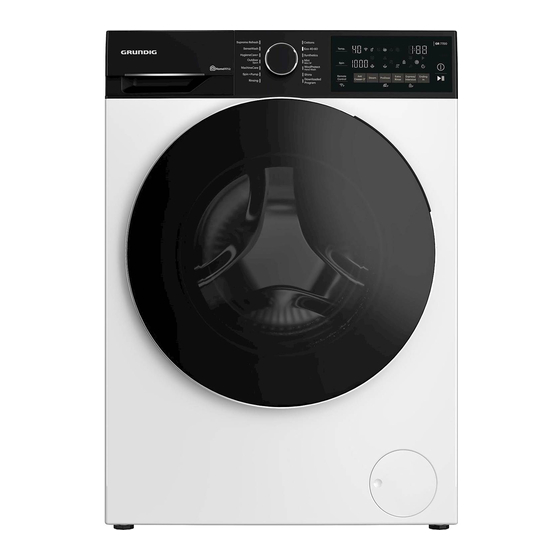
Summary of Contents for Grundig GWPE89E6168WW
- Page 1 Washing Machine User Manual GWPE89E6168WW Document Number: 2820529728_EN/ 05-10-21.(8:59)
- Page 2 Please read this user manual first! Dear Customer, Thank you for selecting a Grundig product. We hope that you get the best results from your product which has been manufactured with high quality and state-of-the-art technology. Therefore, please read this entire user manual and all other accompanying documents carefully before using the product.
-
Page 3: General Safety Instructions
General safety instructions This section contains safety instructions that will help protect from risk of personal injury or property damage. Our company shall not be liable for any damages that may arise in case of failure to follow these instructions. Always have the installation and repairing procedures carried out by the Authorized Service Agent. -
Page 4: Electrical Safety
Do not forget to close the loading door when leaving the room where the product is located. Children and pets may get locked inside and drown. Children should not perform cleaning and user maintenance works without an adult’s supervision. Keep packaging materials away from children. Danger of injury and drowning. -
Page 5: Installation Safety
Carry the product in an upright position. Make sure that the hoses as well as the power cable are not folded, pinched or crushed after the product is fitted into its place after installation or cleaning procedures. 1.5 Installation Safety Check the information on the manual and installation instructions to prepare the product for installation and make sure the electrical mains, clean water mains and water outlet are suitable. -
Page 6: Usage Safety
Fit the end of the water discharge hose to the dirty water discharge drain, the sink or the bathtub. Place the power cable and houses in locations without risk of tripping. Do not install the product behind a door, a sliding door or at another location that will prevent the door from opening completely. - Page 7 Do not place your hands into the rotating drum. Wait until the drum no longer rotates. Do not place your hand or a metal object under the washing machine. If washing laundry at high temperatures, the discharged washing water could burn your skin if in contact with it. When the discharge hose is connected to the tap.
-
Page 8: Important Instructions For Environment
Important instructions for environment 2.1 Compliance with WEEE Directive This product complies with EU WEEE Directive (2012/19/EU). This product bears a classification symbol for waste electrical and electronic equipment (WEEE). This product has been manufactured with high quality parts and materials which can be reused and are suitable for recycling. -
Page 9: Technical Specifications
Technical specifications Supplier name or trademark GRUNDIG GWPE89E6168WW Model name 7177881600 Rated capacity (kg) Maximum spin speed (rpm) 1600 Built-in Height (cm) Width (cm) Depth (cm) Single Water inlet / Double Water inlet • / - • Available Electrical input (V/Hz) -
Page 10: Appropriate Installation Location
4.1 Installation Please read the “Safety Instructions” section first! During the installation, when you turn on the product for the first time, calibration mode* must be run. Calibration mode provides the machine to detect load amount correctly. To activate calibration mode, Drum Clean** program should be selected, and spin speed option should be cancelled. During the cycle, drum must be empty. -
Page 11: Removing Transportation Safety Bolts
Rest the tabs of Cover B against the lower panel. Complete the Cover B assembly by rotating the cover. Insert the cap by pushing it with your finger. 4.1.3 Removing transportation safety bolts Loosen all transportation safety bolts with an appropriate wrench until they turn freely. Stretch the internal component by pressing on the holding areas and pull the component out. -
Page 12: Connecting To Water Supply
4.1.4 Connecting to water supply Models with a single water inlet shall not be connected to the hot water tap. In such a case the laundry will get damaged or the product will switch to protection mode and will not operate. WARNING Do not use old or used water inlet hoses on a new product. -
Page 13: Adjusting The Feet
4.1.6 Adjusting the feet In order to ensure that the product operates more silently and vibration-free, it must stand level and balanced on its feet. Ensure that the product is balanced by adjusting the feet. Otherwise, the product may move from its place and cause WARNING crushing, noise and vibration problems. -
Page 14: Preliminary Preparation
4.2 Preliminary preparation Please read the "Safety Instructions" section first! 4.2.1 How to sort laundry • Sort laundry according to type of fabric, colour, and degree of soiling and allowable water temperature. • Always observe the instructions given on the garment care labels. 4.2.2 How to prepare clothes for washing •... -
Page 15: Detergent, Softener And Other Cleaning Agents
4.2.6 How to use detergent and softener Read the manufacturer instructions on the package while using detergents provided that they are added from the powder detergent compartment number 2, starch, fabric colourants, bleach and decolourants, anti-limescale and follow the WARNING dosage information provided. - Page 16 Filling Liquid Detergent and Softener • Open the detergent compartment by pulling it towards yourself. • To fill liquid detergent (left) and softener (right), open the related tank’s lid by pulling it upwards as shown in the picture. • Remember not to exceed the “Max” sign when adding liquid detergent or softener.
- Page 17 • If powder detergent is to be used in programs where the detergent dosing system is operating, desired amount of detergent is put into the powder detergent compartment. If the detergent compartment in the middle is to be used, the automatic dosage selection must be deactivated. •...
- Page 18 4.2.7 Proper washing recommendations Clothes Light Colours and Black/Dark Delicates/ Colours Whites Colours Woollens/Silks (Recommended (Recommended (Recommended temperature (Recommended temperature temperature range temperature range range based on soil level: 40- range based on soil level: based on soil level: based on soil level: 90 oC) cold-40 oC) cold-40 oC)
-
Page 19: Operating The Product
4.3 Operating the product Please read the "Safety Instructions" section first! 4.3.1 Control panel 1 - Programme selection knob 8 - Auxiliary function button 5 2 - Spin speed adjustment button 9 - Auxiliary function button 4 3 - Temperature adjustment button 10 - Auxiliary function button 3 4 - Display 11 - Auxiliary function button 2... -
Page 20: Programme And Consumption Table
4.3.3 Programme and consumption table Auxiliary functions Selectable temperature Programme range °C Cold - 90 2,75 1600 • • • • • Cottons Cold - 90 2,00 1600 • • • • • 1,10 1600 • • • • • Cold - 90 •... -
Page 21: Programme Selection
Please check installation section of user manual before the first use of your product The auxiliary functions in the table may vary according to the model of your machine. Water and energy consumption may vary subject to the changes in water pressure, water hardness and temperature, ambient temperature, type and amount of laundry, selection of auxiliary functions and spin speed, and changes in electric voltage. - Page 22 4.3.5 Programmes • Eco 40-60 In the Eco 40-60 programme, you may wash normally soiled cotton laundry that are specified to be washed together at 40°C or 60°C. This programme is the standard test programme according to the EU environmentally friendly design and energy labelling regulations. Although this programme washes longer than other washing programmes, it is more efficient in terms of energy and water consumption.
- Page 23 • Curtain You can use this programme to wash your tulles and curtains. As their meshed texture causes excessive foaming, put little amount of detergent into the main washing compartment. Thanks to the special spin profile of the programme, tulles and curtains crease less. Do not load your curtains above the specified capacity in order not to damage them.
-
Page 24: Temperature Selection
• Delicates You can wash your delicate clothes such as cotton/synthetic blended knitwear or hosiery in this programme. It washes with more delicate washing action. Wash your clothes whose colour you want to preserve either at 20 degrees or by selecting the cold wash option. •... -
Page 25: Spin Speed Selection
4.3.7 Spin speed selection Whenever a new programme is selected, the recommended spin speed of the selected programme is displayed on the Spin Speed indicator. It is possible that the recommended spin speed value is not the maximum spin speed that can be selected for the current programme. Press the Spin Speed Adjustment button to change the spin speed. -
Page 26: Auxiliary Functions
4.3.8.1 Auxiliary functions • Express / Intensive You can shorten or extend the programme duration with this function. Depending on the programme selection, there may be differences in time increases and decreases. In case the QUICK or INTENSIVE LED is not lit, the appropriate programme duration is shown for your normally soiled laundry. - Page 27 4.3.8.2 Functions/Programmes Selected by Pressing the Function Keys for 3 Seconds • Anti-Crease+ Press and hold 1. Auxiliary function button for 3 seconds. When the function is selected, the drum rotates for up to 8 hours for preventing the laundry from creasing at the end of the programme. You can cancel the programme and take your laundry out at any time during the 8-hour duration.
-
Page 28: To Activate The Child Lock
• Child lock Use Child Lock function to prevent children from tampering with the machine. Thus you can avoid any changes in a running programme. You can switch on and off the machine with On / Off button when the Child Lock is active. When you switch on the machine again, programme will resume from where it has stopped. -
Page 29: Starting The Programme
In order for the End Time function is activated and the programme is completed at the end of the specified time, you must press Start/Pause button after adjusting the time. If you want to cancel the End Time function, turn off and on the product by pressing the On/Off button. When you have activated the End Time function, do not add liquid detergent in the powder detergent compartment no 2. - Page 30 Opening the loading door in case of power failure: In case of power failure, you can use the loading door emergency handle under the pump filter cap to open the loading door manually. To avoid any water overflow before opening the loading door, make sure there is no water left inside the machine. •...
- Page 31 Switching the machine to pause mode: You can switch the machine to pause mode if the Start/Pause button is pressed when any programme is operating. Pause symbol will flash on the display. Changing the programme selection after programme has started: Programme cannot be changed when a programme is running.
-
Page 32: Remote Control Setup
The Bluetooth of your smart device should be on and your device should be connected to the internet during setup. Your smart device should be close to the washing machine. After the setup, the Bluetooth can be turned off or your smart device does not need to be close to the washing machine. You may use your product provided that your smart device is connected to internet. - Page 33 • Follow the instructions on the remote control application screen. • When setup is complete, give your washing machine a name. On the "Products" page in the app you can see the product you just added. If you cannot complete the setup successfully in 5 minutes, your washing machine will automatically turn itself off. In this case, you will have to start over the setup steps.
- Page 34 If you want to control your washing machine remotely, press Remote Control button on the control panel and activate the Remote Control function. Once access is established to the product, you will see a screen similar to the one below. When the Remote Control Function is on, only the machine can be turned on and off and status can be tracked.
-
Page 35: Maintenance And Cleaning
4.4 Maintenance and cleaning Please read the “Safety Instructions” section first! Service life of product extends and frequently experienced problems will be reduced if it is cleaned at regular intervals. 4.4.1 Cleaning the detergent drawer When to clean • If you see hardened, viscous detergent or softener when you open the dosing container lid, •... -
Page 36: Cleaning The Loading Door And The Drum
• Take out the discharge bar that is located at the back of the drawer. • The hole behind the detergent compartment that will be emptied is placed over a container. • Slightly push the discharge bar into the slot at the back of the detergent compartment. •... -
Page 37: Cleaning The Water Intake Filters
4.4.4 Cleaning the water intake filters There is a filter at the end of each water intake valve at the rear of the product and also at the end of each water intake hose where they are connected to the tap. These filters prevent foreign substances and dirt in the water to enter the product. - Page 38 3 Follow the below procedures in order to drain water. If the product has an emergency water draining hose, in order to drain the water: Pull the emergency draining hose out from its seat. Place a large container at the end of the hose. Drain the water into the container by pulling out the plug at the end of the hose.
-
Page 39: Troubleshooting
Troubleshooting Please read the “Safety Instructions” section first! Problem Cause Solution Programs do not start after the Start / Pause / Cancel button is not pressed. • *Press Start / Pause / Cancel button. loading door is closed. It may be difficult to close the loading door in case of •... - Page 40 Problem Cause Solution Washing takes longer than Water pressure is low. • Product waits until taking in adequate amount specified in the user manual.(*) of water to prevent poor washing quality due to the decreased amount of water. Therefore, the washing time extends.
- Page 41 Problem Cause Solution Washing performance is poor: Oily Regular drum cleaning is not applied. • Clean the drum regularly. For this procedure, please stains appeared on the laundry. (**) see "Cleaning the loading door and the drum". Washing performance is poor: Odours and bacteria layers are formed on the drum as •...
- Page 42 Problem Cause Solution Foam is overflowing from the Too much detergent is used. • Mix 1 tablespoonful softener and ½ l water and pour into detergent drawer. the main wash compartment of the detergent drawer. • Put detergent into the product suitable for the programmes and maximum loads indicated in the “Programme and consumption table”.
- Page 43 However, only the service agent (i.e. authorized professional repairers) that you can reach through the phone number given in the user manual/warranty card or through your authorized dealer may provide service under the guarantee terms. Therefore, please be advised that repairs by professional repairers (who are not authorized by Grundig) shall void the guarantee. Self-Repair Self-repair can be done by the end-user with regard to the following spare parts: door, door hinge and seals, other seals, door locking support.grundig.com...
Need help?
Do you have a question about the GWPE89E6168WW and is the answer not in the manual?
Questions and answers