Table of Contents
Advertisement
Advertisement
Table of Contents

Related Manuals for Targus Stow-N-Go AKP01US


Summary of Contents for Targus Stow-N-Go AKP01US
- Page 1 Wireless Stow-N-Go™ Keypad USER GUIDE...
-
Page 2: Table Of Contents
Table of Contents Introduction ...3 System Requirements ...3 Installing the Battery ...4 Connecting the Receiver and Installing the Default Drivers ...5 Turning the Keypad On and Off ...5 Establishing a Communications Link ...6 Using the Keypad ...7 Operating Hints ...8 Power Management ...9 Troubleshooting ...10 Technical Support ...12... -
Page 3: Introduction
TARGUS WIRELESS STOW-N-GO Introduction Congratulations on your purchase of the Targus WirelessStow-N-Go Keypad. The keypad is designed with a built-in cavity to store the USB receiver, eliminating the potential misplacement of the receiver and to provide ease of traveling with the keypad. -
Page 4: Installing The Battery
Targus Wireless Stow-N-Go Installing the Battery Battery Cover 1. Remove the battery cover from the back of the keypad. 2. Insert the supplied battery, making sure that thepositive (+) and negative (-) ends match the polarity indicators inside the battery housing. -
Page 5: Connecting The Receiver And Installing The Default Drivers
Targus Wireless Stow-N-Go Connecting the Receiver and Installing the Default Drivers To connect the receiver: 1. Remove the receiver from the back of the keypad. 2. Plug the USB receiver into an available USB port on your computer. For Windows® 98SE, follow any on-screen instructions to complete the default driver installation. -
Page 6: Establishing A Communications Link
Targus Wireless Stow-N-Go Establishing Link After your computer detects the USB receiver and the default driver software is installed, you may need to establish a communications link between the receiver and the keypad before you can use it. 1. Plug the receiver into your computer's USB port and turn on the keypad. -
Page 7: Using The Keypad
Targus Wireless Stow-N-Go 2. During this time, press and release the reset button onthe back of the keypad. When a communications link is established, the LED on the receiver will stop flashing. You are now ready to use the keypad. -
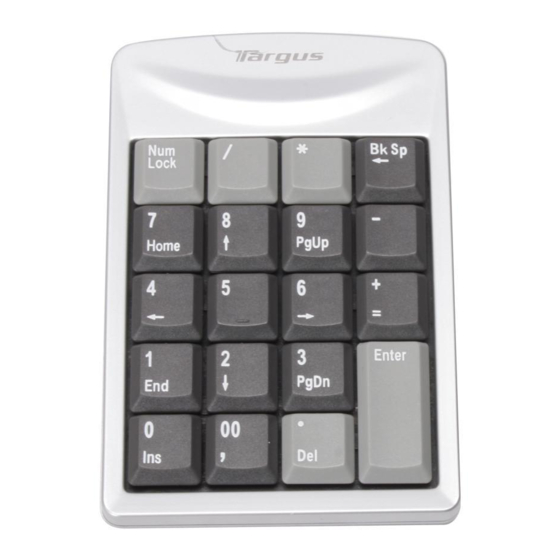
Page 8: Operating Hints
Targus Wireless Stow-N-Go NumLock on - enters "6" on the display NumLock off - moves one character to the right of the cursor position NumLock on - enters "7" on the display Home NumLock off - emulates the Home key NumLock on - enters "8"... -
Page 9: Power Management
Targus Wireless Stow-N-Go Power Management • To extend the life of your batteries, power off the battery with the on/off switch located on the back of the keypad while traveling or when you’re not using it. • The keypad’s power saving mode feature activates after 4 minutes of non-operation. -
Page 10: Troubleshooting
Targus Wireless Stow-N-Go Troubleshooting What do I do if the keypad does not work? • Make sure that the polarity of the batteries is correct. The positive (+) and negative (-) ends of each battery must match the positive (+) and negative (-) connections in the battery housing. - Page 11 Targus Wireless Stow-N-Go • Increase the distance between the receiver and the base units of other wireless devices. • Turn off any wireless devices and their base units that are near the keypad’s receiver. • If you are using the keypad on a metal surface, move it and the receiver to a non-metal surface.
-
Page 12: Technical Support
This warranty does not cover accidental damage, wear and tear, or consequential or incidental loss. Under no conditions is Targus liable for loss of, or damage to a devices nor loss of, or damage to, programs, records, or data; nor any consequential or incidental damages, even if Targus has been informed of their possibility. -
Page 13: Declaration Of Conformity
Corporation in the United States and/or other countries. All trademarks and registered trademarks are the properties of their respective owners. All rights reserved. Features and specifications subject to change without notice. © 2006, Targus Group International, Inc. and Targus, Inc., Anaheim, CA 92806 USA. - Page 14 Visit our Website at www.targus.com Features and specifications subject to change without notice. © 2006 Targus Group International, Inc. and Targus, Inc. AKP01US / 410-0006-001B...
Need help?
Do you have a question about the Stow-N-Go AKP01US and is the answer not in the manual?
Questions and answers