Advertisement
SAFETY & WARNINGS
When using an electrical appliance, basic safety precautions should always be followed, including the following:
- Read all instructions.
- Do not touch hot surfaces. Use handles or knobs.
- Close supervision is necessary when any appliance is used by or near children.
- To protect against electric shock, do not place any part of the electric oven in water or other liquid.
- Do not let cord hang over edge of table or counter, or touch hot surfaces.
- Do not operate appliance with damaged cord or plug or after the appliance malfunctions, or has been damaged in any manner, return appliance to the nearest Authorized Service Center for examination, repair, or adjustment.
- The use of accessory attachments not recommended by the appliance manufacturer may cause hazard or injury.
- When operating the oven, keep at least four inches of space on all sides of the oven to allow for adequate air circulation.
- Unplug from outlet when not in use, or before cleaning. Let it to cool before putting on or taking off parts, or before cleaning.
- To disconnect, return the unit to standby mode, then unplug the plug. Always hold the plug, but never pull the cord.
- Do not cover CRUMB TRAY or any part of the oven with metal foil. This may cause overheating of the oven.
- Do not clean with metal scouring pads. Pieces can break off the pad and touch electrical parts, creating a risk of electric shock.
- Oversized foods or metal utensils must not be inserted in a electric oven as they may create a fire or risk of electric shock.
- A fire may occur if the oven is covered or touching flammable material, including curtains, draperies, walls, and the like, when in operation. Do not store any item on the oven during operation.
- Extreme caution should be exercised when using containers constructed if anything other than metal or glass.
- Do not place any of the following materials in the oven: cardboard, plastic, paper, or anything similar.
- Do not store any materials, other than manufacturer's recommended accessories, in this oven when not in use.
- Always wear protective, insulated oven mitts when inserting or removing items from the hot oven.
- This appliance has a tempered, safety glass door. The glass is stronger than ordinary glass and more resistant to breakage. Tempered glass can break, but the pieces will not have sharp edges. Avoid scratching door surface or nicking edges. If the door gas a scratch or nick, contact our consumer relations line before using the oven.
- Do not use outdoors.
- Do not use appliance for other than intended use.
- This appliance is for HOUSEHOLD USE ONLY.
- The temperature of the door or the outer surface may be higher when the appliance is working.
- Protect against hurt by sharp edge when action.
- Temperature of accessible surfaces may be high when the appliance is operating.
- Do not rest cooking utensils or baking dishes on glass door.
- This appliance is intended to be used in household and similar applications such as:
- staff kitchen areas in shops, offices and other working environments;
- farm houses;
- by clients in hotels, motels and other residential type environments;
- bed and breakfast type environments.
- Children should be supervised to ensure that they do not play with the appliance.
- The weight of the food which is put on the Food Tray/Wire Rack can not be over 6.6 pounds (3.0kg).For reference: The food can not concentrate on one side of the Food Tray/Wire Rack, you would better try you best to make the food put on the Food Tray/Wire Rack evenly.
- For appliance with type Y attachment, if the supply cord is damaged, it must be replaced by the manufacturer, its services agent or similarly qualified persons in order to avoid a hazard
- Rear surface of appliances should be placed against a wall.
![]()
This appliance includes a heating function. Surfaces, other than the functional surfaces may develop high temperatures. Since temperatures are perceived differently by different people, this device should be used with CAUTION. Hold the appliance exclusively to grip surfaces intended to hold and use such heat protection measures as heat protection Gloves or pot holders. Areas which are not intended to grips must be given sufficient time to cool.- Do not place on or near a hot gas or electric burner, or in a heated oven.
- Extreme caution must be used when moving an appliance containing hot oil or other hot liquids.
- Turn the timer knob to "LOW" position to shut off the appliance.
- Appliances are not intended to be operated by means of an external timer or separate remote-control system.
- This appliance can be used by children aged from 8 years and above if they have been given supervision or instruction concerning use of the appliance in a safe way and understand the hazards involved.
- Children shall not play with the appliance.
- Cleaning and user maintenance shall not be made by children without supervision.


***APPLIANCE SURFACES ARE HOT AFTER USE AND MAY CAUSE INJURY***. Always wear protective, insulated oven gloves when touching hot oven or hot dishes and food, or when inserting or removing rack, pans or baking dishes.
BEFORE USING YOUR OVEN
Before using your convection electric oven for the first time, be sure to:
- Unpack the unit.
- Remove all racks and pans. Wash the racks and pans in hot sudsy water or in dishwasher.
- Thoroughly dry all accessories and re-assemble in oven. Plug oven into outlet and you are ready to use your new Electric Oven.
- After re-assembling your oven, we recommend that you run it at MAX temperature for approximately 15 minutes to eliminate any packing oil that may remain after shipping.
OVEN COMPONENTS

USING YOUR OVEN
Please familiarize yourself with the following oven functions and accessories prior to first use:
- Glass Door: For front viewing of food.
- Heating Element: For heating food.
- Air fry Basket: For carrying food to be cooked for the Air Fry function.
- Crumb Tray: For crumb or fallen food particles collection. Pulls out for easy cleaning.
- Food Tray: For carrying food to be cooked.
- Wire rack: For carrying food to be cooked.
- Food Tray Handle: For removing basket or tray.
- Rotisserie handle: For removing rotisserie rod assembly.
- Rotisserie fork: For roasting chicken and other kinds of meats.
NOTE: The maximum amount of French fries on the Air fry basket is 350g. If need to go beyond that, please take it out and shake it more evenly.
ROTISSERIE FORK TIPS
- Insert the fork into the rod until near the end of the rod and then secure with thumbscrew.
- Insert the food from the other side of the rod.
- Place second fort into other side of the rod, and then secure with thumbscrew. Check that the food is in the center of the rod firmly.
- Insert the rod with food into the oven. Insert the one side of the rod into the support-hole of the oven. And then place the other side of the rod onto the support-bracket of the oven.
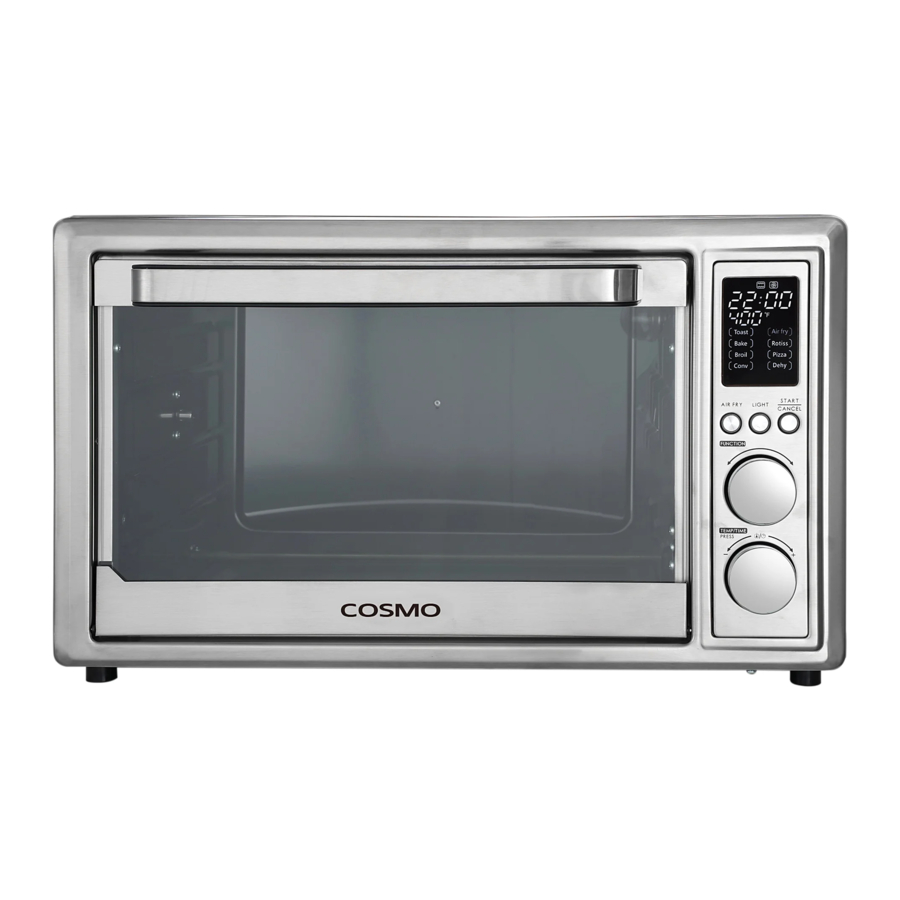
CONTROL PANEL

Function Buttons & Knobs
- "AIR FRY" button: Quickly select Air Fry function.
- "LIGHT" button: It can be turned ON/OFF the light.
- "START/CANCEL" button:
- Once the function is selected, it can be activated by pressing the "START/CANCEL" button;
- During the operating, press and hold this button for about 1.5s to cancel the work and return to standby;
- When set the cooking data, press and hold this button for about 1.5s to cancel all the setting and return to standby mode;
- During the preheating, press this button to cancel the preheating and start cooking operation;
- When the preheating is complete, press this button to start cooking operation;
- During the clock setting mode, press this button to confirm the time and return to standby mode.
- "FUNCTION" knob: This knob can be used to select the desired function. The icon of function will blink in the LED display when it is selected.
- "TEMP/TIME" knob: The temperature/time can be adjusted by this knob.
- Turn the knob to set the desired cooking temperature;
- After temperature setting, press the knob once to switch to time setting mode. Turn the knob to set the desired cooking time;
- For the Toast function, turn this knob to set the desired shade level;
- User can press the knob repeatedly to switch the time setting mode and temperature setting mode;
- In the standby mode, long press this button for about 3seconds to enter the oven clock setting mode. Turn the knob to set the hour time and press the knob once to confirm the hour setting. After confirmed the hour setting, the minute starts to blink. Turn the knob to set the minute time and press the knob once to confirm the time setting. User can press the knob repeatedly to switch the hour setting mode and minute setting mode. Press "START/CANCEL" button to confirm the clock setting, and the unit return to standby mode.
OPERATION INSTRUCTIONS
- TOAST
Different types of bread require different settings. Lighter breads and waffles require lighter setting. Darker breads, muffins and English muffins require a darker setting.- Place the food to be cooked on the wire rack. Insert the rack into the middle support guide of the oven.
- Turn FUNCTION knob to "Toast".
- Turn TEMP/TIME knob to set the desired shade level. (NOTE: Baking temperature setting and time setting are not available.)
- Press "START/CANCEL" button to start the operation.
NOTE:- Baking level, time or temperature is nonadjustable while the oven is working.
- To cancel operation, long press "START/CANCEL" button for 1.5s and return to standby mode. No pause setting.
- To check or remove food, use the handle to help side food in and out.
- When the working cycle is complete, the unit will auto stop and return to standby mode. Open the door completely and remove the food immediately or the heat remaining in the oven will continue to toast and dry out your toast.
![]()
Cooked food, metal rack, and door can be very hot, handle with care. Do not leave the oven unattended.
- AIR FRY
The Air Fry function good for cooking a variety of French fries or chicken wings, under intense heat and maximized airflow to cook foods crispy and brown; food are ideally baked using this function.- Turn FUNCTION knob to "Air Fry" or select by pressing "Air Fry" button.
- Turn TEMP/TIME knob to set desired baking temperature. To set the time, press the TEMP/TIME knob once and then turn it to set desired baking time. You can switch from temperature setting to time setting and vice versa by pressing TEMP/TIME knob.
- Press "START/CANCEL" button to start the preheating. "PrE" flash in LED display.
- The unit emits beeps and the preheating is complete. "PrE" blink in LED display. Place the food to be cooked on the Air fry Basket. Insert the basket into the middle support guide of the oven and close the door.
- Press "START/CANCEL" button to start the operating. The time counts down.
NOTE:- The convection fan runs with high speed during the operating.
- Baking time or temperature is nonadjustable during the preheating.
- Baking time or temperature is adjustable during the operating.
- To cancel operation, long press "START/CANCEL" button for 1.5s and return to standby mode. No pause setting.
- To check or remove food, use the handle to help side food in and out.
- When the working cycle is complete, the unit will auto stop and emit beeps, "00:00" showing in the LED display until the user press "START/CANCEL" button. Open the door completely and remove the food with handle.
![]()
Cooked food, metal basket, and door can be very hot, handle with care. Do not leave the oven unattended.
- BAKE
The Bake function cooks food evenly throughout. This function is ideal for baking cakes, muffins, brownies and pastries.- Turn FUNCTION knob to "Bake".
- Turn TEMP/TIME knob to set desired baking temperature. To set the time, press the TEMP/TIME knob once and then turn it to set desired baking time. You can switch from temperature setting to time setting and vice versa by pressing TEMP/TIME knob.
- Press "START/CANCEL" button to start the preheating. "PrE" flash in LED display.
- The unit emits beeps and the preheating is complete. "PrE" blinks in LED display. Place the food to be cooked on the wire rack/food tray. Insert the rack/tray into the middle support guide of the oven and close the door.
- Press "START/CANCEL" button to start the operating. The time counts down.
NOTE:- Baking time or temperature is nonadjustable during the preheating.
- Baking time or temperature is adjustable during the operating.
- To cancel operation, long press "START/CANCEL" button for 1.5s and return to standby mode. No pause setting.
- To check or remove food, use the handle to help side food in and out.
- When the working cycle is complete, the unit will auto stop and emit beeps, "00:00" showing in the LED display until the user press "START/CANCEL" button. Open the door completely and remove the food with handle.
![]()
Cooked food, metal rack/tray, and door can be very hot, handle with care. Do not leave the oven unattended.
- ROTISSERIE
The Rotisserie function is a rotating roast, good for whole chicken roasting.- Place whole chicken on the rotisserie rod and fixed by the fork both side, insert the rod into the rotisserie hole position and close the door. NOTE: Need put the Food tray at bottom rack slot to collect oil drip during cooking, and put some water in food tray before cooking, it will make good effect for rotisserie.
- Turn FUNCTION knob to "Rotiss".
- Turn TEMP/TIME knob to set desired baking time. To set the time, press the TEMP/TIME knob once and then turn it to set desired baking time. You can switch from temperature setting to time setting and vice versa by pressing TEMP/TIME knob.
- Press "START/CANCEL" button to start the operating. The time counts down.
NOTE:- Baking time or temperature is adjustable during the operating.
- To cancel operation, long press "START/CANCEL" button for 1.5s and return to standby mode. No pause setting.
- To check or remove food, use the handle to help side food in and out.
- When the working cycle is complete, the unit will auto stop and emit beeps, "00:00" showing in the LED display until the user press "START/CANCEL" button. Open the door completely and remove the food with handle.
![]()
Cooked food, metal rod/tray, and door can be very hot, handle with care. Do not leave the oven unattended.
- BROIL
The Broil function is good for cooking open-faced sandwiches, thin cuts of meat (like Bacon), poultry and fish, sausages and vegetables. Broiling can also be used to brown the tops of casseroles, gratins and desserts.- Place the food to be cooked on the wire rack/food tray. Insert the rack/ tray into the middle support guide of the oven and close the door.
- Turn FUNCTION knob to "Broil ".
- Turn TEMP/TIME knob to set desired baking time. The cooking temperature is default and nonadjustable for this function.
- Press "START/CANCEL" button to start the operating. The time counts down.
NOTE:- Baking time is adjustable during the operating.
- To cancel operation, long press "START/CANCEL" button for 1.5s and return to standby mode. No pause setting.
- To check or remove food, use the handle to help side food in and out.
- When the working cycle is complete, the unit will auto stop and emit beeps, "00:00" showing in the LED display until the user press "START/CANCEL" button. Open the door completely and remove the food with handle.
![]()
Cooked food, metal rack/tray, and door can be very hot, handle with care. Do not leave the oven unattended.
- PIZZA
The Pizza function melts and browns cheese and toppings while crisping the pizza crust.- Turn FUNCTION knob to "Pizza".
- Turn TEMP/TIME knob to set desired baking temperature. To set the time, press the TEMP/TIME knob once and then turn it to set desired baking time. You can switch from temperature setting to time setting and vice versa by pressing TEMP/TIME knob.
- Press "START/CANCEL" button to start the preheating. "PrE" flash in LED display.
- The unit emits beeps and the preheating is complete. "PrE" blink in LED display. Place the food to be cooked on pizza pan, and then place the pan on the wire rack. Insert the wire rack into the middle support guide of the oven and close the door.
- Press "START/CANCEL" button to start the operating. The time counts down.
NOTE:- Baking time or temperature is nonadjustable during the preheating.
- Baking time or temperature is adjustable during the operating.
- To cancel operation, long press "START/CANCEL" button for 1.5s and return to standby mode. No pause setting.
- To check or remove food, use the handle to help side food in and out.
- When the working cycle is complete, the unit will auto stop and emit beeps, "00:00" showing in the LED display until the user press "START/CANCEL" button. Open the door completely and remove the food with handle.
![]()
Cooked food, metal rack/pan, and door can be very hot, handle with care. Do not leave the oven unattended.
- CONVECTION
- Turn FUNCTION knob to "Conv".
- Turn TEMP/TIME knob to set desired baking temperature. To set the time, press the TEMP/TIME knob once and then turn it to set desired baking time. You can switch from temperature setting to time setting and vice versa by pressing TEMP/TIME knob.
- Press "START/CANCEL" button to start the preheating. "PrE" flash in LED display.
- The unit emits beeps and the preheating is complete. "PrE" blink in LED display. Place the food to be cooked on the wire rack/food tray. Insert the rack/tray into the middle support guide of the oven and close the door.
- Press "START/CANCEL" button to start the operating. The time counts down.
NOTE:- The convection fan runs with low speed during the operating.
- Baking time or temperature is nonadjustable during the preheating.
- Baking time or temperature is adjustable during the operating.
- To cancel operation, long press "START/CANCEL" button for 1.5s and return to standby mode. No pause setting.
- To check or remove food, use the handle to help side food in and out.
- When the working cycle is complete, the unit will auto stop and emit beeps, "00:00" showing in the LED display until the user press "START/CANCEL" button. Open the door completely and remove the food with handle.
![]()
Cooked food, metal rack/tray, and door can be very hot, handle with care. Do not leave the oven unattended.
- DEHYDRATE
The Dehydrate function combines low and stable heat to dry out foods without cooking. Good for drying fruit or vegetables chips.- Place the food to be cooked on the wire rack/food tray. Insert the rack/ tray into the middle support guide of the oven and close the door.
- Turn FUNCTION knob to "Dehy ".
- Turn TEMP/TIME knob to set desired baking time. The cooking temperature is default and nonadjustable for this function.
- Press "START/CANCEL" button to start the operating. The time counts down.
NOTE:- Baking time is adjustable during the operating.
- To cancel operation, long press "START/CANCEL" button for 1.5s and return to standby mode. No pause setting.
- To check or remove food, use the handle to help side food in and out.
- When the working cycle is complete, the unit will auto stop and emit beeps, "00:00" showing in the LED display until the user press "START/CANCEL" button. Open the door completely and remove the food with handle.
![]()
Cooked food, metal rack/tray, and door can be very hot, handle with care. Do not leave the oven unattended.
CARE & MAINTENANCE
This appliance requires little maintenance. It contains no user serviceable parts. Do not try to repair it yourself. Contact a qualified appliance repair technician if the product requires servicing.
CLEANING INSTRUCTIONS
Your toaster oven should be cleaned regularly for best performance and long life. Regular cleaning will also reduce the risk of fire hazard.

To protect against electrical shock, DO NOT IMMERSE THE OVEN IN WATER OR ANY OTHER LIQUIDS.
- Remove plug from electrical outlet. Allow it to cool.
- Remove the Removable Crumb Tray, Rack, Tray by pulling out of the oven. Clean them with damp, soapy cloth. Make sure to only use mild, soapy water.
- To clean inside of oven, wipe the oven walls, bottom of oven, and glass door with a damp, soapy cloth. Repeat with a dry, clean cloth.
- Wipe outside of oven with a damp cloth.
![]()
DO NOT USE ABRASIVE CLEANERS OR METAL SCOURING PADS. Make sure to only use mild, soapy water. Abrasive cleaners, scrubbing brushes and chemical cleaners will damage the coating on this unit. Pieces can break off the coating and touch electrical parts involving a risk of electrical shock. - Allow the appliance to cool and dry completely before storing. If storing the oven for long periods of time, make certain that the oven is clean and free of food particles. Store the oven in a dry location such as on a table or countertop or cupboard shelf. Other than the recommended cleaning, no further user maintenance should be necessary.
- Any other servicing should be performed by an authorized service representative.
STORING THE OVEN
Unplug unit, allow it to cool, and clean before storing. Store the Electric Oven in its box in a clean, dry place. Never store appliance while it is hot or still plugged in. Never wrap cord tightly around the appliance. Do not put any stress on the cord where it enters the unit, as it could cause the cord to fray and break.
SPECIFICATIONS
| Model: | COS-317AFOSS |
| Rated Voltage: | 120V |
| Rated Frequency: | 60Hz |
| Wattage: | 1800W |
| Oven Capacity: | 1.1 cu. ft. / 30 Liters |
| External Dimensions (WxDxH): | 20.08 x 17.17 x 12.09 inches / 510 x 436 x 307 mm |
| Internal Dimensions (WxDxH): | 14.17 x 13.82 x 9.45 inches / 360 x 351 x 240 mm |
| Net Weight: | 19.95 lbs. / 9.05 kg |
| Temperature: | 200°F - 450°F |
| Functions: | Toast, Air Fry, Bake, Rotisserie, Broil, Pizza, Convection, Dehydrate |
| Display: | LED |
| Internal Light: | Yes |
| Accessories: | Food tray, wire rack, crumb tray, air fry basket, rotisserie fork, rotisserie handle, food tray handle |
| Certification: | UL / ETL |
WARRANTY AND SERVICE
For full warranty details on this product please visit: http://www.cosmoappliances.com/warranty
TO RECEIVE WARRANTY SERVICE, YO UR PRO DUCT MUST BE REGISTERED. TO REGISTER, VISIT:
WWW.COSMOAPPLIANCES.COM/WARRANTY
SCAN TO REGISTER


Do Not Return This Product To The Store If you have a problem with this product, please contact
Cosmo Customer Support at
+1(888)784-3108
DATED PROOF OF PURCHASE, MODEL #, AND SERIAL # REQUIRED FOR WARRANTY SERVICE
Correct Disposal of this product:
This marking indicates that this appliance should not be disposed with other household wastes. To prevent possible harm to the environment or human health from uncontrolled waste disposal, recycle it responsibly to promote the sustainable reuse of material resources.


Documents / Resources
References
Download manual
Here you can download full pdf version of manual, it may contain additional safety instructions, warranty information, FCC rules, etc.
Advertisement


Need help?
Do you have a question about the COS-317AFOSS and is the answer not in the manual?
Questions and answers