
Related Manuals for Cosmo C51EIX


Summary of Contents for Cosmo C51EIX
-
Page 1: Installation Instructions
USER MANUAL & INSTALLATION INSTRUCTIONS 24” BUILT-IN OVEN IMPORTANT SAFETY INSTRUCTIONS Carefully read the following important information regarding installation safety and maintenance. Keep these instructions for future reference. -
Page 2: Table Of Contents
Contents Safety Requirements .......................... 3 Proper installation and maintenance ....................3 Fire safety ............................4 Burn prevention ..........................5 Child safety ............................. 6 Cleaning safety ..........................6 Cookware safety ..........................6 Electrical Requirements ........................7 Installation Instructions ........................8 Installation of built-in ovens ......................8 Electrical installation ........................ -
Page 3: Safety Requirements
Safety Requirements IMPORTANT SAFETY INSTRUCTIONS READ AND SAVE THESE INSTRUCTIONS When properly cared for, your new appliance has been designed to be safe and reliable. Read all instructions carefully before use. These precautions will reduce the risk of burns, electric shock, fire and injury to persons. When using kitchen appliance, basic safety precautions must be followed, including those in the following pages. -
Page 4: Fire Safety
• In the event of an error the display flashes and beeps continuously. Disconnect appliance from the power supply and call a qualified technician. • Do not repair or replace any part of the appliance unless specifically recommended in the manual. -
Page 5: Burn Prevention
TO REDUCE THE RISK OF PERSONAL INJURY IN THE EVENT OF A GREASE FIRE, OBSERVE THE FOLLOWING: SMOTHER FLAMES with a close-fitting lid, cookie sheet, or metal tray, then turn off the burner. EXERCISE CAUTION TO PREVENT BURNS. If the flames do not go out immediately, EVACUATE AND CALL THE FIRE DEPARTMENT. -
Page 6: Child Safety
Child safety • Secure all loose garments, etc. before beginning. Tie long hair so that it does not hang loose, and do not wear loose fitting clothing or hanging garments, such as ties, scarves, jewelry, or dangling sleeves. • When children become old enough to use the appliance, it is the legal responsibility of the parents or legal guardians to ensure that they are instructed in safe operation of the appliance by qualified persons. -
Page 7: Electrical Requirements
Electrical Requirements Electrical Shock Hazard Do not use an extension cord. Failure to follow these instructions can result in death, fire, or electrical shock. • Severe shock, or damage to the range • Any additions, changes or conversions may occur if the range is not installed by a required in order for this appliance to qualified installer or electrician. -
Page 8: Installation Instructions
Installation Instructions Electrical Shock Hazard Do not use an extension cord. Failure to follow these instructions can result in death, fire, or electrical shock Only a qualified person in compliance with the instructions provided must install the appliance. The manufacturer declines all responsibility for improper installation, which may harm persons and animals and damage property. - Page 9 IMPORTANT: Installation must be in compliance with the consumption declaration. In order to ensure adequate ventilation, the back panel of the cabinet unit must be removed. Installing the oven so that it rests on two strips of wood is preferable. If the oven rests on a continuous, flat surface, there must be an aperture of at least 1 ¾”...
-
Page 10: Electrical Installation
Electrical installation Electrical Shock Hazard Do not use an extension cord. Failure to follow these instructions can result in death, fire, or electrical shock Only a qualified person in compliance with the instructions provided must install the appliance. The manufacturer declines all responsibility for improper installation, which may harm persons and animals and damage property. - Page 11 Three-Wire Connection · Connect red wire from oven to red wire in junction box. · Connect black wire from oven to black wire in junction box. · Connect green ground wire from oven to gray neutral wire in junction box. The conduit cable, where connected at the oven, swivels.
-
Page 12: How To Use Your Oven
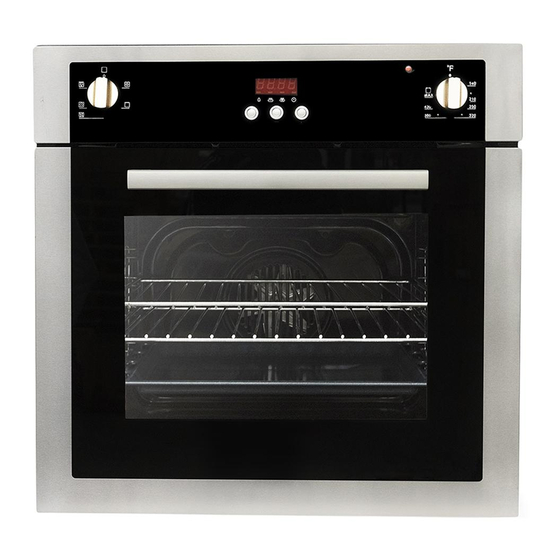
How To Use Your Oven Close-up view Figure 5 A. Control panel G. Oven rack H. Guides for sliding the racks or dripping in and out Before using your oven for the first time This multi-function oven combines the advantages of traditional convection ovens with those of the more modern fan assisted models in a single appliance. -
Page 13: Operating The Oven
IMPORTANT: Place the dripping pan provided (only available on certain models) on the bottom shelf of the oven to prevent any sauce and/or grease from dripping onto the bottom of the oven only when grilling food or when using the rotisserie (only available on certain models). For all other types of cooking, never use the bottom shelf and never place anything on the bottom of the oven when it is in operation because this could damage the enamel. -
Page 14: Clock Functions
Clock functions Once the oven is connected to electrical power, the clock display will show “12:00” with the square symbol above “ ” (See Figure 7) “+” “-” Press the button will increase or decrease the number until it reaches the right time ... - Page 15 IMPORTANT: The setting must be carried out in 5 seconds. If electricity fails suddenly, all the set procedure and the proper clock time (hour, minute) will disappear. After electrical power is on again, “12:00” and the square symbol above “ ”...
- Page 16 Semi-Automatic Timer Setting A. Setting timer for how long to cook 1. Longest time that can be set is10 hours maximum. 2. Press the function button (See Figure 6) repeatedly until the square symbol above “ ” “+” “-” is flashing, press button and set the timer for how long the oven needs to cook.
-
Page 17: Oven Functions
Oven functions Grill 2131W Position Knob C to MAX. (See Figure 6) Cook food in the ‘Grill Mode’ with the oven door ajar. The top central heating elements come on. The extremely high and direct temperature of the grill makes it possible to brown the surface of meats and roasts while locking the juices in to keep them tender. -
Page 18: Practical Cooking Advice
This is recommended for the defrosting of all types of food, but in particular for delicate types of food which do not require heat, such as ice cream cakes, cream or custard desserts, and fruitcakes. By using the fan, the defrosting time is approximately halved .In the case of meat, fish and bread, it is possible to accelerate the process using the “Baking Mode”... - Page 19 The oven is fitted with 5 racks. During fan assisted cooking, use two of the three central racks; the lowest and highest racks receive the hot air directly and therefore delicate foodstuffs could be burnt on these racks. As a general rule, use the 2nd and 4th rack from the bottom, placing the foodstuffs that require greater heat on the 2nd rack from the bottom.
- Page 20 Therefore the best results when using the grill modes are obtained by placing the grid on the lower racks (See “Practical Cooking Advice Table” on Page 21), then, to prevent fat and grease from dripping onto the bottom of the oven and smoke from forming, place a dripping-pan on the 1st oven rack from the bottom.
-
Page 21: Practical Cooking Advice Table
Practical cooking advice table Selector knob Food to be cooked Weight Cooking Preheating Thermostat Cooking setting (in kg ) rack time knob time position (Minutes) setting (Minutes) from bottom 1. Defrosting All frozen food 2.Grill Soles and cuttlefish 8-10 Squid and prawn kebabs Cod filet Grilled vegetables 10-15... -
Page 22: How To Maintain Your Oven
NOTE: Cooking times are approximate and may vary according to personal taste. When cooking using the grill or fan assisted grill, the dripping pan must always be placed on the 1st oven rack from the bottom. How To Maintain Your Oven Electrical Shock Hazard Failure to follow these instructions can result in death, fire, or electrical shock. -
Page 23: How To Remove The Oven Door
How to remove the oven door For ease of installation, some oven doors may be removed to reduce the weight of the oven by 30 lbs (14kg) per door, before installing into the cabinet. When removing the door: Make sure oven is cool and power to the oven has been turned off before removing the door. Failure to do so could result in electrical shock or burns. -
Page 24: Replacing The Oven Lamp
Replacing the oven lamp Electrical Shock Hazard Failure to follow these instructions can result in death, fire, or electrical shock. 1. Disconnect the oven from the power 4. Replace the glass cover and supply by means of the omni-polar reconnect the oven to the mains power switch used to connect the appliance to supply. -
Page 25: Transport
· 71.65 lbs approx · Weight - Shipping · 81.6 lbs approx Dimensions (W x H x D) · Outside · 23.4 x 21.4 x 23.4 in · Cutout · 22 x 22.9 x 22 in Brand Name · Cosmo...
Need help?
Do you have a question about the C51EIX and is the answer not in the manual?
Questions and answers