Table of Contents
Advertisement
Quick Links
I N S P I R I N G T H E W O R L D ' S K I T C H E N
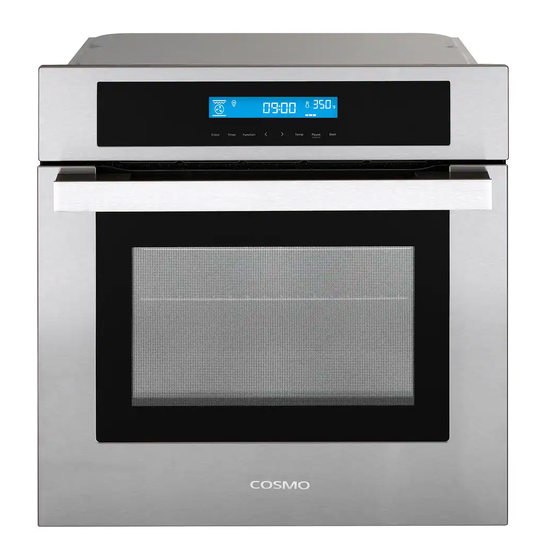
24 IN. DIGITAL CONTROL WALL OVEN
COS-C
106SIX-PT
IMPORTANT SAFETY INSTRUCTIONS
Read these instructions completely and carefully. Save these instructions for lo
cal inspector's use. Observe all governing codes and ordinances.
NOTE TO INSTALLER: Be sure to leave these instructions with the
Consumer. Keep these instructions for future reference. Product failure due to
improper installation is not covered under warranty agreement.
INSTALLATION & USER MANUAL
Advertisement
Table of Contents

Related Manuals for Cosmo COS-C106SIX-PT


Summary of Contents for Cosmo COS-C106SIX-PT
- Page 1 I N S P I R I N G T H E W O R L D ’ S K I T C H E N 24 IN. DIGITAL CONTROL WALL OVEN COS-C 106SIX-PT IMPORTANT SAFETY INSTRUCTIONS Read these instructions completely and carefully. Save these instructions for lo cal inspector’s use.
- Page 3 COSMO appliances are designed according to the strictest safety and performance standard for the North American market. We follow the most advanced manufacturing philosophy.
-
Page 4: Table Of Contents
Table of Contents SAFETY AND WARNINGS ............4-7 FITTING OVEN INTO KITCHEN ............8 CONTROL PANEL DESCRIPTION ...........9 OPERATION INSTRUCTIONS ............10 CLOCK SETTING ....................10 FUNCTION SETTING ..................10-11 LAMP SETTING ......................12 INQUIRING FUNCTION ..................12 CHILD LOCK FUNCTION ..................13 REMINDER FUNCTION ..................13 RESERVATION FUNCTION ...................14 START/PAUSE/CANCEL FUNCTION ..............14 ENERGY-SAVING FUNCTION ................15 OPERATION NOTES ....................15... -
Page 5: Safety And Warnings
Safety & Warnings WARNINGS These are the most critical warnings summarized below. WARNING • Make sure the appliance is properly installed and grounded by a qualified technician. • When the oven is first switched on, it may give off an unpleasant smell. - Page 6 Safety & • Do not allow children to go near the oven when it is operating. • Children should be supervised to ensure that they do not use or play with the appliance. • All wiring and electrical connections should be installed to local code.
- Page 7 Safety & Warnings • DO NOT use harsh abrasive cleaners or sharp metal scrapers to clean the oven door glass; such cleaners and tools can scratch the surface, which may result in shattering of the glass. • DO NOT use a steam cleaner to clean the appliance. •...
- Page 8 Safety & • Flammable materials should NOT be stored in an oven or near surface units. • DO NOT USE WATER ON GREASE FIRES. Smother fire or flame, or use dry chemical or foam-type fire extin- guisher. • Kitchens are an active work environment, and as such, we recommend wearing appropriate attire, including closed toe shoes, when operating this appliance.
-
Page 9: Fitting Oven Into Kitchen
Fitting Oven into Kitchen The oven may be installed underneath a work top or into an upright cupboard. Fix the oven in position by screwing into place, using the two fixing holes in the frame. To locate the fixing holes, open the oven door and look inside. To allow adequate ventilation, the measurements and distances ad- hered to when fixing the oven. -
Page 10: Control Panel Description
Control Panel Description Symbol Function Description Oven Lamp: Allows the user to observe the food inside of the oven, through the window. Oven lamp will light for all cooking functions. Defrost: The circulation of air at room temperature allows for quicker thawing of frozen food, without the use of any heat. -
Page 11: Operation Instructions
Operation Instructions Clock Setting After connecting the unit to the power, the numbers "12:00" will show on the display. 1.) Press " ", the hour number will flash. 2.) Press " " to adjust the hour number; time should be within numbers 0 through 12. - Page 12 Operation Instructions Function Setting Notes • After connecting the unit to the power, the numbers "12:00" will show on the display. • The step quantities for the adjustment time of the coding switch are as follows: 0--0:30 min: step 1 minute 0:30--9:00 hour: step 5 minutes •...
-
Page 13: Lamp Setting
Operation Instructions Lamp Setting 1.) Press " " to select a function, and the correspond- ing icon will illuminate. 2.) Press " " button to start, " 0:00 " and icon " " will light up, " : " will flash. Inquiring Function In the following states, you can use the inquiring function;... -
Page 14: Child Lock Function
Operation Instructions Child Lock Function To Lock: Press " " and " " simultaneously for 3 seconds, there will be a long beeping sound and the " " symbol will illuminate. To Unlock: Press " " and " " simultaneously for 3 seconds, there will be a long beeping sound indicating the Child Lock is unlocked. -
Page 15: Reservation Function
Operation Instructions Reservation Function The delay function can only be used once the Clock has been set on the appliance. In standby mode: 1.) Press " " 2 times, the display shows " " and "End". 2.) Press " " to set the hour of the cooking ending time of reservation. -
Page 16: Energy-Saving Function
Operation Instructions Energy-Saving Function The oven features a 9-hour notification to remind you to start cooking at a certain time, from 1 minute to 9 hours. The reminder can only be set when the oven is in Standby Mode. To set the reminder: 1.) In standby mode and reminding state , press "... -
Page 17: Accessories
Accessories Wire Shelf For grill, dishes, cake pan with items for roasting and grilling. Slider Bracket For cooking larger sized food, these shelf support rails on the right and left sides of the oven can be removed, so dishes and trays can be placed on the oven floor to use functions such as Radiant Grilling, Double Grilling and Double Grill with Fan. -
Page 18: Shelf Placement Warning
Shelf Placement Warning Shelf Placement Warning To ensure the oven shelves are used safely, correct shelf placement between the side rails is important. Shelves and the pan only can be used between the first and fifth layers. The shelves should be used correctly with the side rails, as it will ensure that during careful removal of the shelf or tray and so any hot food will not not slide out. -
Page 19: Bulb Replacement
Bulb Replacement Bulb Replacement 1.) Disconnect power from the main outlet, or switch off the cir- cuit breaker of the unit's main outlet. 2.) Unscrew the glass lamp cover by turning it counter-clockwise (NOTE: It may be stiff) and replace the bulb with a new one of the same type. -
Page 20: Secure The Oven To The Cabinet
Securing the Oven to the Cabinet Securing the Oven to the Cabinet 1.) Fit oven into the cabinet recess. 2.) Open the oven door. 3.) Secure the oven to the kitchen cabinet with two distance holders " A " which fit the holes in the oven frame and fit the two screws "... -
Page 21: Ventilation Openings
Ventilating Openings When cooking is finished, or in a Pause state or in Standby Mode -AND- if the oven's center temperature is over 160 de- grees, the cooling fan will continue working for 15 minutes, -OR- when the oven's center temperature becomes lower than 160 degrees, the cooling fan will stop in advance. -
Page 22: Oven Connection
Oven Connection This appliance must properly installed and grounded by a qualified technician. Ask your dealer to recommend a qualified technician or an authorized repair service. This appliance is manufactured with a green GROUND wire connected to the oven chassis. After making sure that the power has been turned off, connect the flexible conduit from the oven to the junction box using a U.L. - Page 23 Oven Connection Wire Branch Circuit Refer to Figure: • Disconnect ground from neutral at free end of conduit. • Connect the green GROUND wire from the oven to the GROUND wire in the junction box (bare or green colored wire). •...
- Page 24 Oven Connection IMPORTANT: Use twist-on connector with square-wire spring Square-wire spring From power supply Terminal Block From the oven...
-
Page 25: Oven Installation
Oven Installation 22" 23.4" 21.8" 0.78" 23.4" 3.1" 9.84" 23.6" 3.93" 24.7" min. 22" 23.8" NOTES • Only plus deviations are admissible for all dimensions. • The cabinet does not include the power switch or socket. • The number of accessories included depends on the particular appliance purchased. -
Page 26: Remove The Door From Oven
Removing the Oven Door Removable oven door allows full access to entire interior of the oven for easier and quicker maintenance. 1.) To remove the door, open the door to the maximum angle. Then Figure 1 pull the buckle at the door hinge backward. -
Page 27: Cleaning And Maintenance
Cleaning & Maintenance To keep the appliance looking good and performing well, we strongly recommend keeping the unit clean. While the mod- ern design of the appliance keeps maintenance to a mini- mum, the parts of the unit which come into contact with food must be cleaned regularly. -
Page 29: Warranty & Service
WARRANTY AND SERVICE For full warranty details on this product please visit: http://www.cosmoappliances.com/warranty TO RECEIVE WARRANTY SERVICE, YOUR PRODUCT MUST BE REGISTERED. TO REGISTER, VISIT: WWW.COSMOAPPLIANCES.COM/WARRANTY SCAN TO REGISTER... - Page 30 REQUIRED FOR WARRANTY SERVICE IMPORTANT Ne pas Réexpédier ce Produit au Magasin Pour tout problème concernant ce produit, veuillez contacter le service des consommateurs Cosmo Customer Support au +1(888) 784-3108 UNE PREUVE D’ACHAT DATEE EST REQUISE POUR BENEFICIER DE LA GARANTIE.
- Page 32 Cosmo is constantly making efforts to improve the quality and performance of our products, so we may make changes to our appliances without updating this manual. Electronic version of this manual is available at: www.cosmoappliances.com PN:16171100A30933...
Need help?
Do you have a question about the COS-C106SIX-PT and is the answer not in the manual?
Questions and answers