Table of Contents
Advertisement
Available languages
Available languages
Quick Links
Advertisement
Table of Contents

Related Manuals for EuroLite LED TMH-S90


Summary of Contents for EuroLite LED TMH-S90
- Page 2 2/36 00129592, Version 1.2...
-
Page 3: Table Of Contents
Diese Bedienungsanleitung gilt für die Artikelnummer 51786075 This user manual is valid for the article number 51786075 Das neueste Update dieser Bedienungsanleitung finden Sie im Internet unter: You can find the latest update of this user manual in the Internet under: www.eurolite.de 3/36 00129592, Version 1.2... -
Page 4: Einführung
BEDIENUNGSANLEITUNG LED TMH-S90 Moving-Head Spot GEFAHR! Elektrischer Schlag durch Kurzschluss Seien Sie besonders vorsichtig beim Umgang mit gefährlicher Netzspannung. Bei dieser Spannung können Sie einen lebensgefährlichen elektrischen Schlag erhalten. Öffnen Sie das Gerät niemals und schützen Sie es vor Feuchtigkeit und Nässe. -
Page 5: Produktmerkmale
• Dimmer • Motorischer Fokus • Lüftergekühlt • Automatische Positionskorrektur • Kompatibel zu QuickDMX - das Funk-DMX-System von Eurolite • Phantomgespeiste USB-Buchse für QuickDMX-Empfänger (Zubehör) • Control Board mit LCD und Folientastatur zur Einstellung der DMX-Startadresse, PAN-/TILT-Reverse, Programm, Reset • Netzein- und ausgang zum einfachen Zusammenschalten von bis zu 8 Geräten •... -
Page 6: Sicherheitshinweise
SICHERHEITSHINWEISE WARNUNG! Lesen Sie aufmerksam die Sicherheitshinweise und benutzen Sie das Produkt nur wie in dieser Anleitung beschrieben, damit es nicht versehentlich zu Verletzungen oder Schäden kommt. GEFAHR! Elektrischer Schlag durch hohe Spannungen Im Inneren des Geräts befinden sich Teile, die unter hoher elektrischer Spannung stehen. Trennen Sie das Gerat vollständig vom Stromnetz, bevor Sie Abdeckungen öffnen oder entfernen. - Page 7 • Die Reinigung beschränkt sich auf die Oberfläche. Dabei darf keine Feuchtigkeit in Anschlussräume oder an Netzspannung führende Teile gelangen. Wischen Sie das Produkt nur mit einem fusselfreien, angefeuchteten Tuch ab. Niemals Lösungsmittel oder scharfe Reinigungsmittel verwenden. Gefahr für Kinder und Personen mit eingeschränkter Fähigkeit •...
-
Page 8: Gerätebeschreibung
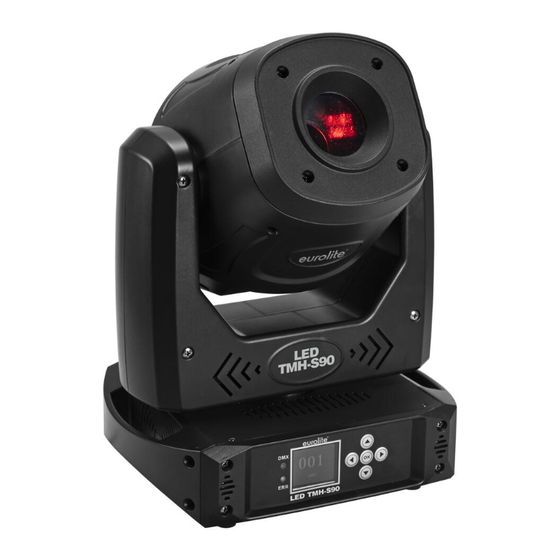
GERÄTEBESCHREIBUNG (1) Linse (2) Projektorkopf (3) Projektorarm (4) Base (5) Tragegriff (6) USB-Anschluss für QuickDMX-Empfänger (7) DMX-Kontrollanzeige (8) Fehler-Kontrollanzeige (9) LCD (10) Bedientasten (11) DMX-Eingang (12) DMX-Ausgang (13) Sicherungshalter (14) Netzausgang (15) Netzeingang (16) Gummifuß 8/36 00129592, Version 1.2... -
Page 9: Installation
INSTALLATION Einsetzen/Austauschen von Gobos LEBENSGEFAHR! Gobos nur bei ausgeschaltetem Gerät austauschen Netzstecker ziehen! Wenn Sie andere Formen und Muster als die Standard-Gobos verwenden möchten, oder Gobos ausgetauscht werden sollen, gehen Sie wie folgt vor: ACHTUNG! Niemals die Schrauben der rotierenden Gobos lösen, da ansonsten die Kugellager geöffnet werden! Entfernen Sie den Sprengring mit einem geeigneten Werkzeug. -
Page 10: Projektormontage
Projektormontage WARNUNG! Verletzungsgefahr durch Herabfallen Über Kopf installierte Geräte können beim Herabstürzen erhebliche Verletzungen verursachen! Stellen Sie sicher, dass das Gerät sicher installiert ist und nicht herunterfallen kann. Die Montage darf nur durch eine Fachkraft erfolgen, die mit den Gefahren und den einschlägigen Vorschriften hierfür vertraut ist. -
Page 11: Anschlüsse
ANSCHLÜSSE Anschluss an den DMX512-Controller / Verbindung Gerät – Gerät Achten Sie darauf, dass die Adern der Datenleitung an keiner Stelle miteinander in Kontakt treten. Die Geräte werden ansonsten nicht bzw. nicht korrekt funktionieren. Beachten Sie, dass die Startadresse abhängig vom verwendeten Controller ist. Unbedingt die Bedienungs- anleitung des verwendeten Controllers beachten. -
Page 12: Anschluss Ans Netz
EUROLITE QuickDMX USB Funksender/Empfänger drahtlos, betrieben werden. Standalone-Betrieb Das Gerät lässt sich im Standalone-Betrieb ohne Controller einsetzen. Trennen Sie dazu den LED TMH-S90 vom Controller und rufen Sie das vorprogrammierte Programm auf. Bitte beachten Sie weitere Hinweise unter Control Board. -
Page 13: Control Board
Control Board Das Control Board bietet mehrere Möglichkeiten: so lassen sich z. B. die DMX-Startadresse eingeben oder das vorprogrammierte Programm abspielen. Drücken Sie 2 x die OK-Taste, so dass sich das Display einschaltet. Durch Drücken der geeigneten Pfeil- Taste (nach unten und nach oben) können Sie sich im Modusmenü bewegen. Zur Auswahl des gewünschten Menüpunktes drücken Sie 2 x die OK-Taste. - Page 14 Address / Einstellen der DMX-Startadresse Mit dieser Funktion können Sie die gewünschte DMX-Startadresse über das Control Board einstellen. DMX-Kanäle Mit dieser Funktion lässt Sie die Anzahl der DMX-Kanäle anzeigen. Mikrofonempfindlichkeit Mit dieser Funktion lässt sich die Mikrofonempfindlichkeit zwischen 0 % und 100 % einstellen. Invert PAN / PAN-Umkehrung Mit dieser Funktion lässt sich die PAN-Bewegung umkehren.
-
Page 15: Dmx-Betrieb
Sys Info Ver / Software Version Mit dieser Funktion lässt sich die Software-Version des Gerätes auslesen. Total hours/ Betriebsstunden Gerät Mit dieser Funktion lassen sich die Gesamtbetriebsstunden des Gerätes seit dem letzten Zurücksetzen auslesen. Partial hours / Betriebsstunden Gerät seit letztem Einschalten Mit dieser Funktion lassen sich die temporären Betriebsstunden des Gerätes seit dem letzten Einschalten des Gerätes auslesen. -
Page 16: Funktionen Im Dmx-Betrieb
Funktionen im DMX-Betrieb Statisches Goborad / Farbrad / Color Wheel Rotierendes Goborad / Static Gobo Wheel Rotating Gobo Wheel Gobo 3 Grün/Green Gobo 4 Gobo 2 Gobo 3 Blau/Blue Rot/Red Gobo 1 Gobo 2 Gobo 4 Gobo 5 Gelb/Yellow Weiß/White Offen/Open Weiß/White Gobo 5... - Page 17 Statisches Goborad, Gobo-Shake Offen Gobo 1 Gobo 2 Gobo 3 Gobo 4 Gobo 5 Gobo 6 Gobo 7 Gobo 1 Shake mit zunehmender Geschwindigkeit Gobo 2 Shake mit zunehmender Geschwindigkeit Gobo 3 Shake mit zunehmender Geschwindigkeit Gobo 4 Shake mit zunehmender Geschwindigkeit Gobo 5 Shake mit zunehmender Geschwindigkeit Gobo 6 Shake mit zunehmender Geschwindigkeit Gobo 7 Shake mit zunehmender Geschwindigkeit...
-
Page 18: Reinigung Und Wartung
REINIGUNG UND WARTUNG Das Gerät sollte äußerlich in regelmäßigen Abständen von Verunreinigungen wie Staub usw. gereinigt werden. Insbesondere die Linse sollte sauber sein, damit das Licht mit maximaler Helligkeit abgestrahlt werden kann. Trennen Sie das Gerät vom Netz und lassen Sie es abkühlen, bevor Sie mit der Reinigung beginnen. Reinigen Sie die Oberflächen mit einem fusselfreien, angefeuchteten Tuch. -
Page 19: Technische Daten
6,2 kg Zubehör EUROLITE TPC-10 Klammer, silber Best.-Nr. 59006856 EUROLITE Sicherungsseil AG-15 4x1000mm bis 15kg Best.-Nr. 58010364 EUROLITE DMX Kabel XLR 3pol 5m sw Best.-Nr. 3022785K PSSO DMX Kabel XLR 3pol 5m sw Neutrik Best.-Nr. 30227812 EUROLITE Omega-Bügel 19 Best.-Nr. 51786532 ROADINGER Flightcase 2x TMH-S90 Best.-Nr. -
Page 20: Introduction
USER MANUAL LED TMH-S90 Moving Head Spot DANGER! Electric shock caused by short-circuit Be careful with your operations. With a dangerous voltage you can suffer a dangerous electric shock when touching the wires. Never open the housing. Keep the device away from rain and moisture. -
Page 21: Product Features
• Motorized focus • Fan-cooled • Automatic position correction • Supports QuickDMX - the wireless DMX system from Eurolite • Built-in phantom-powered USB port for QuickDMX receivers (accessories) • Control board with LCD and foil-keyboard for adjusting the DMX-starting address, PAN/TILT-Reverse, Program, Reset •... -
Page 22: Safety Instructions
SAFETY INSTRUCTIONS WARNING! Please read the safety warnings carefully and only use the product as described in this manual to avoid accidental injury or damage. DANGER! Electric shock caused by high voltages Within the device there are areas where high voltages may be present. Completely disconnect the device from the power supply before you open or remove covers. - Page 23 Warning – risk of burns and fire • The admissible ambient temperature range (Ta) is -5 to +45°C. Do not operate the device outside of this temperature range. • The housing temperature (Tc) can be up to 55°C during use. Avoid contact by persons and materials. •...
-
Page 24: Description Of The Device
DESCRIPTION OF THE DEVICE (1) Lens (2) Projector head (3) Yoke (4) Base (5) Transport handle (6) USB port for QuickDMX receiver (7) DMX indicator (8) Error indicator (9) LCD (10) Operating buttons (11) DMX input (12) DMX output (13) Fuseholder (14) Power out (15) Power input (16) Rubber foot... -
Page 25: Installation
INSTALLATION Inserting/Exchanging gobos DANGER! Install the gobos with the device switched off only. Unplug from mains before! If you wish to use other forms and patterns as the standard-gobos, or if gobos are to be exchanged, please follow the instructions below: CAUTION! Never unscrew the screws of the rotating gobo as the ball bearing will otherwise be opened! -
Page 26: Rigging
Rigging WARNING! Risk of injury caused by falling objects Devices in overhead installations may cause severe injuries when crashing down. Make sure that the device is installed securely and cannot fall down. The installation must be carried out by a specialist who is familiar with the hazards and the relevant regulations. (1) Safety-rope (2) Clamp (3) Omega-holders... -
Page 27: Connections
CONNECTIONS DMX512 connection / connection between fixtures The wires must not come into contact with each other; otherwise the fixtures will not work at all, or will not work properly. Please note the starting address depends upon which controller is being used. DMX512 control A DMX512 data link is required in order to control the device via DMX. -
Page 28: Connection To The Mains
EUROLITE QuickDMX USB Wireless Transmitter/Receiver. Stand-alone operation In stand-alone mode, the LED TMH-S90 can be used without controller. Disconnect the LED TMH-S90 from the controller and call up the internal program. Please refer to the instructions under Control Board. -
Page 29: Control Board
Control Board The Control Board offers several features: you can easily set the starting address or run the pre- programmed program. Press OK 2 x until the display is lit. Browse through the mode menu by pressing the arrow buttons (up and down). - Page 30 DMX channels With this function, you can display the number of the DMX channels. Mic sensitivity With this function, you can select the desired microphone sensitivity between 0 % and 100 %. Invert PAN With this function, you can reverse the PAN-movement. Invert TILT With this function, you can reverse the TILT-movement.
-
Page 31: Dmx Operation
Sys Info With this function, you can display the software version of the device. Total hours With this function, you can display the running time of the device since the last hours reset under Advance / time reset. Partial hours With this function, you can display the temporary running time of the device since the last switch-on of the device. -
Page 32: Functions In Dmx Mode
Functions in DMX mode Statisches Goborad / Farbrad / Color Wheel Rotierendes Goborad / Static Gobo Wheel Rotating Gobo Wheel Grün/Green Gobo 3 Gobo 4 Gobo 2 Gobo 3 Blau/Blue Rot/Red Gobo 1 Gobo 2 Gobo 4 Gobo 5 Gelb/Yellow Weiß/White Offen/Open Weiß/White... - Page 33 Static gobo wheel, gobo shake Open Gobo 1 Gobo 2 Gobo 3 Gobo 4 Gobo 5 Gobo 6 Gobo 7 Gobo 1 shake with increasing speed Gobo 2 shake with increasing speed Gobo 3 shake with increasing speed Gobo 4 shake with increasing speed Gobo 5 shake with increasing speed Gobo 6 shake with increasing speed Gobo 7 shake with increasing speed...
-
Page 34: Cleaning And Maintenance
CLEANING AND MAINTENANCE The outside of the device should be cleaned periodically to remove contaminants such as dust etc. The lenses, in particular, should be clean to ensure that light will be emitted at maximum brightness. Disconnect the device from power and allow it to cool before cleaning. Clean the surface with a soft lint-free and moistened cloth. -
Page 35: Technical Specifications
20.5 cm Weight: 6.2 kg Accessories EUROLITE TPC-10 Coupler, silver No. 59006856 EUROLITE Safety Bond AG-15 4x1000mm up to 15kg No. 58010364 EUROLITE DMX cable XLR 3pin 5m bk No. 3022785K PSSO DMX cable XLR 3pin 5m bk Neutrik No. 30227812 EUROLITE Omega Holder 19 No. - Page 36 Eurolite is a brand of Steinigke Showtechnic GmbH Andreas-Bauer-Str. 5 97297 Waldbüttelbrunn Germany D00127139 Version 1.2 Publ. 19/04/2022...
Need help?
Do you have a question about the LED TMH-S90 and is the answer not in the manual?
Questions and answers