Advertisement
Quick Links
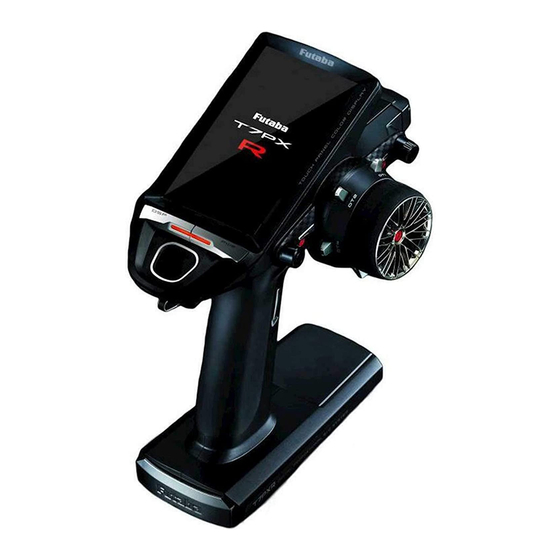
T7PXR /T7PX /T7XC Software Update Method
Whenever improvements and new functions are available, the software of your T7PXR/T7PX/T7XC radio
You can download it and make a copy on your microSD card. Below is the procedure for the software update.
Procedure for the software update
Before you update the software, the battery that is connected to the T7PXR/T7PX/T7XC should be fully
Caution:
charged.
During the software update, the model data that is stored in the T7PXR/T7PX/T7XC should be kept
Note:
without any change. (NOT erased and NOT changed.) However, for your safety, making a backup of your model
data before the software update is highly recommended.
Download the zip file of the update data
1.
from our website.
2.
3.
computer.
"FUTABA"
4.
card.
Note:
5.
folder that contained the update software
Turn on the transmitter power while
6.
update is started.
7.
"Completed" message is shown on the LCD
attached picture.)
8.
from the card slot.
Possible Problems
the software update will not be completed.
"Low battery."
recharged.
transmitter.
"Write error."
The software update procedure is stopped for an
ter when this error message appears on the LCD
microSD card
(sold separately)
1M23Z05402
-
-
-
-
-
Advertisement

Related Manuals for FUTABA T7PXR


Summary of Contents for FUTABA T7PXR
- Page 1 You can download it and make a copy on your microSD card. Below is the procedure for the software update. Procedure for the software update Before you update the software, the battery that is connected to the T7PXR/T7PX/T7XC should be fully Caution: charged.
- Page 2 V11.0 Added HPS-CB701/HPS-CD700 Added support to change the SR mode of HPS-CT702 and HPS-CD700. * UR mode is not supported. If the servo is set to UR mode, change it to normal mode or SR mode before using it. In the gear ratio chart, we have expanded the range of spur gear settings from 50-130 to 40-130.
- Page 3 V10.1 Fixed the start display Fixed a bug that the start display was disturbed on T7PX/T7XC V10.0 Extended throttle speed function. Added an alternate speed type for drag cars to the throttle speed function. Throttle speed Sudden throttle trigger operation on a slippery road only causes the wheels to spin, and the vehicle cannot accelerate smoothly.
- Page 4 tons. 1~100 Servo operation is delayed. * Throttle trigger position tons. 1~100 buttons to adjust the return speed amount. Servo operation is delayed. * Throttle trigger position A button was also added to throttle curve to quickly navigate to speed menu regardless of speed type.
- Page 5 Extended winch mixing function. It added winch mixing that can use on crawlers and others. This mixing function allows any Trim/Dial to control a winch. The Trim/Dial will only move the device forward or reverse when the button is activated or pressed acting in a momentary manner. Movement will stop when the switch is released.
- Page 6 winch. If there is no assignable The number of channels assignable channels. tons. 0~100 Mixing from the winch to throttle and throttle to winch can be set. tons. 0~100 - The mixing operation from the throttle to the winch does not tons.
- Page 7 Changed to display Enter at the end of correction in calibration. Timer In addition to the conventional [Clock] and [Total Timer], you can now select [Timer] for the time dis- played at the top of the screen. ⇒ ⇒ Timer) The voltage display at the top of the screen has been changed from 5 steps to 3 steps.
- Page 8 V9.0 Added HPS-CB701 Added support to change the SR mode of HPS-CB701. * UR mode is not supported. If the servo is set to UR mode, change it to normal mode or SR mode before using it. Other Fixed a bug in telemetry alarm function. V8.3 Added HPS-CT701 Added support to change the SR mode of HPS-CT701.
- Page 9 V8.0 The stick setting is added to the throttle mode on the T7XC. If you changed the throttle stick to ratchet type, set "stick" to [ratchet]. Menu screen The mode list ap- pears on the Throttle mode menu screen. throttle. Added support to change SR mode of HPS-CB500 and HPS-CT500.
- Page 10 V7.0 The Gyro Link is a function that allows you to set the parameters of the car gyro wirelessly from the transmitter. *A gyro compatible with the wireless setting : GYD550 (As of April 2020) - The S.BUS servo data can be set wirelessly from the transmitter via the gyro. *A receiver compatible with the wireless setting function is required.
- Page 11 Example: sounds and writing ends. Be sure to write after changing the settings. Display data list the right. * Low Middle High speeds up response. Limit Adjustment function of maximum steering angle. goes out on the right. obtained as long as the tires do not interfere with the arms.
- Page 12 Gyro data 1/2 2/2 Damper Hunting suppression response has worsened. Tail slide speed * The steering response feels fast. steering operation. junction with the operation of the Eight points of gain can be set up to the steering. endpoint based on neutral. Gyro data can be switched with the push switch or trim lever/dial of the transmitter.
- Page 13 the condition to be set. condition. Added an indicate the gyro mixing status on the home screen. Displays the current operation mode (Normal/AVCS) and the selected gyro data. The MC(ESC)-Link function is now compatible with Acuvance ESC Xarvis/XarvisXX. Home...
- Page 14 V6.0 The throttle rate functions set on the "D/R, ATL" screen. With the throttle rate function, you can adjust the amount of throttle movement so that it does not reach full power even when the throttle trigger pulls to the high side. - By assigning the throttle rate function to the switch with the switch select function, the task can be to the situation.
- Page 15 V5.0 A menu for home screen setting has been added. The display method of the meter displayed on the home screen and the display content have been changed. The steering and throttle operation can also be dis- played on the meter. Home Menu screen select.
- Page 16 V4.0 It corresponds to the Kyosho Mini-Z EVO dedicated receiver RA-42. For futher instruction, Please also read the instruction manual of RA-42. " " screen from " " or "User menu". " ". LED 2 seconds solid operation.
- Page 17 The condition function has been enhanced. * Up to 4 conditions can be used. * It is possible to name the condition. * Switching or condition can be switched by switch or trim / dial. "Condition name" group box. Up to 4 conditions can be used. condition.
- Page 18 complete. " " " " screen can also be dis- " " or the "User menu".) s c r e e n f r o m t h e " C o n d i t i o n " "Condi- tion"...
- Page 19 When the trim or the dial is operated, the value of the function is displayed for a few seconds at the top of the screen. indicated to the top of the The MC970CR has been added to the "MC (ESC) link" function of Futaba ESC parameter change. *MC970CR is available only in the Japanese market. (As of Sep 2018)
- Page 20 V2.3 *Improvement in SR mode setting* Even if a servo that is not compatible with SR mode is connected to a T7PX/T7XC with softwareV2.0 to V2.2, the transmitter can switch the servo to SR mode, but the incompatible servo will not work and the servo program is damaged when you forcibly switch the servo to SR mode.
- Page 21 V2.0 Futaba S.BUS / S.BUS 2 The "S. BUS servo" function (Instruction manual page 135) that allows you to change the servo parameters can now be set up wirelessly by connecting to the receiver. *A receiver compatible with the wireless setting function is required. (As of April 2018, R334SBS / R334SBS-E is compatible with wireless setting.
- Page 22 - Operation change in the "Acceleration" range (instruction manual page 60) within EPA setting range. - Added poll number setting and gear ratio setting on Telemetry Link setting screen of non-Futaba sensor (Castle TL 0). - Added support to change SR mode of BLS373SV.
- Page 23 V1.2 Futaba has added a function to program your Futaba R334SBS / R334SBS-E receiver from the T7PX. To update the receiver, you need a PC that can be connected to the Internet, a mini driver (to push the switch of the receiver), a micro SD card (commercial product), and a cord for CGY750 / GY701 / GY520 (optional) or DSC cord (optional).
- Page 24 Tap the "Update" button on the screen. The update will start. A progress Error If an error display appeared, reinstall the update from the beginning. - The receiver is not in the update wait state . - The cable is disconnected. - The micro SD card is not inserted in the T7PX.
Need help?
Do you have a question about the T7PXR and is the answer not in the manual?
Questions and answers