Table of Contents
Advertisement
Available languages
Available languages
Quick Links
Advertisement
Chapters
Table of Contents

Subscribe to Our Youtube Channel
Related Manuals for Elite ARC 130XP


Summary of Contents for Elite ARC 130XP
- Page 1 Keep Working Manual de usuario Por favor lea cuidadosamente este manual, contiene información importante de seguridad. SOLDADOR INVERSOR PARA ELECTRODO Y TIG LIFT ARC 6 1 3 0 7 1 6 0 7 1 7 5 X P S i 7 2 0 0 KEEP WORKiNG...
-
Page 2: Table Of Contents
6 1 3 0 X P S i 7 1 6 0 7 1 7 5 X P S i 7 2 0 0 Keep Working CONTENIDO 1. SEGURIDAD 2. DESCRIPCIÓN DEL PRODUCTO 3. ESPECIFICACIONES 4. EXPLICACIÓN DE LOS SÍMBOLOS 5. -
Page 3: Seguridad
6 1 3 0 6 1 3 0 X P S i X P S i 7 1 6 0 7 1 6 0 7 1 7 5 7 1 7 5 X P S i X P S i 7 2 0 0 7 2 0 0 Keep Working... - Page 4 6 1 3 0 6 1 3 0 X P S i X P S i 7 1 6 0 7 1 6 0 7 1 7 5 7 1 7 5 X P S i X P S i 7 2 0 0 7 2 0 0 Keep Working...
- Page 5 6 1 3 0 X P S i 7 1 6 0 7 1 7 5 X P S i 7 2 0 0 Keep Working • Retire todas las sustancias inflamables del sitio de trabajo. El fuego no puede detectarse mientras se utiliza protección para la vista al soldar.
- Page 6 6 1 3 0 X P S i 7 1 6 0 7 1 7 5 X P S i 7 2 0 0 Keep Working • Mantenga los cables de soldadura cerca el uno del otro y paralelos para disminuir la intensidad del campo magnético generado.
-
Page 7: Descripción Del Producto
El ciclo de trabajo es el porcentaje de tiempo en que la máquina de soldadura puede entregar corriente para soldar continuamente, en un periodo de 10 minutos. En las Elite XP este valor es del 55% cuando la corriente de salida está fijada en el máximo de su amperaje y la temperatura ambiente es de 40°C. -
Page 8: Especificaciones
SOLDANDO DESCANSANDO ¡Advertencia!: No exceda los ciclos de trabajo establecidos en la placa de datos incluida en la soldadora y en este instructivo. 3. ESPECIFICACIONES elite ARC 130XP elite ARC 160XP elite ARC 175XP SI6130XP SI7160XP SI7175XP Voltaje... -
Page 9: Explicación De Los Símbolos
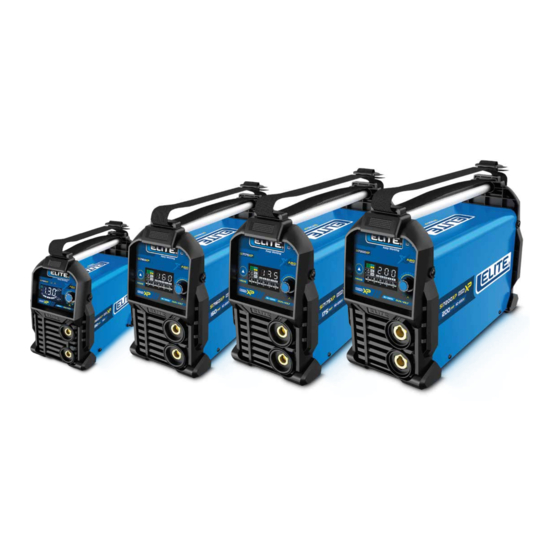
6 1 3 0 X P S i 7 1 6 0 7 1 7 5 X P S i 7 2 0 0 Keep Working elite ARC 130XP elite ARC 160XP elite ARC 175XP SI6130XP elite ARC 200XP SI7160XP SI7175XP SI7200XP 1.Pantalla LED... -
Page 10: Ficha Técnica
6 1 3 0 X P S i 7 1 6 0 7 1 7 5 X P S i 7 2 0 0 Keep Working SÍMBOLO DESCRIPCIÓN Manténgase alejado de la lluvia Esta marca indica que este producto no debe eliminarse con otros residuos domésticos en toda la UE. - Page 11 6 1 3 0 X P S i 7 1 6 0 7 1 7 5 X P S i 7 2 0 0 Keep Working KEEP WORKiNG KEEP WORKiNG...
- Page 12 6 1 3 0 X P S i 7 1 6 0 7 1 7 5 X P S i 7 2 0 0 Keep Working KEEP WORKiNG KEEP WORKiNG...
-
Page 13: Montaje Y Primer Uso
6 1 3 0 X P S i 7 1 6 0 C S v M 5 3 0 7 1 7 5 X P S i 7 2 0 0 Keep Working 6. MONTAJE Y PRIMER USO Nota: elija un porta electrodos que cumpla con EN60974-11. Obtenga un protector facial que lleve un símbolo de control de calidad y que tenga un vidrio protector que también lleve un símbolo de control de calidad, el nivel de protección debe ser 9-10. - Page 14 7 1 6 0 7 1 7 5 X P S i 7 2 0 0 Keep Working elite ARC 130XP SI6130XP 1. Pantalla LED 2. Perilla con pulsador para regular y seleccionar los diferentes estados del equipo. Simbolos pantalla LED...
- Page 15 6 1 3 0 X P S i 7 1 6 0 7 1 7 5 X P S i 7 2 0 0 Keep Working INSTRUCCIONES PARA AJUSTE DEL EQUIPO El proceso MMA esta predeterminado al encender el equipo. Presione la perilla para cambiar entre los parámetros.
- Page 16 7 2 0 0 Keep Working PROCESO TIG Para hacer uso del proceso TIG encienda el equipo y pulse la perilla 3 veces. Para ajustar la corriente gire la perilla. elite ARC 160XP elite ARC 175XP elite ARC 200XP SI7160XP SI7175XP SI7200XP 1.
- Page 17 6 1 3 0 X P S i 7 1 6 0 7 1 7 5 X P S i 7 2 0 0 Keep Working Indicador sobrecalentamiento Conectado a 110-127v Conectado a 220-230v Indicador de selección de proceso soldadura TIG DC, con tecnología Lift Arc.
- Page 18 6 1 3 0 X P S i 7 1 6 0 7 1 7 5 X P S i 7 2 0 0 Keep Working PROCESO MMA Para el proceso MMA (soldadura manual con electrodo revestido o SMAW) están disponibles 5 menús de parametrización: corriente , espesor de material base , diámetro de electrodo...
- Page 19 6 1 3 0 X P S i 7 1 6 0 7 1 7 5 X P S i 7 2 0 0 Keep Working Gire la perilla para ajustar el diámetro del electrodo a Para ajustar el diametro de electrodo pulse la perilla usar y pulse la perilla para guardar.
- Page 20 6 1 3 0 X P S i 7 1 6 0 7 1 7 5 X P S i 7 2 0 0 Keep Working Gire la perilla para ajustar el valor deseado y pulse la Para ajustar el Arc force pulse la perilla hasta que el perilla para guardar.
- Page 21 6 1 3 0 X P S i 7 1 6 0 C S v M 5 3 0 7 1 7 5 X P S i 7 2 0 0 Keep Working Gire la perilla para ajustar el ancho del material base a Para ajustar el espesor del material base pulse la perilla soldar y pulse la perilla para guardar.
- Page 22 6 1 3 0 X P S i 7 1 6 0 7 1 7 5 X P S i 7 2 0 0 Keep Working Encendido del electrodo Inserte el electrodo en el porta electrodos presionando la palanca en el porta electrodos. Colóquese la careta para soldar antes de encender el electrodo.
-
Page 23: Mantenimiento Y Solución De Problemas
6 1 3 0 X P S i 7 1 6 0 7 1 7 5 X P S i 7 2 0 0 Keep Working 8. MANTENIMIENTO Y SOLUCIÓN DE PROBLEMAS El aparato está diseñado para un uso prolongado con un mínimo de mantenimiento. El funcionamiento exitoso a largo plazo depende de los cuidados correctos del aparato y de su limpieza periódica. -
Page 24: Garantía
TIEMPOS DE GARANTÍA Si este producto Elite falla debido a un defecto de material o de fabricación dentro del plazo de un año a partir de la fecha de compra, devuélvalo a cualquier tienda de distribución autorizada Elite, Centros de Servicio Corporativo, Autorizado u otro punto de venta Elite para que sea reparado gratuitamente (o reemplazado si la reparación... - Page 25 Keep Working User manual Please read this manual carefully, contains important safety information. WELDING INVERTER MACHINE FOR MMA AND TIG LIFT ARC 6 1 3 0 7 1 6 0 7 1 7 5 X P S i 7 2 0 0 KEEP WORKiNG...
- Page 26 6 1 3 0 X P S i 7 1 6 0 7 1 7 5 X P S i 7 2 0 0 Keep Working CONTENT 1. SAFETY 2. PRODUCT DESCRIPTION 3. SPECIFICATIONS 4. EXPLANATION OF THE SYMBOLS 5. DATA PLATE 6.
- Page 27 6 1 3 0 6 1 3 0 X P S i X P S i 7 1 6 0 7 1 6 0 7 1 7 5 7 1 7 5 X P S i X P S i 7 2 0 0 7 2 0 0 Keep Working...
- Page 28 6 1 3 0 6 1 3 0 X P S i X P S i 7 1 6 0 7 1 6 0 7 1 7 5 7 1 7 5 X P S i X P S i 7 2 0 0 7 2 0 0 Keep Working...
- Page 29 6 1 3 0 X P S i 7 1 6 0 7 1 7 5 X P S i 7 2 0 0 Keep Working • Do not use the machine to thaw pipes, do not weld in sealed containers. •...
- Page 30 6 1 3 0 X P S i 7 1 6 0 7 1 7 5 X P S i 7 2 0 0 Keep Working Warning • Keep the workplace clean and tidy, disorganized and poorly lit places can cause accidents. Be prudent, before starting work consider all the requirements to carry out your work.
-
Page 31: Product Description
Duty cycle is the percentage of time that the welding machine can deliver current to weld continuously, in a period of 10 minutes. On the Elite XP this value is 55% when the output current is maximum of its amperage and maximum ambient temperature is 40 °... -
Page 32: Specifications
WELDING RESTING ¡Advertencia!: No exceda los ciclos de trabajo establecidos en la placa de datos incluida en la soldadora y en este instructivo. 3. SPECIFICATIONS elite ARC 130XP elite ARC 160XP elite ARC 175XP SI6130XP SI7160XP SI7175XP Voltage... -
Page 33: Explanation Of The Symbols
6 1 3 0 X P S i 7 1 6 0 7 1 7 5 X P S i 7 2 0 0 Keep Working elite ARC 130XP elite ARC 160XP elite ARC 175XP SI6130XP elite ARC 200XP SI7160XP SI7175XP SI7200XP 1. -
Page 34: Data Plate
6 1 3 0 X P S i 7 1 6 0 7 1 7 5 X P S i 7 2 0 0 Keep Working SÍMBOLO DESCRIPCIÓN Keep away from rain This marking indicates that this product should not be disposed with other household wastes throughout the EU. - Page 35 6 1 3 0 X P S i 7 1 6 0 7 1 7 5 X P S i 7 2 0 0 Keep Working KEEP WORKiNG KEEP WORKiNG...
- Page 36 6 1 3 0 X P S i 7 1 6 0 7 1 7 5 X P S i 7 2 0 0 Keep Working KEEP WORKiNG KEEP WORKiNG...
- Page 37 6 1 3 0 X P S i 7 1 6 0 C S v M 5 3 0 7 1 7 5 X P S i 7 2 0 0 Keep Working 6. ASSEMBLY AND FIRST-TIME USE Note: Please choose an electrode holder which conforms with EN60974-11 Obtain a face shield carrying a quality control symbol and having protective glass that also carries a quality control symbol, the protection level should be 9-10.
- Page 38 7 1 6 0 7 1 7 5 X P S i 7 2 0 0 Keep Working elite ARC 130XP SI6130XP 1. LED display 2. Knob with push button to regulate and select the different states of the equipment. LED display symbols...
- Page 39 6 1 3 0 X P S i 7 1 6 0 7 1 7 5 X P S i 7 2 0 0 Keep Working INSTRUCTIONS FOR ADJUSTING THE EQUIPMENT The MMA process is default when turning on the equipment. Press the knob to switch between parameters.
- Page 40 7 2 0 0 Keep Working TIG PROCESS To use the TIG process , turn on the equipment and press the knob 3 times. To adjust the current turn the knob. elite ARC 160XP elite ARC 175XP elite ARC 200XP SI7160XP SI7175XP SI7200XP 1.
- Page 41 6 1 3 0 X P S i 7 1 6 0 7 1 7 5 X P S i 7 2 0 0 Keep Working Overheat indicator Connected to 110-127v Connected to 220-230v TIG DC process indicator, with Lift Arc technology.
- Page 42 6 1 3 0 X P S i 7 1 6 0 7 1 7 5 X P S i 7 2 0 0 Keep Working MMA PROCESS For the MMA process (manual welding with coated electrode or SMAW) 5 parameterization menus are available: current , base material thickness , electrode diameter...
- Page 43 6 1 3 0 X P S i 7 1 6 0 7 1 7 5 X P S i 7 2 0 0 Keep Working Turn the knob to set the diameter of the electrode to be To adjust the electrode diameter, press the knob until the used and press the knob to save.
- Page 44 6 1 3 0 X P S i 7 1 6 0 7 1 7 5 X P S i 7 2 0 0 Keep Working Turn the knob to set the diameter of the electrode to be To adjust the Arc force push the knob until the icon used and press the knob to save.
- Page 45 6 1 3 0 X P S i 7 1 6 0 C S v M 5 3 0 7 1 7 5 X P S i 7 2 0 0 Keep Working Turn the knob to adjust the thickness of the material to be To adjust the thickness of the material, press the knob welded and push the knob to save.
- Page 46 6 1 3 0 X P S i 7 1 6 0 7 1 7 5 X P S i 7 2 0 0 Keep Working Igniting the electrode Insert the electrode into the electrode holder by pressing the lever on the electrode holder. Hold the welder’s shield in front of your eyes/face before igniting the electrode.
-
Page 47: Maintenance & Troubleshooting
6 1 3 0 X P S i 7 1 6 0 7 1 7 5 X P S i 7 2 0 0 Keep Working 8. MAINTENANCE & TROUBLESHOOTING The device is constructed for long service with a minimum of maintenance. Long term satisfactory operation depends on the correct care of the device and regular cleaning. -
Page 48: Warranty
WARRANTY TIMES If this Elite product fails due to a material or manufacturing defect within one year from the date of purchase, return it to any authorized Elite distribution store, Corporate Service Centers, Authorized or other Elite point of sale for It is repaired free of charge (or replaced if repair is impossible). - Page 49 Keep Working K E E P W O R K i N G...
Need help?
Do you have a question about the ARC 130XP and is the answer not in the manual?
Questions and answers