Table of Contents
Advertisement
Quick Links
Advertisement
Table of Contents

Subscribe to Our Youtube Channel
Related Manuals for ALLEN & HEATH CQ Series


Summary of Contents for ALLEN & HEATH CQ Series
- Page 1 User Guide Firmware V1.1.0 User Guide V1.1.0 Issue 1...
-
Page 2: Table Of Contents
1. Important Information .................. 7 2. Introduction ....................8 The different models ....................8 Images and examples in this guide ..............10 3. Updating Firmware ..................11 Update firmware using the CQ-MixPad app ..........11 Update firmware using a USB drive ..............12 4. - Page 3 Quick Start ....................... 24 Shows, Scenes and Libraries ................26 Processing Copy, Paste and Reset ............... 29 Processing Quick Fire ..................32 Convert a Quick Channel to a Complete Channel ........33 7. How to… ......................34 Use Gain Assistant ....................34 Use Quick Channels .....................
- Page 4 CONTROL & NETWORK / Network (WiFi) (CQ-18T, CQ_20B) ....72 9. PROCESSING ....................73 INPUTS (bank view) ....................73 INPUT / Quick Channels ..................75 INPUT / Preamp ...................... 79 INPUT / Gate ......................81 INPUT / PEQ ......................82 INPUT / Compressor ....................
- Page 5 FX Model - Echo Verb ..................104 FX Model - Space Verb ..................105 FX Model – Echo ....................106 FX Model - Tap Delay ..................107 FX Model - Stereo Delay .................. 108 FX Model - Beat Delay ..................110 FX Model - Double Tracker ................
- Page 6 Default Network Settings .................. 131 14. System Block Diagram ................132 15. Specifications ..................133 16. Warranty Information ................136 User Guide V1.1.0 Issue 1...
-
Page 7: Important Information
1. Important Information Safety Before powering on the CQ, read the safety instructions sheet (004-1511-01 or 004-1512-01) supplied with the unit. For your own safety and that of the operator, technical crew and performers, follow all instructions and heed all warnings included in these documents and those printed directly on the equipment. -
Page 8: Introduction
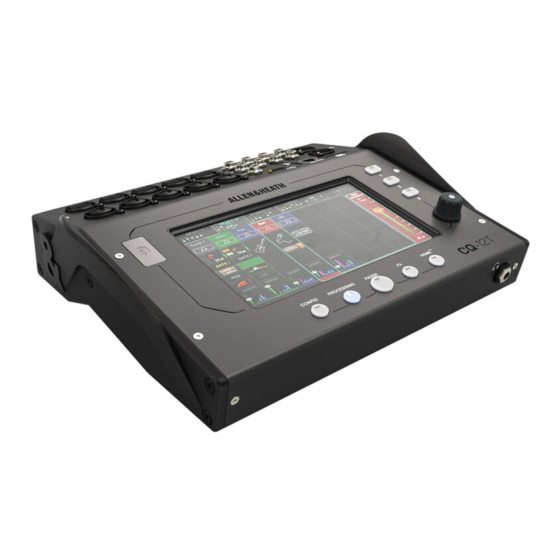
2. Introduction Welcome to the CQ User Guide. CQ is a range of portable, standalone digital audio mixers which use 96kHz processing and include assistants and tools designed to be used by technical and non-technical users alike. There are 3 models in the range, two with hands-on control, and all of which can be controlled remotely. - Page 9 CQ-18T Hardware Overview CQ-12T Hardware Overview User Guide V1.1.0 Issue 1...
-
Page 10: Images And Examples In This Guide
CQ-20B Hardware Overview Images and examples in this guide This guide uses screenshots from the CQ-18T, which includes all the features of the CQ-12T and more. CQ-MixPad, used to control all models, has an almost identical user interface with a few layout differences (listed in the CQ-MixPad section of this guide) and so is not... -
Page 11: Updating Firmware
3. Updating Firmware There are two methods for updating CQ firmware, either with the CQ-MixPad app (available for iOS, Android, Mac and Windows) or by using a USB drive connected to the USB-A port. Updating firmware (from V1.1.0 onward) will not clear or delete data, but it is best practice to store a show before carrying out an update if possible. -
Page 12: Update Firmware Using A Usb Drive
Update firmware using a USB drive Insert a new or FAT formatted USB drive into the CQ’s USB-A port. 2. Press the HOME screen key and select SYSTEM then the USB/SD tab (with USB and SDHC symbols). 3. Press the Format button in the USB Status section on the left and follow the on-screen instructions to format the drive, this will clear all data and set up any necessary folder structure for use with CQ. -
Page 13: Connections
4. Connections Power CQ-12T, CQ-18T 12VDC, 5A, centre positive connection and clip. Use supplied external switching power supply with IEC connection to mains. CQ-20B IEC connection with internal switch mode power supply. 1. Mic/Line Inputs Mono Inputs 1-5 (CQ-12T) and 1-8 (CQ-18T, CQ-20B) Balanced XLR (1-Ground, 2-Hot/Positive, 3-Cold/Negative), recallable preamp with +60dB gain and phantom power. -
Page 14: Outputs
2. Outputs Main LR Balanced XLR (1-Ground, 2-Hot/Positive, 3-Cold/Negative) Nominal +4dBu output (when output meter displays 0dB) Out 1-6 (CQ-12T, CQ-18T) Balanced ¼” TRS Jack (Tip-Hot/Positive, Ring-Cold/Negative, Sleeve-Ground) Nominal +4dBu output (when output meter displays 0dB) Out 1-6 (CQ-20B) Balanced XLR (Pin1-Ground, Pin2-Hot/Positive, Pin3- Cold/Negative) Nominal +4dBu output (when output meter displays 0dB) Headphone/s... -
Page 15: Usb And Sd
4. USB and SD USB-A (CQ as host, for audio and data storage and recall) USB-B (CQ as client, for audio only). Conforms to USB 2.0 standard. Class compliant USB- B interface. Full size SD card slot. Use SDHC, Up to 32GB, UHS-I, Class 10. -
Page 16: Connecting Control Apps
5. Connecting control apps The CQ-MixPad app provides full remote control of the CQ over a network connection from an iOS, Android, macOS or Windows device. CQ4You is an easy-to-use personal monitoring app, which also works over a network, and controls the send levels to one of the outputs. Up to 2 instances of CQ-MixPad can be connected to a CQ at once, along with up to 6 instances of CQ4You (one for every output). -
Page 17: Connect Using Wifi Access Point (Cq-18T, Cq-20B)
Connect using WiFi Access Point (CQ-18T, CQ-20B) Navigate to CONFIG / CONTROL & NETWORK / Network If there is already a connection to the CQ-20B, otherwise follow First connection to a CQ-20B. 2) Switch Enabled Network to WiFi Access Point 3) Setup the network. -
Page 18: Connect Using An External Router Or Network
Connect using an external router or network Connect the CQ to the external router or network as a client, using a network cable connected to the network port. Follow instructions on any router or access point as if the CQ were a computer (e.g. connect to a LAN port). -
Page 19: Operation And Workflow
6. Operation and Workflow Physical Controls (CQ-12T, CQ-18T) Screen keys 5x Keys for navigation between the main CONFIG, PROCESSING, FADER, FX and HOME screens. • Screens have persistence, other than for channel selection, which is followed across CONFIG, PROCESSING and FADER screens. •... -
Page 20: Cq-Mixpad
CQ-MixPad The CQ-MixPad app has been designed to have an almost identical interface to the touchscreen on the CQ-12T and CQ-18T. CQ Touchscreen (Processing bank view) CQ-MixPad (Processing bank view) User Guide V1.1.0 Issue 1... - Page 21 Differences Main screen keys: Physical keys on hardware Vs Main tabs at the top of CQ-MixPad 2. Soft Keys: Physical keys on hardware Vs buttons on CQ-MixPad 3. Location of channel bank tabs: At the top of a CQ touchscreen Vs At the bottom left of CQ-MixPad 4.
-
Page 22: Cq4You
Adjustment of processing parameters in CQ-MixPad Touch or click and drag left and right on complete channel processing parameters to adjust. Keep the control selected (keep finger on the screen or click and hold) and move up or down away from the parameter for finer adjustments when moving left or right. The farther from the parameter, the finer the adjustment. -
Page 23: Workflow And Main Screens Overview
Workflow and main screens overview The CQ UI has been designed for fast operation during mixing and with a logical layout for setup. Common mixing functions appear in the middle 3 screens, with the idea that the user ‘works in’ from the HOME and CONFIG screens during setup, and then switches between PROCESSING, FADER and FX screens when mixing. -
Page 24: Quick Start
Quick Start The Quick Start button (in the first HOME screen tab) opens a list of factory templates for use as the starting point for some typical mixer applications. Recalling a Quick Start template will set all CONFIG, PROCESSING and FX screen parameters, including input and output channel linking, naming and colour along with all processing and FX units. - Page 25 Important things to be aware of when using Quick Start: • The current state of the CQ will be overwritten, so it’s good practice to store a Scene before recalling a Quick Start template. • Unlike a Scene, Quick Start can change stereo linking of inputs and outputs and EQ Type.
-
Page 26: Shows, Scenes And Libraries
Shows, Scenes and Libraries Shows The CQ has one ‘Show’ running on it at any time. A Show includes the current state of the mixer, the current mixer config, mixer preferences, up to 100 Scenes and up to 128 Library items. Shows are used for different setups and applications and therefore recall more settings than a Scene, including stereo linking of channels, Output EQ Type and brightness settings for screens or LED’s. - Page 27 Stored in the CQ • 1 Show • Network settings • Unit name • Factory Libraries Stored in each Show • 100 Scenes • 128 User Libraries • Input/Output Stereo Linking • USB source and sample rate • Surface brightness preferences •...
- Page 28 Available Libraries All Libraries are displayed as a pop-up, accessed using the Library button in the screen listed in brackets here. Libraries affect the selected channel or processing being viewed. Whole Input Channel (CONFIG / INPUTS) Includes: Input name/colour, preamp/trim settings, Quick Channel or Complete Channel (HPF, Gate, PEQ, Compressor) Input Channel Processing (PROCESSING / INPUTS (bank view)) Includes: Quick Channel, Complete Channel (HPF, Gate, PEQ, Compressor)
-
Page 29: Processing Copy, Paste And Reset
Processing Copy, Paste and Reset Copy Open the dropdown menu from the top right-hand corner and select Copy to see the available processing to Copy. Copying can be carried out in the bank view (as shown), but also when viewing individual processing. - Page 30 Paste Open the dropdown menu from the top right-hand corner (if not already open from copying) and select Paste to see the available places any copied processing can be pasted Touch any of the options to paste the processing. Any processing block or channel where processing has been pasted will be indicated with a lighter blue.
- Page 31 Reset Open the dropdown menu from the top right-hand corner and select Reset to see the available reset options. Touch any of these options to reset processing to default values. Resets can be carried out in the bank view (as shown), but also when viewing individual processing.
-
Page 32: Processing Quick Fire
Processing Quick Fire Open the dropdown menu from the top right-hand corner when in a bank view and select Quick Fire to view an overlay which allows processing to be quickly switched in or out across all visible complete channels. Quick Fire also allows channels to be muted from within the PROCESSING screen. -
Page 33: Convert A Quick Channel To A Complete Channel
Convert a Quick Channel to a Complete Channel Any Quick Channel can be converted to a Complete Channel at any time without any change to the audio. This allows Quick Channels to be used for a fast setup, but which can then be switched to Complete Channels for control of individual parameters if desired. -
Page 34: How To
7. How to… Use Gain Assistant Gain Assistant can be used on any input channel which has a preamp, when the Input Source is set to Analogue. Connect a source (e.g. Microphone) to input socket 1- 10 (CQ-12T) or 1-16 (CQ-18T, CQ-20B). Go to CONFIG / INPUTS and select that input socket. - Page 35 Gain Assistant will automatically raise the Gain and set the optimum input level. Once the Auto Set function is complete, the Auto Gain feature will be enabled. The input is now ready for processing and recording or adding to a mix. ...
-
Page 36: Use Quick Channels
Use Quick Channels Quick Channels are instrument or source-centric whole channel presets which allow the user to mix quickly by adjusting multiple parameters with just a few controls. They are useful for non-technical users who don’t want to get lost in menus and parameter values, but also for more technical users who need to work fast but may want to make more in-depth adjustments later. - Page 37 Switch to Factory to show the built-in factory options. Choose and recall a Quick Channel according to the type of instrument/source being used. Each of the Factory options is a different Quick Channel and most include several variants when recalled too. In the PROCESSING screen, view the Quick Channel controls by selecting the channel and then touching or clicking on the Quick Channel icon.
-
Page 38: Send Signal From Inputs To The Main Output
Send signal from Inputs to the Main Output Prior to sending signal anywhere, preamp gain or trim should be set correctly for the input source. Follow the How to Use Gain Assistant section for best results. This ensures optimum signal level coming into the channel for processing, but more importantly when thinking about sending (routing) signals, changing the preamp gain or trim also affects the level of signal being sent to any outputs. - Page 39 Send multiple inputs to one output using the FADER screen Go to the FADER screen and check that the fader on the right-hand side is labelled ‘Main LR’. If not, use the Sends to button to show all available ‘Send to’...
-
Page 40: Send Signal From Inputs To Outputs 1-6
Send signal from Inputs to Outputs 1-6 Prior to sending signal anywhere, preamp gain or trim should be set correctly for the input source. Follow the How to Use Gain Assistant section for best results. This ensures optimum signal level coming into the channel for processing, but more importantly when thinking about sending (routing) signals, changing the preamp gain or trim also affects the level of signal being sent to any outputs. - Page 41 Send multiple inputs to one Output using the FADER screen Go to the FADER screen and use the Sends to button, above the fader on the right-hand side, to select an output to send signal to. Use the tabs at the top of the screen to navigate between banks of Inputs.
-
Page 42: Use The Feedback Assistant
Use the Feedback Assistant The Feedback Assistant (FBA) detects the prominent and persistent frequencies caused by feedback, and then adds narrow filters to the output to reduce the levels of those frequencies whilst changing the overall sound as little as possible. It can be used in any situation where the input source can ‘hear’... - Page 43 Go to CONFIG / OUTPUTS and select the Output socket where Feedback Assistant (FBA) is needed. Settings will appear in the bottom half of the screen. Set EQ Type to PEQ & FBA if it is not already. Go to PROCESSING / OUTPUTS. Select the Output channel, then select the channel’s FBA to show details and controls.
- Page 44 Gently raise the Output level fader to the right of the graph and controls. As the output level increases, feedback will occur and the FBA will be able to detect it and add fixed filters. Raise the fader to a higher level that it will be used at during the show or event to generate and detect as much potential feedback as possible and allow for changes to the mix (e.g.
- Page 45 Detect and add Live filters to an Output during a show or event Follow the previous How To guide to add Fixed filters during setup whenever possible. This gives the best starting point for the FBA. Go to CONFIG / OUTPUTS and select the Output socket where Feedback Assistant (FBA) is needed.
- Page 46 Disable HOLD to start detecting feedback frequencies; Enable HOLD to pause detection at any time Enable the RTA (Real Time Analyser) to show the frequency content of the selected Output on the graph. Repeat for any other outputs as required. ...
-
Page 47: Add And Use Fx
Add and use FX There are two ways to use each FX Unit, Shared or Inserted. When in Shared Mode, the FX Unit processes signal from multiple channels at the same time. The ‘wet’ processed signal can then be sent, at different levels, to outputs and be heard alongside the ‘dry’... - Page 48 Switch to the SENDS TO tab at the top to display all channel sends to the selected FX Unit. Select and adjust individual send levels to the FX Unit from each channel. Note that these send levels are the same as can be viewed on each channel from the PROCESSING / SENDS screen.
- Page 49 Using an FX Unit in Inserted Mode Go to the FX screen and select one of the FX Units on the left-hand side. To choose a different FX type, use the Library button at the right top corner of the screen, select an FX type or stored preset then recall it.
-
Page 50: Send Audio To And From A Daw
Send Audio to and from a DAW CQ can send and receive multichannel audio with a built-in audio interface that connects to a computer or device via USB-B. The maximum number of channels that can be sent and received are: CQ-12T: 16×16 (48/96kHz) CQ-18T: 24×22 (48/96kHz) CQ-20B: 24×24 (48/96kHz) - Page 51 Select the Sample Rate. This should match the Sample Rate of the DAW session. Select Multitrack for Stream Mode to send and receive all channels individually. Assign outputs to the final pairs of channels as required. These can be stereo inputs, FX or outputs.
- Page 52 Send Audio from a DAW to the CQ: Connect the CQ to the computer or device using a standard USB-B cable. Go to CONFIG / Digital Audio (Symbols) / USB/SD to set up the connection. Select the Sample Rate. This should match the Sample Rate of the DAW session.
-
Page 53: Record/Playback Multitrack Using An Sd Card
Record/Playback Multitrack using an SD Card For best results use UHS-I, Class 10 SD card storage. Other cards will work, though the maximum number of tracks that can be recorded may reduce, or more errors may occur. The maximum recording time is based on the FAT32 file system used, which allows for mono WAV recordings (one for each track) of around 8hrs (@48kHz) or 4hrs (@96kHz). - Page 54 To record Multitrack on an SD Card Go to CONFIG / USB/SD/BLUETOOTH / USB/SD to check and adjust settings. Select a point in the signal path of an Input channel to record from using Source Point Select the Sample Rate. 48kHz allows for longer recording time and more channels to be recorded at a lower quality.
- Page 55 To Playback Multitrack from an SD Card Go to CONFIG / Digital Audio (Symbols) / USB/SD to set up the connection. Select the Sample Rate. This should match the Sample Rate of recording. On the CQ, go to CONFIG / INPUTS and select the channels to use for playback.
-
Page 56: Store And Recall Settings
Store and Recall settings The CQ has 1 Show on it at any time. Up to 100 Scenes can be stored within each Show along with up to 128 Library items. Using these three separate data types, it’s possible to store and recall anything from the settings of a PEQ on a single channel, to the entire setup of the CQ. - Page 57 Store Processing Parameters Using Libraries Go to PROCESSING, locate the bank of faders from the top of the screen containing the channel with processing to be stored. Select the channel, then stay in bank view to store a whole channel or select a processing block (e.g. PEQ) to view in detail and store only that part of the processing.
- Page 58 Recall Processing Parameters Using Libraries Go to PROCESSING, locate the bank of faders from the top of the screen containing the channel where the processing will be recalled to. Select the channel, then stay in bank view to recall processing for a whole channel or select a processing block (e.g.
- Page 59 Store/Recall show files Show files can only be stored and recalled from/to a connected USB-A storage device which has been formatted correctly using the HOME / SYSTEM / USB/SD (Symbols) screen. Connect a USB Drive to the USB-A port of the unit.
-
Page 60: Config
8. CONFIG INPUTS Input sockets are shown at the top of the screen, matching the hardware layout. Each includes a Chromatic Meter to show input signal. Touch a socket to select it and display settings for that input/channel at the bottom. - Page 61 Library – Opens the channel library to store or recall all channel settings, including Name, Colour, Preamp and Processing. Quick and Complete libraries are available. Name/Colour – Change the name and colour for the selected channel. Gain Assistant –Touch Auto Set and generate noise in the microphone or with the connected instrument/device to automatically set preamp gain based on the level of signal received at the input.
-
Page 62: Outputs
OUTPUTS Output sockets are shown at the top of the screen, matching the hardware layout. Touch a socket to select it and display settings for that output/channel at the bottom. Stereo Link (Out 1-6 only) – Use odd/even pairs of outputs as a single stereo channel (odd=left, even=right). - Page 63 Input Send Levels (Out 1-6 only) – Select whether send levels from the inputs are Pre Fader (independent of send levels to the Main LR output) or Post Fader (they ‘follow’ and are relative to the send levels of inputs to the Main LR output). Follow Main LR Pan (Out 1-6 only) –...
-
Page 64: Digital Audio (Symbols) / Usb/Sd
Digital Audio (Symbols) / USB/SD Source Point – Choose whether the signal being sent to USB/SD from input channels includes no input channel processing, some processing, or all processing. Sample Rate – Select between 48kHz or 96kHz. This affects USB-A recording, the USB-B connection to a computer and SD recording. - Page 65 Channel Assignment – Mono input channels are permanently assigned to USB/SD outputs. In addition to these, the CQ-12T has 3 assignable stereo outputs and the CQ-18T and CQ-20B each have 4 assignable stereo outputs. These allow recording and playback of stereo line inputs, FX units, Main LR output or outputs 1-6. The last stereo pair is set to Main LR by default and as well as being sent to multitrack outputs, is used for stereo recording to USB-A or when the USB-B Stream Mode is set to Stereo.
-
Page 66: Digital Audio (Symbols) / Bluetooth
Digital Audio (Symbols) / Bluetooth On/Off – Turn Bluetooth on or off. Discoverable – Allow the CQ unit to be seen by other Bluetooth devices. Activate this then add the CQ as a Bluetooth device to a phone, tablet, or computer. Forget Device –... -
Page 67: Amm (Auto Mic Mixer)
AMM (Auto Mic Mixer) CQ’s Automatic Microphone Mixer uses a gain sharing algorithm, designed for use in multi-microphone speech applications like conferences, meetings, broadcasting and podcasts. It can be used on every mono input channel of the CQ with two banks shown at the top of the page. -
Page 68: Control & Network / Footswitch
CONTROL & NETWORK / Footswitch A single footswitch using a TS (Tip, Sleeve) connection or a dual footswitch using a TRS (Tip, Ring, Sleeve) connection can be used with CQ. Each switch can be set for independently for Latching, Momentary or Soft Latch (momentary acting as latching) operation. -
Page 69: Control & Network / Soft Rotaries (Cq-18T)
CONTROL & NETWORK / Soft Rotaries (CQ-18T) Each Soft Rotary can be selected individually. Smart Rotaries – When turned on, rotaries are automatically mapped to controls depending on the screen being viewed. For example, in the input channel bank view, they will control Gain, Pan and Level, then when viewing a PEQ, they will control Width, Frequency and Gain of the last adjusted band. -
Page 70: Control & Network / Soft Keys
CONTROL & NETWORK / Soft Keys Each Soft Key can be selected individually. Function - Assign a function to the selected Soft Key. Once the function is selected, further options will appear e.g. for channel selection. Options include: • AMM and Processing In/Out controls, Listen, Mute and Centre Panning for specific channels or the currently selected channel •... -
Page 71: Control & Network / Network (Ethernet)
CONTROL & NETWORK / Network (Ethernet) Enabled Network – Select Ethernet for wired connection through the Network port. Select Wi-Fi Access Point for wireless connection using the integrated access point of the unit (CQ-18T, CQ-20B). IP Mode – It is recommended that IP Mode is left set to Automatic, to allow address assignment via DHCP when possible. -
Page 72: Control & Network / Network (Wifi) (Cq-18T, Cq_20B)
CONTROL & NETWORK / Network (WiFi) (CQ-18T, CQ_20B) Enabled Network – Select Ethernet for wired connection through the Network port. Select Wi-Fi Access Point for wireless connection using the integrated access point of the unit (CQ-18T, CQ-20B). Security – Select between an open access point or a WPA2 password protected network. -
Page 73: Processing
9. PROCESSING INPUTS (bank view) The bank view displays one of four banks at a time, each showing up to eight input, FX or output channels. Switch between banks using the tabs with mini faders and meters at the top (when using a CQ-12T or CQ-18T touchscreen) or bottom left (when using the CQ-MixPad app). - Page 74 Quick Channel and Complete Channel differences A Quick Channel shows the Quick Channel icon for the Quick Channel being used. A Complete Channel is shown as separate processing ‘blocks’ with signal path running from top to bottom, so for example, the signal will pass through the gate before going through the PEQ.
-
Page 75: Input / Quick Channels
INPUT / Quick Channels CQ includes Quick Channels for a variety of common audio sources which provide a quick and easy way to adjust multiple channel processing parameters with a few controls. This enables the mix to be put together much faster than with conventional controls and if more control is required, Quick Channels can be converted to Complete Channels at any time. - Page 76 Drums/Percussion Quick Channel Example A ‘one knob’ Quick Channel has instrument or source types on the left-hand side. Select one of the options on the left, then touch the large main dial and use the touchscreen rotary (CQ-12T, CQ-18T) or touch and drag (CQ-MixPad) to adjust to taste.
- Page 77 Bass Quick Channel Example A ‘three knob’ Quick Channel has styles or types on a selection dial. Select one of the options on the dial by selecting and turning it, or by touching directly on the desired option. Use the three controls at the bottom right to make adjustments. ...
- Page 78 EasyEQ Quick Channel Example The EasyEQ is a unique Quick Channel which is in fact a model of the MusiQ found in the Allen & Heath ZED range of analogue mixers, with the added benefit of a compressor. Low – Cut or boost Low frequencies. Mid –...
-
Page 79: Input / Preamp
INPUT / Preamp Input Source – Select Analogue to source the channel from the analogue sockets or select USB/SD to source from USB drive and SD card. The current source for this input channel is displayed below. When playing back from SD the source will be SD, otherwise it will be USB-B. Gain Assistant –... - Page 80 Invert Polarity – Invert the polarity of the signal. Often used where multiple microphones are used on the same source (e.g. snare top and snare bottom) Gain – Adjust the gain manually for the incoming signal. Trim – Digital level adjustment, available on stereo line inputs and when an input source is set to digital (USB/SD).
-
Page 81: Input / Gate
INPUT / Gate A Gate allows wanted signal through and attenuates unwanted signal. It has many uses including removal of hum from an idle instrument or avoiding hearing the snare drum through a tom microphone when only the snare is being played. Attack –... -
Page 82: Input / Peq
INPUT / PEQ The 4-band Parametric Equaliser enables adjustments to the tone of the signal by cutting or boosting around different frequencies. Type – LF and HF bands include options for Shelf, Bell or HPF/LPF. Width – Adjust the amount that frequencies around the centre frequency are affected. -
Page 83: Input / Compressor
INPUT / Compressor A Compressor is used to control and reduce the dynamic range of the signal. RMS/Peak – Compression is either triggered by RMS (short average) or Peak (instant) signal level. Hard/Soft Knee – With a hard knee, compression begins to take effect only when the threshold is reached. - Page 84 Ratio – The ratio of the incoming signal to compressed signal when compression is active. E.g. when set to 3:1 and when compressing, every 3dB increase in level at the input will result in only a 1dB increase of level at the output. Threshold –...
-
Page 85: Input / Sends
INPUT / Sends The SENDS section shows all send levels from an input or FX channel to all possible destinations. Input to Main LR / Pan – Adjust the send level and stereo position of the selected channel to Main LR. This is also the fader shown in the bank tabs at the top of the PROCESSING and FADER screens, in bank view with the channel selected, and in the FADER screen when Sends to is set to Main LR. -
Page 86: St. Inputs / Fx (Bank View)
ST. INPUTS / FX (bank view) This bank includes three (CQ-12T, CQ-18T) or four (CQ-20B) stereo inputs. These are dedicated stereo channels for • Stereo line level inputs • Stereo USB channel, which can be used as a return from a DAW or for playback of stereo audio from USB storage •... -
Page 87: Outputs (Bank View)
OUTPUTS (bank view) The Outputs bank includes the six Outputs and Main LR processing channels. Output processing is slightly different to input processing and also depends on the EQ Type set per output in the CONFIG / OUTPUTS screen. As with Input processing, signal flow runs from top to bottom and touching any output will select it and show its main fader (Output level) on the right-hand side. -
Page 88: Output / Geq
OUTPUT / GEQ A GEQ is used to cut or boost specific frequencies in the signal. Fader – Touch and drag or select a band and use the touchscreen rotary (CQ-12T, CQ-18T) to cut or boost by up to 12dB. RTA –... -
Page 89: Output / Peq
OUTPUT / PEQ The 4-band Parametric Equaliser enables adjustments to the tone of the signal by cutting or boosting around different frequencies. Type – LF and HF bands include options for Shelf, Bell or HPF/LPF. Width – Adjust the amount that frequencies around the centre frequency are affected. -
Page 90: Output / Fba
OUTPUT / FBA Detect The Feedback Assistant detects feedback and applies narrow filters to prevent it. Detect – Disable the ‘HOLD’ box to start detecting feedback frequencies; Enable the ‘HOLD’ box to pause feedback frequency detection. Mode – Select whether the next filter to be added (when feedback is detected) will be in Fixed or Live mode. - Page 91 Adjust Each box on the left represents one of the 16 total filters. Blue – Fixed mode filters. Green – Live mode filters. Orange – Currently selected filter. Touch a box or a point on the graph to select a filter for adjustment. Adjust Filter –...
- Page 92 Filter Modes Fixed filters remain in place until they are manually deleted, the FBA is completely reset, or if the Feedback Assistant ‘steals’ them. Up to 12 of the 16 filters can be in Fixed mode, always leaving 4 for use in Live mode. Live filters recover over time and once fully recovered, will switch back to being unused filters.
-
Page 93: Output / Compressor
OUTPUT / Compressor A Compressor is used to control and reduce the dynamic range of the signal. RMS/Peak – Compression is either triggered by RMS (short average) or Peak (instant) signal level. Hard/Soft Knee – With a hard knee, compression begins to take effect only when the threshold is reached. - Page 94 Ratio – The ratio of the incoming signal to compressed signal when compression is active. E.g. when set to 3:1 and when compressing, every 3dB increase in level at the input will result in only a 1dB increase of level at the output. Threshold –...
-
Page 95: Output / Level And Limiter
OUTPUT / LEVEL and LIMITER A Limiter works like a very fast compressor with an infinite:1 compression ratio and limits the output level to whatever is set by the threshold. In CQ, the limiter is applied post fader, meaning that it can be set for use on an output for monitoring and prevent the output signal rising above a set level, even if the output level fader is adjusted by a musician using CQ4You for example. -
Page 96: Fader
10. FADER Sends to Main LR The Fader screen displays up to eight channels at a time. Use the mini fader tabs at the top (touchscreen) or bottom left (CQ-MixPad) to switch between the 4 banks of channels. Use the Faders Only button at the top right to either show channel Listen, Pan and Mute controls, or longer faders with no controls. -
Page 97: Sends To An Output
Sends to an Output Touch Sends to and select an output to show all send levels to that output on the fader for each input and FX channel. With an Output other than Main LR selected, the fader background is coloured blue to indicate that fader positions are showing the ‘Sends to’... -
Page 98: Sends To Fx
Sends to FX Touch Sends to and select an FX to show all send levels to that FX unit on the fader for each input and FX channel. When Sends to an FX are selected, the fader background is coloured purple to indicate that fader positions are showing the ‘Sends to’... -
Page 99: Control (Shared)
11. FX CONTROL (Shared) Select an FX unit from the left-hand side to adjust. FX model controls are shown in the main section of the screen. Library – Use the Library button in the top right to recall different FX models into the selected FX Unit, or to store/recall user presets. - Page 100 Below the FX model controls are the FX Unit controls which are independent of the FX model being used. FX Unit Mode – ‘Shared’ allows multiple channels to send signal to the FX Unit simultaneously, and for the output of the FX Unit to be sent to Main LR, Outputs or other FX Units at different levels using either the PROCESSING / SENDS screen, or the FADER screen.
-
Page 101: Sends To (Shared Fx Units Only)
SENDS TO (Shared FX Units only) When FX units are in Shared mode, use the SENDS TO tab to view and adjust channel send levels to the selected FX unit. These send levels are the same as can be found on each channel individually in the PROCESSING / SENDS screen and can also be controlled using faders when this FX Unit is selected using ‘Sends to’... -
Page 102: Control (Inserted)
CONTROL (Inserted) FX Unit Mode – ‘Shared’ allows multiple channels to send signal to the FX Unit simultaneously, and for the output of the FX Unit to be sent to Main LR, Outputs or other FX Units at different levels from either the PROCESSING / SENDS screen, or in the FADER screen. -
Page 103: Fx Model - Easy Verb
FX Model - Easy Verb Easy Verb is an instrument/source-centric reverb model. Type – Select the instrument or source the reverb is being used with. Reverb Size – Adjust the overall size of the reverb. FX ASSIST – FX Assist looks at the signal passing through the FX Unit and then makes dynamic adjustments to enhance or improve the sound of the FX. -
Page 104: Fx Model - Echo Verb
FX Model - Echo Verb Echo Verb is a 3-in-1 FX model which includes an echo, a reverb, and a tap delay. Echo Level – Adjust the level of the echo effect. Echo Time – Adjust how quickly the echo occurs. Size –... -
Page 105: Fx Model - Space Verb
FX Model - Space Verb Space Verb includes various reverberant spaces and classic plate reverbs, it’s designed to help unify a mix by putting multiple inputs into the same virtual space. Space – Select an environment or studio reverb type. Decay Time –... -
Page 106: Fx Model - Echo
FX Model – Echo Echo is a simple to use delay unit with a natural tone. Repeat Rate – Adjust the speed of the repeats. Intensity – Adjust the level of the repeats feeding back into the echo. Treble – Cut or boost the level of higher frequencies. Bass –... -
Page 107: Fx Model - Tap Delay
FX Model - Tap Delay Tap Delay is a single delay which allows the speed of the repeats can be set using taps on screen or using a Soft Key. Tap Delay Time – Tap multiple times on the ms value box to set delay time or select and adjust with the touchscreen rotary (CQ-12T, CQ-18T) or touch and drag (CQ-MixPad). -
Page 108: Fx Model - Stereo Delay
FX Model - Stereo Delay Stereo Delay includes two tap delays (left and right) where the speed of repeats can be set independently for each. Width – Adjust from centre (both delays are heard in the centre) to full width (left is only heard in the left output and right is only heard in the right output). - Page 109 HF Damping – Adjust the amount of damping on the high frequencies for either a more digital or more analogue sounding delay. FX ASSIST - FX Assist looks at the signal passing through the FX Unit and then makes dynamic adjustments to enhance or improve the sound of the FX. One option can be selected at any time, or touch/click the selected option to turn FX Assist Off.
-
Page 110: Fx Model - Beat Delay
FX Model - Beat Delay Beat Delay includes two delays (left and right) where the speed of the repeats is set as a musical division or note value of a BPM value. Width – Adjust from centre (both delays are heard in the centre) to full width (left is only heard in the left output and right is only heard in the right output). - Page 111 HF Damping – Adjust the amount of damping on the high frequencies for either a more digital or more analogue sounding delay. FX ASSIST - FX Assist looks at the signal passing through the FX Unit and then makes dynamic adjustments to enhance or improve the sound of the FX. One option can be selected at any time, or touch/click the selected option to turn FX Assist Off.
-
Page 112: Fx Model - Double Tracker
FX Model - Double Tracker The Double Tracker recreates the classic studio effect of recording (or ‘tracking’) the same source multiple times, where slight differences in each recording result in a bigger, thicker sound. Delay – Adjust the amount of delay between virtual take. Thickness –... -
Page 113: Fx Model - Chorus
FX Model – Chorus Chorus layers the sound to create an effect similar to a choir or multiple instruments playing the same thing. Rate – Adjust the modulation speed. Shape – Select whether modulation is a complete sinusoidal wave or a sinusoidal half-wave. -
Page 114: Fx Model - Flanger
FX Model – Flanger A Flanger folds the signal back on itself and uses a very fast modulated delay to create a shifting metallic effect. Speed – Adjust speed of the modulation. Depth – Adjust the amount of modulation. Width – Select the stereo spread of the effect. ... -
Page 115: Fx Model - Phaser
FX Model – Phaser The Phaser combines the original signal and a copy of the signal with phase shifting applied at different frequencies. This causes some frequencies to cancel out at the same time as others are reinforced. Rate – Adjust the speed of the frequency sweep. Tone –... -
Page 116: Home
12. HOME Home (Symbol) Quick Start – Recall mixer configuration and channel processing for different applications. See the Quick Start section for more information. Headphone Control (symbol) – Adjust headphone output level. Set the headphone output source in the CONFIG / OUTPUTS screen. User Guide ... -
Page 117: Record / Stereo
RECORD / Stereo Stereo recording/playback to/from a connected USB drive. USB-A audio/data and SD recording/playback features utilise the same system resources and cannot be used at the same time. Stereo Record The top section of the screen includes level meters for the channels being recorded, recording controls and information (when recording). - Page 118 Stereo Playback The bottom section of the screen is for playback of audio from USB-A storage. Select Track - Select the track to be played. Playback Mode – Options include Play All (and stop), Play Single (and stop), Repeat All (loop through all tracks) and Repeat Single (loop a single track). Transport Control –...
-
Page 119: Record / Multitrack
RECORD / Multitrack Record or Playback individual signals to and from individual channels using an SDHC card. USB-A audio/data and SD recording/playback features utilise the same system resources and cannot be used at the same time. Meters switch automatically to show either signal being recorded or played. Set where input channel signal is recorded from (the tap-off point) and assign the last pairs of channels to be recorded in the CONFIG / USB/SD/BT / USB/SD screen. - Page 120 Playback Mode – Options include Play All (and stop), Play Single (and stop), Repeat All (loop through all tracks) and Repeat Single (loop a single track). Transport Controls – Use to Record, Play/Pause, Stop and skip to Previous/Next. Use the circular playback position marker at the very bottom of the screen to jump to a specific point in the track.
- Page 121 Buffer Usage Buffer usage meters indicate the performance of the connected storage device. If buffers are filled, data will be lost and an error will be counted. Length of recording The maximum length of a multitrack recording is determined by the maximum file size of 4GB (for each mono channel recorded), which equates to approximately 4 hrs at 96kHz or 8 hrs at 48kHz.
-
Page 122: Scenes
SCENES Scenes are used to store and recall the mix state of the CQ including all processing and send levels. 100 scene slots are available. More information can be found in the Shows, Scenes and Libraries section. Recall – Replace the current state with the stored state. Overwrite –... -
Page 123: Data / Shows
DATA / Shows A Show includes the current state of the CQ, along with all stored states (Scenes) and all stored User Libraries. The CQ has one Show loaded at any time, but can store or recall a show to/from a connected USB drive. Recall –... -
Page 124: Data / Libraries
DATA / Libraries The CQ can have up to 128 User libraries stored at any time. These are included when storing or recalling an entire Show, but can also be stored or recalled individually using a USB drive. ‘Mixer Libraries’ lists all the Libraries in the Show currently loaded on the CQ. ‘USB Libraries’... -
Page 125: System / Info
SYSTEM / Info Displays diagnostic information about the unit. Core temp, Core voltage, DAC temp and FX temp all include Max and Min values. Note that these are not the maximum and minimum ranges of operation, but rather the maximum and minimum values that have been recorded since the unit was last powered on. -
Page 126: System / Usb/Sd (Symbols)
SYSTEM / USB/SD (Symbols) Displays details on any connected USB drive and/or SD Card Format – Select to Format the connected USB Drive or SD Card. This will delete all data, set the file system to FAT32 and add folders required for use with CQ for audio recording (USB/SD) and data storage (USB). -
Page 127: System / Firmware
SYSTEM / Firmware Shows the firmware currently installed on the unit at the bottom of the screen along with the firmware found on a connected USB drive at the top. Update – Begin the firmware update process. User Guide V1.1.0 Issue 1... -
Page 128: System / Meters
SYSTEM / Meters Chromatic meters are displayed in the CONFIG screen, on Quick Channels and there is one on the CQ-20B which can be set for use with any input or output channel. They use colour and brightness to express signal level in a smaller space and can also show much lower levels than standard meters (from -72dB), so a source can often be seen before being heard. -
Page 129: System / Preferences
SYSTEM / Preferences Unit Name – Change the name of the unit, as displayed in the ‘Choose Unit’ connection screen when using remote control apps (CQ-MixPad, CQ4You) Unit name and the Wi-Fi Access Point network name (SSID) on the CQ-18T and CQ- 20B are the same by default, but can be renamed independently. -
Page 130: Resets
13. Resets CQ-12T and CQ-18T Factory Reset Start with the power off. 2. Hold ‘HOME’ and Soft Key ‘1’ whilst powering on the unit. 3. Continue to hold until the unit has fully booted. A Factory reset will clear all stored data including Scenes and Libraries and reset all preferences and network settings to their default values. -
Page 131: Default Network Settings
Default Network Settings On first boot or after a reset, network defaults are as follows: Wi-Fi (CQ-18T, CQ-20B) • SSID is Visible. • SSID is [CQ18T_XXXX or CQ20B_XXXX] where XXXX are the last 4 digits of the serial number. • Security is set to ‘OPEN’... -
Page 132: System Block Diagram
14. System Block Diagram User Guide V1.1.0 Issue 1... -
Page 133: Specifications
15. Specifications Mic/Line Inputs Balanced XLR, Balanced XLR/TRS Combi, fully recallable preamp Input Sensitivity -60 to +0dBu Line Inputs (Combi Sockets) -20dB Pad (Fixed) Hi-Z Inputs (CQ-20B 15&16) Relay switched, 1M Ohm impedance, 0 to +40dB gain Analogue Gain 0dB to +60dB, 1dB steps Maximum Input Level +17dBu (XLR), +30dBu (TRS) Input Impedance... - Page 134 System Measured balanced XLR in to XLR out, 0dB gain, 0dBu input Dynamic Range 110 dB Frequency Response +0/-0.5dB 20Hz to 20kHz Headroom +18dB Internal operating Level 0dBu THD+N, Mic routed to Main L/R Out +10dBu input, 0dB system gain, 0.003%, -92dB (Relative, 20- 20kHz) dBFS Alignment +18dBu = 0dBFS (+22dBu at XLR output)
- Page 135 CQ-12T As Used 291 x 242 x 89 mm (11.4" x 9.5" x 3.5") Packed in shipping box 370 x 305 x 190 mm (14.6" x 12" x 7.5") Unpacked weight 2.4 kg (5.3 lbs) Packed weight 3.2 kg (7.05 lbs) Mains Power +12V DC 5.4A (centre positive) (100-240V AC, 50/60Hz PSU supplied)
-
Page 136: Warranty Information
16. Warranty Information Limited One Year Manufacturer’s Warranty Allen & Heath warrants the Allen & Heath -branded hardware product and accessories contained in the original packaging ("Allen & Heath Product”) against defects in materials and workmanship when used in accordance with Allen &...
Need help?
Do you have a question about the CQ Series and is the answer not in the manual?
Questions and answers