Table of Contents
Advertisement
Quick Links
Download this manual
See also:
Instruction Manual
INSTALLATION MANUAL
Hybrid Digital Video Recorder
Enregistreur vidéo numérique hybride
Grabador de vídeo digital híbrido
Hybrid-Digital-Videorecorder
Before installing and using this unit, please read this manual carefully. Be sure to read the "Safety
GB
precautions" note at the end of this manual.
Refer to the included CD-ROM "Application Disc" for the "INSTRUCTION MANUAL".
Be sure to keep it handy then later reference.
Avant d'installer et d'utiliser cet appareil, veuillez lire attentivement ce manuel. Veillez à lire la remarque
F
"Précautions de sécurité" à la fin de ce manuel.
Utilisez le CD-ROM fourni pour consulter le "MANUEL D'INSTRUCTIONS" en allemand, français,
espagnol et italien.
Conservez-le à portée de main pour pouvoir vous y reporter en cas de besoin.
Antes de instalar y usar este aparato, por favor lea cuidadosamente este manual. Asegúrese de leer la
E
nota "Precauciones de seguridad" al final de este manual.
Consulte en el CD-ROM suministrado el "MANUAL DE INSTRUCCIONES" en alemán, francés, español
e italiano.
Asegúrese de tenerlo a mano para posterior referencia.
Lesen Sie bitte vor dem Installieren und dem Verwenden dieses Gerätes diese Bedienungsanleitung
D
sorgfältig durch. Lesen Sie bitte den Abschnitt "Sicherheitshinweise" am Ende dieser Anleitung durch.
Die "BEDIENUNGSANLEITUNG" in den Sprachen Deutsch, Französisch, Spanisch und Italienisch
finden Sie auf der beiliegenden CD-ROM.
Bewahren Sie sie zum späteren Nachschlagen auf.
DSR-HB8000
Advertisement
Table of Contents

Related Manuals for Sanyo DSR-HB8000


Summary of Contents for Sanyo DSR-HB8000
- Page 1 INSTALLATION MANUAL Hybrid Digital Video Recorder Enregistreur vidéo numérique hybride Grabador de vídeo digital híbrido Hybrid-Digital-Videorecorder Before installing and using this unit, please read this manual carefully. Be sure to read the “Safety precautions” note at the end of this manual. Refer to the included CD-ROM “Application Disc”...
-
Page 2: Table Of Contents
Contents <Foreword> Checking the accessories ....3 <Names of parts> Front panel ....... 4 Rear panel . - Page 3 Indice <Prefacio> Verificación de los accesorios ....3 <Nombres de las partes> Panel delantero ......4 Panel trasero .
-
Page 4: Checking The Accessories
Checking the accessories Keyboard & Mouse (×1) Rack mount handle (×2) Stand (×4) Screw for expansion hard disk (10-32 × 5/8": ×20) Vérification des accessoires Clavier et souris (×1) Poignée de montage en bâti (×2) Support en caoutchouc (×4) Vis pour extension de disque dur (10-32 ×... -
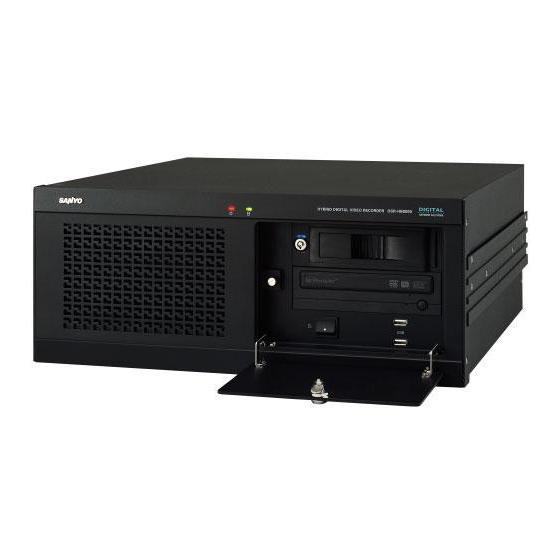
Page 5: Names Of Parts (Front Panel)
Names of parts (front panel) Air duct Power ( ) indicator Access ( ) indicator Drive panel Drive panel key lock Removable HDD key lock Power indicator Access indicator (removable HDD) Noms des pièces (panneau avant) Conduit de ventilation Témoin d’alimentation ( Témoin d’accès ( Panneau du lecteur Verrouillage de la clé... -
Page 6: Rear Panel
Air duct Standby switch Power socket RS-485 TERMINATE ON/OFF switch RS-485 A/B port • To connect a Sanyo system controller, Sanyo PTZ camera, etc. 2nd RS-485 port • To connect a competitor’s PTZ camera, etc. A Sanyo camera cannot be connected. -
Page 7: Panneau Arrière
Interrupteur de veille Fiche électrique Interrupteur RS-485 TERMINATE ON/OFF Port A/B RS-485 • Pour connecteur un contrôleur de système Sanyo, une caméra PTZ Sanyo, etc. Deuxième port RS-485 • Pour connecter une caméra PTZ, etc. autre que les nôtres. Il n’est pas possible de connecter une caméra Sanyo. -
Page 8: Sold Separately Expansion Hard Disk
Sold separately expansion hard disk Unscrew the cover screws of the cabinet, and remove the cover. Remove screw (A) from the expansion hard disk rack and screw (B) from the bottom of it. Slide the rack in the direction indicated by the arrow and remove it. -
Page 9: Installing This Unit
Installing this unit A Installing this unit on a rack mount Remove the side plates on the left and right sides of this unit and fix the supplied handles unscrewed screws Be sure to leave more than 1 cm above, under, left and right of this unit. -
Page 10: Basic Connections
Basic connections Do not connect the power cord until all other connections have been completed. (✱) (✱) (✱) (A) Through output of the camera video (B) Vertical image instability may occur when switching the camera connected to the MON2 terminal. This is not a defect. -
Page 11: Connexions De Base
Connexions de base Ne branchez pas le cordon d’alimentation tant que les autres branchements n’ont pas ete effectues. (A) Via la sortie de la vidéo de la caméra (B) Lors de la commutation de la caméra connectée vers la borne MON2, il est possible que l’image verticale soit instable. -
Page 12: Alarm Connections
Alarm connections Connexions de l’alarme A Bornes d’entrée de l’alarme Il est possible de détecter les intrus par l’ouverture et la fermeture d’une porte, par exemple, en connectant un interrupteur, un capteur de sécurité ou autre à l’appareil. Conexiones de alarma A Terminales de entrada de alarma Se pueden detectar intrusos por la apertura y cierre de, por ejemplo, una puerta al conectar un interruptor, un sensor de... -
Page 13: Rs-485 Connections
RS-485 connections TERMINATE switch: Terminator settings (ON/OFF) RS-485 A/B port: To connect a Sanyo system controller, Sanyo PTZ camera, etc. 2nd RS-485 port: To connect a competitor's PTZ camera, etc. A Sanyo camera cannot be connected. Connexions RS-485 Interrupteur TERMINATE: paramètres de terminaison (ON/OFF) Port A/B RS-485: Pour connecteur un contrôleur de... -
Page 14: Network Connections (Lan)
Network connections (LAN) Connexions réseau (LAN) ■ Connectez l’ordinateur à l’aide du câble LAN. • Utilisez des câbles 10BASE-T/100BASE-TX/1000BASE-T de catégorie 5 (type droit). Concentrateur de commutation Conexiones de red (LAN) ■ Conecta el ordenador con el cable LAN. • Use cables Categoría 5 10BASE-T/100BASE-TX/1000BASE-T (tipo rectos). Hub permutador Intranet LAN/WAN Netzwerkverbindungen (LAN) -
Page 15: Cd/Dvd Instructions
CD/DVD instructions ■ Inserting a disc Press the CD/DVD eject button (A), the tray opens. Turn the disc so that the disc label faces upwards and place the disc in the depression of the tray, slightly press the center of the tray to close the tray. •... -
Page 16: Removable Hdd Instructions
Removable HDD instructions (A) Lock (B) Unlock ■ Installing the hard disk Turn the power off using the power ( front panel, and turn the standby switch on the rear panel off. Open the front door using the supplied key. Turn the hard disk so that the hard disk label faces upwards and the terminals face to the rear. -
Page 17: Instrucciones Del Hdd Desmontable
Instrucciones del HDD desmontable (A) Abrir (B) Cerrar ■ Instalación del disco duro Desconecte la alimentación usando el interruptor de alimentación ( ) en el panel delantero y desconecte el interruptor de espera en el panel trasero. Abra la puerta delantera usando la llave suministrada. Gire el disco duro de manera que la etiqueta del disco duro quede mirando hacia arriba y los terminales mirando hacia atrás. -
Page 18: Login
Login Open the front panel drive panel using the supplied key and turn the power on. • The start-up screen is displayed and the program starts loading. Connexion Ouvrez le panneau du lecteur situé au niveau du panneau avant à l’aide de la clé fournie et mettez l’appareil sous tension. -
Page 19: Regarding The Instruction Manual
Regarding the instruction manual A Refer to the LIVE screen. Click the ( ) icon in the [Mode] menu and choose “Instruction Manuals”. Click the ( En ce qui concerne le manuel d’instructions A Reportez-vous à l’écran EN DIRECT. Cliquez sur l’icône ( ) du mode [Mode] et sélectionnez “Manuels d’instructions”. -
Page 20: Specifications
Specifications Signal method Conforms to the NTSC/PAL system (software switch) • NTSC: 40 ips (single-screen), 480 ips (multi-screen) • PAL: 35 ips (single-screen), 400 ips (multi-screen) Compression Video: MPEG 4, method Audio: G.721, 8 kHz sampling rate ® ® Operating system Microsoft Windows XP Embedded... -
Page 21: Especificaciones
Especificaciones Método de señal Conforme con el sistema NTSC/PAL (interruptor de software) • NTSC: 40 ips (pantalla única), 480 ips (pantalla múltiple) • PAL: 35 ips (pantalla única), 400 ips (pantalla múltiple) Método de Vídeo: MPEG 4, compresión Audio: G.721, tasa de muestreo de 8 kHz ®...
Need help?
Do you have a question about the DSR-HB8000 and is the answer not in the manual?
Questions and answers