Table of Contents
Advertisement
WASHER SAFETY .................................................................. 2
INSTALLATION REQUIREMENTS ......................................... 3
Tools and Parts ...................................................................... 3
Optional Equipment .............................................................. 3
Location Requirements ........................................................ 3
...Electrical Requirements ........................................................ 6
Water Supply Requirements ................................................. 7
Drain Requirements .............................................................. 7
Laundry Product Dispenser Pumps ...................................... 7
INSTALLATION INSTRUCTIONS ........................................... 8
Inspection and Storage ........................................................ 8
Mechanical Installation ......................................................... 8
Remove Shipping Brackets .................................................. 8
Electrical Connection ........................................................... 9
Water Supply Connection .................................................... 9
Drain Connection .................................................................. 9
Laundry Product Supply Pump Connection ......................... 9
Complete Installation .......................................................... 10
Break-In Period .................................................................. 10
Controls Troubleshooting ................................................... 10
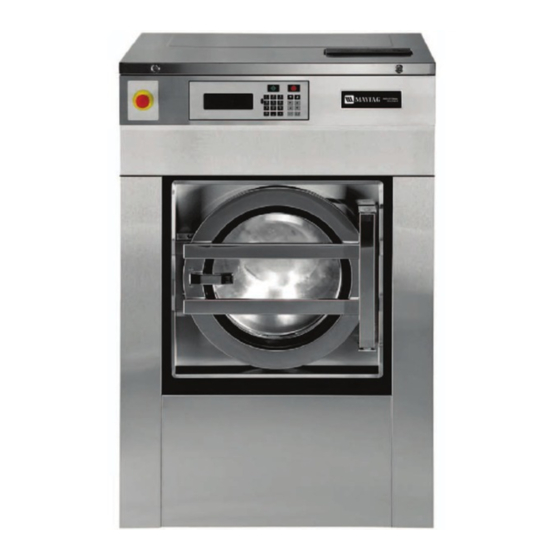
INSTALLATION INSTRUCTIONS
MFS18, MFS25, MFS35, MFS55
COMMERCIAL WASHER
TABLE OF CONTENTS
WASHER MAINTENANCE ...................................................... 11
Maintenance Schedule .......................................................... 11
Vibration Switch Adjustment and Function Test ................... 11
Belt Inspection, Adjustment, and Replacement ....................12
Door Seal Adjustment and Replacement ..............................12
Fuse Replacement ................................................................13
Opening Door Without Power ..............................................13
DIMENSIONS AND TECHNICAL SPECIFICATIONS ..............14
Dimensions ............................................................................14
Component Locations ...........................................................15
Technical Specifications ........................................................16
Torque Specifications ............................................................16
www.maytagcommerciallaundry.com
1
Advertisement
Table of Contents

Related Manuals for Maytag MFS55PNAVS


Summary of Contents for Maytag MFS55PNAVS
-
Page 1: Table Of Contents
INSTALLATION INSTRUCTIONS MFS18, MFS25, MFS35, MFS55 WASHER SAFETY ... 2 INSTALLATION REQUIREMENTS ... 3 Tools and Parts ... 3 Optional Equipment ... 3 Location Requirements ... 3 ...Electrical Requirements ... 6 Water Supply Requirements ... 7 Drain Requirements ... 7 Laundry Product Dispenser Pumps ... -
Page 2: Washer Safety
IMPORTANT: This washer must be directly wired to the electrical system ■ and may not be attached with a plug. The circuit must be a dedicated circuit and may not be ■ combined with any lighting circuit. Adequate grounding is essential to washer operation. ■... -
Page 3: Installation Requirements
INSTALLATION REQUIREMENTS Tools and Parts Gather the required tools and parts before starting installation. Read and follow the instructions provided with any tools listed here. Tools needed: These washers must be installed by professional installers. The installer should have a full compliment of standard SAE and metric hand tools as well as other specialized tools as required. -
Page 4: Product Dimensions
27.6" (701 mm) Front View MFS18 MFS25 0.6" (15 mm) 0.6" (15 mm) * Door may not open completely with this minimum clearance 4" (100 mm) Side View Product Dimensions General product dimensions are shown below. See Technical Specifications for dimensions not shown here. Installation on an elevated base NOTES: Models MFS35 and MFS55 are mountable on either a metal... - Page 5 Elevated Metal Base for Secured Installation The elevated metal base for a secured installation may be fabricated from a metal U-channel as shown in the illustration below. The maximum allowable height of the base is 12" (300 mm). The base must be able to withstand both the load and vibration of the washer.
-
Page 6: Electrical Requirements
Electrical Requirements It Is Your Responsibility To contact a qualified electrical installer. ■ To be sure that the electrical connection is adequate and in ■ conformance with the National Electrical Code, ANSI/NFPA 70-latest edition, or Canadian Electrical Code CSA C22.1, and all local codes and ordinances. -
Page 7: Water Supply Requirements
Water Supply Requirements Water supply requirements: Valved hot and cold water supply with a water pressure ■ between 14.5 and 116 PSI (100–800 kPa). Water pressure between 43 and 73 PSI (300–500 kPa) is recommended. A hot water heater or boiler supplying an adequate ■... -
Page 8: Installation Instructions
INSTALLATION INSTRUCTIONS Inspection and Storage 1. Inspect carton for damage. Inspect washer if carton shows signs of damage. Do not remove washer from pallet. 2. Verify model number and serial number on the data plate with your order. 3. Store inside in a temperature controlled environment 33–130°F (1–55°C). -
Page 9: Electrical Connection
Electrical Connection 1. Turn off power at fuse box or breaker box. 2. Open top of washer with key. Prop the top open with the support. 3. Remove approximately 6" (150 mm) of shielding from cable end to expose insulated wires. Be sure that there is sufficient wire to create a drip loop or wire sag, as shown. -
Page 10: Complete Installation
Tubing Connectors All models There are 6 tubing connectors in back of the washer. One connector is larger in diameter than the others. The larger diameter connector should be used for the pump requiring the highest flow rate. If you need additional chemicals, contact the manufacturer. -
Page 11: Washer Maintenance
Maintenance Schedule After Each Load Remove debris from the wash drum including paper clips, ■ coins, and other hard items. When not in use, leave the washer door open to allow the ■ washer to air out and prolong gasket life. Daily Maintenance Clean water, detergent, and other stains off of the washer ■... -
Page 12: Belt Inspection, Adjustment And Replacement
5. Be sure that the sensor spring is roughly centered in the floating arm slot horizontally and about 1/3 of the way from the bottom vertically. Centering Sensor Spring – 6. Adjust switch gap with a feeler gauge (see illustration). Loosen adjustment screws to adjust. -
Page 13: Fuse Replacement
Door Seal Adjustment (Models MFS35 and MFS55) 1. To adjust pressure on the hinge side, open the door and loosen the door frame bolts clamping the door frame to the hinge. Take out the square washers. Tighten the bolts. Loosen the door hinge bolts. Insert one, two or three square washers between the longitudinal beam and the cross beam as needed. -
Page 14: Dimensions And Technical Specifications
DIMENSIONS AND TECHNICAL SPECIFICATIONS Front View (Models MFS18 and MFS25) Top View MFS18 25.99" (660 mm) 28.15" (715 mm) 42.50" (1080 mm) 22.10" (560 mm) 17.91" (455 mm) 0.80" (20 mm) 15.50" (420 mm) 10.40" (263 mm) 35.80" (910 mm) 4.10"... -
Page 15: Component Locations
Front View (Models MFS18 and MFS25) Top View 1. Control panel 2. Connection liquid soap 3. Serial plate 4. Air relieve 5. Water supply 6. Air vent holes, Frequency inverter 7. Fuses 8. Main switch Component Locations Front View (Models MFS35 and MFS55) 9. -
Page 16: Technical Specifications
** Consult an electrician to ensure proper GFCI connection. Recommended Torque Values for Steel Bolts Bolt Size W10214572B © 2010 ® Registered Trademark/TM Trademark of Maytag Corporation or its related companies. All rights reserved. Technical Specifications MFS18 MFS25 25.99 x 28.15 x 42.50"...
Need help?
Do you have a question about the MFS55PNAVS and is the answer not in the manual?
Questions and answers