Table of Contents
Advertisement
Quick Links
Advertisement
Table of Contents

Related Manuals for Dell OptiPlex 7060 Micro


Summary of Contents for Dell OptiPlex 7060 Micro
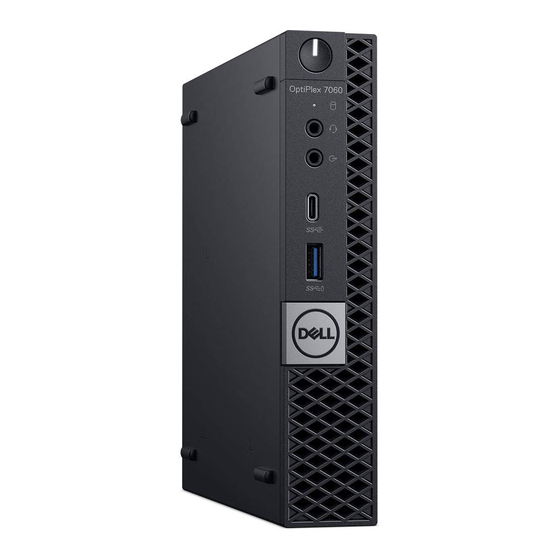
- Page 1 Questo manuale d’istruzione è fornito da trovaprezzi.it. Scopri tutte le offerte per Dell OptiPlex 7060 (CV3WX) o cerca il tuo prodotto tra le migliori offerte di PC Desktop e Workstation OptiPlex 7060 Micro Service Manual Regulatory Model: D10U Regulatory Type: D10U003...
- Page 2 A WARNING indicates a potential for property damage, personal injury, or death. © 2018 Dell Inc. or its subsidiaries. All rights reserved. Dell, EMC, and other trademarks are trademarks of Dell Inc. or its subsidiaries. Other trademarks may be trademarks of their respective owners.
-
Page 3: Working On Your Computer
Damage due to servicing that is not authorized by Dell is not covered by your warranty. Read and follow the safety instructions that came with the product. -
Page 4: After Working Inside Your Computer
Turn off your computer. Disconnect all network cables from the computer. CAUTION: To disconnect a network cable, first unplug the cable from your computer and then unplug the cable from the network device. Disconnect your computer and all attached devices from their electrical outlets. Press and hold the power button while the computer is unplugged to ground the system board. -
Page 5: Technology And Components
Technology and components This chapter details the technology and components available in the system. Topics: • DDR4 • USB features • USB Type-C • Advantages of Displayport over USB Type-C • HDMI 2.0 DDR4 DDR4 (double data rate fourth generation) memory is a higher-speed successor to the DDR2 and DDR3 technologies and allows up to 512 GB in capacity, compared to the DDR3's maximum of 128 GB per DIMM. -
Page 6: Memory Errors
Figure 2. Thickness difference Curved edge DDR4 modules feature a curved edge to help with insertion and alleviate stress on the PCB during memory installation. Figure 3. Curved edge Memory Errors Memory errors on the system display the new ON-FLASH-FLASH or ON-FLASH-ON failure code. If all memory fails, the LCD does not turn on. - Page 7 finally has the answer to the consumers' demands with a theoretically 10 times faster than its predecessor. In a nutshell, USB 3.1 Gen 1 features are as follows: • Higher transfer rates (up to 5 Gbps) • Increased maximum bus power and increased device current draw to better accommodate power-hungry devices •...
-
Page 8: Alternate Mode
Applications USB 3.0/USB 3.1 Gen 1 opens up the laneways and provides more headroom for devices to deliver a better overall experience. Where USB video was barely tolerable previously (both from a maximum resolution, latency, and video compression perspective), it's easy to imagine that with 5-10 times the bandwidth available, USB video solutions should work that much better. -
Page 9: Usb Power Delivery
USB Power Delivery The USB PD specification is also closely intertwined with USB Type-C. Currently, smartphones, tablets, and other mobile devices often use a USB connection to charge. A USB 2.0 connection provides up to 2.5 watts of power — that'll charge your phone, but that's about it. A laptop might require up to 60 watts, for example. -
Page 10: Advantages Of Hdmi
• HDMI Micro Connector - A new, smaller connector for phones and other portable devices, supporting video resolutions up to 1080p • Automotive Connection System - New cables and connectors for automotive video systems, designed to meet the unique demands of the motoring environment while delivering true HD quality Advantages of HDMI •... -
Page 11: Disassembly And Reassembly
Disassembly and reassembly Side cover Removing side cover Follow the procedure in Before working inside your computer. To remove the side cover: Remove the thumbscrew that secures the side cover to the system. b Slide the side cover towards the front of the system and lift the cover to remove from the system. Disassembly and reassembly... -
Page 12: Installing Side Cover
Installing side cover To install the side cover: Place the side cover on the system. b Slide the cover towards the back of the system to install it. Disassembly and reassembly... - Page 13 Replace the thumbscrew to secure the cover to the system. Disassembly and reassembly...
-
Page 14: Removing 2.5-Inch Hard Drive Assembly
Follow the procedure in After working inside your computer. 2.5-inch hard drive assembly Removing 2.5–inch hard drive assembly Follow the procedure in Before working inside your computer. Remove the Side cover. To remove the drive assembly: Press the blue tabs on both sides of the hard drive assembly [1]. b Push the hard drive assembly to release it from the system and remove the hard drive assembly from the system [2]. -
Page 15: Installing 2.5-Inch Drive Assembly
Installing 2.5–inch drive assembly To install the hard drive assembly: Insert the hard drive assembly into the slot on the system. b Slide the hard drive assembly towards the connector in the system board until it clicks into place. Disassembly and reassembly... -
Page 16: Hard Drive
Install the Side cover. Follow the procedure in After working inside your computer. Hard drive Removing the 2.5–inch drive from the drive bracket Follow the procedure in Before Working Inside Your Computer. Remove the: Side cover 2.5 inch hard drive assembly To remove the drive bracket: Pull one side of the drive bracket to disengage the pins on the bracket from the slots on the drive [1] and lift the drive [2]. -
Page 17: Installing The 2.5 Inch Hard Drive Into The Drive Bracket
Installing the 2.5 inch hard drive into the drive bracket Align and insert the pins on the drive bracket with the slots on one side of the drive. Flex the other side of the drive bracket, and align and insert the pins on the bracket into the drive. Install the: 2.5 inch hard drive assembly Side cover... - Page 18 Disconnect the speaker cable and system fan cable from the connectors on the system board. Disassembly and reassembly...
-
Page 19: Installing System Fan
Installing system fan To install the system fan: Connect the speaker cable and system fan cable to the connectors on the system board. b Place the system fan on the system and slide the system fan until it clicks into place. Disassembly and reassembly... -
Page 20: Removing Speaker
Install the Side cover. Follow the procedure in After working inside your computer. Speaker Removing speaker Follow the procedure in Before working inside your computer. Remove the: Side cover System fan To remove the speaker: Release the speaker cable from the retention hooks on the system fan [1]. b Remove the two (M2.5x4) screws that secure the speaker to the system fan [2]. -
Page 21: Installing Speaker
Installing speaker To install the speaker: Align the slots on the speaker with the slots on the system fan [1]. b Replace the two (M2.5X4) screws to secure the speaker to the system fan [2]. Route the speaker cable through the retention hooks on the system fan [3]. Disassembly and reassembly... -
Page 22: Removing Memory Module
Install the: System fan Side cover Follow the procedure in After working inside your computer. Memory modules Removing memory module Follow the procedure in Before working inside your computer. Remove the: Side cover System fan To remove the memory module: Pull the securing clips from the memory module until the memory module pops up [1]. -
Page 23: Installing Memory Module
Installing memory module To install the memory module: Align the notch on the memory module with the tab on the memory module connector. b Insert the memory module into the memory module socket [1] and press it until it clicks into place [2]. Disassembly and reassembly... -
Page 24: Removing Heat Sink
Install the: System fan Side cover Follow the procedure in After working inside your computer. Heat sink Removing heat sink Follow the procedure in Before working inside your computer. Remove the: Side cover 2.5 inch hard drive assembly System fan To remove the heat sink: Loosen the three(M3) captive screws that secure the heat sink to the system [1]. -
Page 25: Installing Heat Sink
Installing heat sink To install the heat sink: Place the heat sink on the processor [1]. b Tighten the three (M3) captive screws to secure the heat sink to the system board [2]. NOTE: The heatsink assembly is secured to the system board with four screws and three screws for 35 W and 65 W CPU respectively. -
Page 26: Removing Processor
Install the: System fan 2.5–inch hard drive assembly Side cover Follow the procedure in After working inside your computer. Processor Removing processor Follow the procedure in Before Working Inside Your Computer. Remove the: Side cover 2.5 inch hard drive assembly System fan Heat sink To remove the processor:... -
Page 27: Installing Processor
NOTE: After removing the processor, place it in an antistatic container for reuse, return, or temporary storage. Do not touch the bottom of the processor to avoid damage to the processor contacts. Touch only the side edges of the processor. Installing processor To install the processor: Place the processor on the socket such that the slots on the processor align with the socket keys [1]. -
Page 28: Removing The Wlan Card
Install the: Heat sink System fan 2.5–inch hard drive assembly Side cover Follow the procedure in After working inside your computer. WLAN card Removing the WLAN card Follow the procedure in Before working inside your computer. Remove the: Side cover 2.5 inch hard drive assembly To remove the WLAN card: Remove the single (M2X3.5) screw that secures the plastic tab to the WLAN card [1]. -
Page 29: Installing The Wlan Card
Installing the WLAN card To install the WLAN card: Insert the WLAN card into the connector on the system board [1]. b Connect the WLAN antenna cables to the connectors on the WLAN card [2]. Place the plastic tab to secure the WLAN cables [3]. d Replace the single (M2X3.5) screw to secure the plastic tab to the WLAN card [4]. -
Page 30: Removing The M.2 Pcie Ssd
Install the: 2.5 inch hard drive assembly Side cover Follow the procedure in After working inside your computer. M.2 PCIe SSD Removing the M.2 PCIe SSD NOTE: The instructions are applicable to M.2 SATA SSD also. Follow the procedure in Before working inside your computer. -
Page 31: Installing The M.2 Pcie Ssd
Installing the M.2 PCIe SSD NOTE: The instructions are applicable to M.2 SATA SSD also. To install M.2 PCIe SSD: Insert the M.2 PCIe SSD to the connector in the system board [1]. b Replace the single (M2X3.5) screw that secures the M.2 PCIe SSD to the system board [2]. Disassembly and reassembly... -
Page 32: Removing Coin Cell Battery
Install the: 2.5 inch hard drive assembly Side cover Follow the procedure in After working inside your computer. Coin-cell battery Removing coin cell battery Follow the procedure in Before working inside your computer. Remove the: Side cover Optional module To remove the coin cell battery: Press the release latch until the coin cell battery pops out [1]. -
Page 33: Installing Coin Cell Battery
Installing coin cell battery To install the coin cell battery: Hold the coin cell battery with the "+" sign facing up and slide it under the securing tabs at the positive side of the connector on the system board [1]. b Press the battery into the connector until it locks into place [2]. -
Page 34: Removing Optional Module
Install the Side cover Optional module Follow the procedure in After working inside your computer. Optional module Removing optional module Follow the procedure in Before working inside your computer. Remove the : Side cover 2.5 inch hard drive assembly To remove the optional card: Disconnect the optional-card cable from the connector on the system board [1]. - Page 35 Pull and lift the optional card away from the system. Disassembly and reassembly...
-
Page 36: Installing Optional Module
Installing optional module To install the optional card: Place and align the optional card to its place in the system. b Replace the four screws to secure the optional card to the system chassis [1,2] Connect the optional card cable to the connector in the system board [3]. Disassembly and reassembly... -
Page 37: Removing System Board
Install the: Side cover 2.5 inch hard drive assembly Follow the procedure in After working inside your computer. System board Removing system board Follow the procedure in Before working inside your computer. Remove the: Side cover 2.5 hard drive assembly System fan WLAN M.2 PCIe SSD... - Page 38 To remove the system board: Remove the two (M3x4) screws [1] and three (6-32x5.4) screws [2] that secure the system board to the system. Disassembly and reassembly...
- Page 39 b Lift the system board to disengage the connectors from the back of the computer [1]. Slide the system board away from the computer [2]. Disassembly and reassembly...
-
Page 40: Installing System Board
Installing system board To install the system board: Hold the system board by its edges and angle it towards the back of the system. b Lower the system board into the system until the connectors at the back of the system board align with the slots on the chassis, and the screw holes on the system board align with the standoffs on the system [1,2]. - Page 41 Replace the two (M3x4) screws [1] and three (6-32x5.4) screws [2] to secure the system board to the system. Disassembly and reassembly...
- Page 42 d Place the HDD caddy support on the system board [1]. Replace the screw that secures the HDD caddy support to the system board [2]. Disassembly and reassembly...
- Page 43 Install the: Processor Heat sink Memory module Optional module M.2 PCIe SSD WLAN System fan 2.5 inch hard drive assembly Side cover Follow the procedure in After working inside your computer. Disassembly and reassembly...
-
Page 44: Troubleshooting
The items detected are listed and will be tested If there are any issues, error codes are displayed. Note the error code and validation number and contact Dell. To run a diagnostic test on a specific device Press Esc and click Yes to stop the diagnostic test. - Page 45 However, if the computer fails the POST, the computer emits a series of LED codes during the start-up. The system LED is integrated on the Power button. The following table shows different light patterns and what they indicate. Table 2. Power LED summary Amber LED state White LED state System state...
-
Page 46: Diagnostic Error Messages
One or more memory modules may be faulty or improperly seated. Reinstall the memory modules or, if necessary, replace them. DISK C: FAILED INITIALIZATION The hard drive failed initialization. Run the hard drive tests in Dell Diagnostics. DRIVE NOT READY The operation requires a hard drive in the bay before it can continue. - Page 47 Shut down the computer, remove the hard drive, and boot the computer from an optical drive. Then, shut down the computer, reinstall the hard drive, and restart the computer. If the problem persists, try another drive. Run the Hard Disk Drive tests in Dell Diagnostics. HARD-DISK DRIVE FAILURE The hard drive does not respond to commands from the computer.
- Page 48 KEYBOARD STUCK KEY FAILURE For external keyboards or keypads, check the cable connection. Restart the computer, and avoid touching the keyboard or keys during the boot routine. Run the Stuck Key test in Dell Diagnostics. LICENSED CONTENT IS NOT ACCESSIBLE IN...
-
Page 49: System Error Messages
The reserve battery that supports the system configuration settings may require recharging. Connect your computer to an electrical outlet to charge the battery. If the problem persists, Contact Dell. TIME-OF-DAY NOT SET-PLEASE RUN THE SYSTEM SETUP The time or date stored in the system setup program does not PROGRAM match the system clock. - Page 50 System message Description out of range may or may not indicate a potential hard drive problem Troubleshooting...
-
Page 51: Getting Help
Dell product catalog. Dell provides several online and telephone-based support and service options. Availability varies by country and product, and some services may not be available in your area. To contact Dell for sales, technical support, or customer service issues: Go to Dell.com/support.
Need help?
Do you have a question about the OptiPlex 7060 Micro and is the answer not in the manual?
Questions and answers