Dell OptiPlex 7040M Owner's Manual
Hide thumbs
Also See for OptiPlex 7040M:
- Quick start manual ,
- Setup and quick reference manual (102 pages) ,
- Owner's manual (55 pages)
Table of Contents
Advertisement
Advertisement
Table of Contents

Related Manuals for Dell OptiPlex 7040M


Summary of Contents for Dell OptiPlex 7040M
- Page 1 OptiPlex 7040M Owner's Manual Regulatory Model: D10U Regulatory Type: D10U001...
- Page 2 WARNING: A WARNING indicates a potential for property damage, personal injury, or death. © 2016 Dell Inc. All rights reserved. This product is protected by U.S. and international copyright and intellectual property laws. Dell and the Dell logo are trademarks of Dell Inc. in the United States and/or other jurisdictions. All other marks and names mentioned herein may be trademarks of their respective companies.
-
Page 3: Table Of Contents
Contents 1 Working on your computer....................5 ..........................5 Before working inside your computer ..............................5 Turning off your computer ............................5 After working inside your computer 2 Removing and installing components................6 ................................6 Recommended tools ................................6 Removing the cover ................................6 Installing the cover ............................. - Page 4 Accessing System Setup ..............................25 System Setup options ................................32 Updating the BIOS .............................32 System and setup password .....................32 Assigning a system password and setup password ................33 Deleting or changing an existing system and/or setup password 6 Specifications....................... 34 7 Contacting Dell......................38...
-
Page 5: Working On Your Computer
CAUTION: To connect a network cable, first plug the cable into the network device and then plug it into the computer. Connect any telephone or network cables to your computer. Connect your computer and all attached devices to their electrical outlets. Turn on your computer. If required, verify that the computer works correctly by running Dell Diagnostics. -
Page 6: Removing And Installing Components
Removing and installing components This section provides detailed information on how to remove or install the components from your computer. Recommended tools The procedures in this document require the following tools: • Small flat blade screwdriver • Phillips screwdriver • Small plastic scribe Removing the cover Follow the procedure in... -
Page 7: Removing The Hard Drive Assembly
Removing the hard drive assembly Follow the procedure in Before Working Inside Your Computer. Remove the cover. To remove the hard drive assembly: a. Press the blue tabs on both sides of the hard drive assembly [1]. b. Push the hard drive assembly to release it from the computer [2]. c. -
Page 8: Installing The Hard Drive Into The Hard Drive Bracket
Installing the hard drive into the hard drive bracket Align and insert the pins on the hard drive bracket with the slots on one side of the hard drive. Flex the other side of the hard drive bracket, and align and insert the pins on the bracket into the hard drive. Install the: hard drive assembly cover... -
Page 9: Installing The Vga Board
Installing the VGA board Align and insert the VGA connector into the slot on the computer. Tighten the screws to secure the VGA board to the computer. Connect the VGA board cable to the connector on the VGA board. Install the cover. Follow the procedure in After Working Inside Your Computer. -
Page 10: Installing The System Fan
Installing the system fan Connect the speaker cable and system fan cable to the connectors on the system board. Place the system fan on the computer and slide the system fan until it clicks into place. Install the cover. Follow the procedure in After Working Inside Your Computer. -
Page 11: Removing The Heat Sink
Removing the heat sink Follow the procedure in Before Working Inside Your Computer. Remove the: cover hard drive assembly system fan To remove the heat sink: a. Loosen the captive screws that secure the heat sink to the computer [1]. b. -
Page 12: Installing The Processor
CAUTION: The processor socket pins are fragile and can be permanently damaged. Be careful not to bend the pins in the processor socket when removing the processor out of the socket. c. Lift the processor out of the socket [3]. NOTE: After removing the processor, place it in an antistatic container for reuse, return, or temporary storage. -
Page 13: Installing The Speaker
Installing the speaker Align the slots on the speaker with the slots on the system fan. Tighten the screws to secure the speaker to the system fan. Route the speaker cable through the retention hooks on the system fan. Install the: system fan cover Follow the procedure in... -
Page 14: Installing The Coin Cell Battery
Installing the coin cell battery Hold the coin cell battery with the "+" sign facing up and slide it under the securing tabs at the positive side of the connector. Press the battery into the connector until it locks into place. Install the: VGA board hard drive assembly... -
Page 15: Installing The System Board
Installing the system board Hold the system board by its edges and angle it toward the back of the computer. Lower the system board into the computer until the connectors at the back of the system board align with the slots on the back wall of the computer, and the screw holes on the system board align with the standoffs on the computer Tighten the screws to secure the system board to the computer. -
Page 16: System Board Layout
System board layout Processor CPU fan connector Internal speaker connector Memory module connectors USB 3.0 connector Intrusion switch USB 3.0 connector Line out connector Universal audio jack M.2 socket1 connector Power switch Hard drive connector M.2 socket3 connector Coin cell battery RJ-45 Ethernet connector USB 3.0 connectors DP/VGA daughter board connector... -
Page 17: List Of Compatible Monitor Models
List of compatible monitor models Table 1. Models for E-plate, PUZ-plate, and U-plate Behind Monitor Mounts E-series Monitor Mount Not Supported E1715S P1914S Supports all monitor E1916H S2240T models that are not compatible with E- Plate / PUZ-Plate displays. E1914H P2014H E1916HV P2314T... - Page 18 Behind Monitor Mounts E-series Monitor Mount Not Supported U2416Wi U2417HJ U2417HWi U3415W UP2414Q UP2715K UP3214Q UP3216Q UZ2215H UZ2315H UZ2715H UP2516D UP2716D U2417H U2717D U2917W UP3017 U3417W...
-
Page 19: Troubleshooting Your Computer
Troubleshooting your computer You can troubleshoot your computer using indicators like diagnostic lights, beep codes, and error messages during the operation of the computer. Diagnostic power LED codes Table 2. Diagnostic power LED codes Power LED light status Possible cause Troubleshooting steps •... -
Page 20: Diagnostic Error Messages
Reinstall the memory modules or, if necessary, replace them. DISK C: FAILED INITIALIZATION The hard drive failed initialization. Run the hard drive tests in Dell Diagnostics. DRIVE NOT READY The operation requires a hard drive in the bay before it can continue. - Page 21 KEYBOARD STUCK KEY FAILURE For external keyboards or keypads, check the cable connection. Restart the computer, and avoid touching the keyboard or keys during the boot routine. Run the Stuck Key test in Dell Diagnostics. LICENSED CONTENT IS NOT ACCESSIBLE IN...
- Page 22 The operating system cannot find a specific track on the hard drive. SHUTDOWN FAILURE A chip on the system board may be malfunctioning. Run the System Set tests in Dell Diagnostics. If the message reappears, Contact Dell. TIME-OF-DAY CLOCK LOST POWER System configuration settings are corrupted.
-
Page 23: System Error Messages
The computer failed to complete the boot routine three system have failed at checkpoint [nnnn]. For consecutive times for the same error. help in resolving this problem, please note this checkpoint and contact Dell Technical Support CMOS checksum error RTC is reset, BIOS Setup default has been loaded. -
Page 24: System Setup
Boot Sequence allows you to bypass the System Setup‐defined boot device order and boot directly to a specific device (for example: optical drive or hard drive). During the Power-on Self Test (POST), when the Dell logo appears, you can: •... -
Page 25: System Setup Overview
NOTE: If you wait too long and the operating system logo appears, wait until you see the desktop. Then, shut down or restart your computer and try again. NOTE: After the Dell logo appears, you can also press F12 and then select BIOS setup. System Setup options NOTE: Depending on the computer and its installed devices, the items listed in this section may or may not appear. - Page 26 Allows you to connect to display through WiFi. WIDI requires Intel WiFi card, Intel graphics, and WIDI receiver in display (or WIDI compliant display). To install the WIDI application, see the dell.com/support site to download the WIDI application. NOTE: When installing the WIDI application, connect the display to Intel on-board graphic output.
- Page 27 Option Description Table 7. Video Option Description Primary Display Allows you to select the primary display when multiple controllers are available in the system. • Auto • Intel HD Graphics NOTE: If you do not select Auto, the on-board graphics device will be present and enabled.
- Page 28 Option Description • On-Silent — Enabled by default if chassis intrusion is detected. CPU XD Support Allows you to enable or disable the Execute Disable mode of the processor. This option is enabled by default. OROM Keyboard Access This option determines whether users are able to enter Option ROM Configuration screens via hotkeys during boot.
- Page 29 Option Description • Enabled Enclave Memory Size Allows you to set the Intel SGX Enclave Reserve Memory Size. • 32 MB • 64 MB • 128 MB Table 11. Performance Option Description Multi Core Support This field specifies whether the process will have one or all cores enabled. This option is enabled by default.
- Page 30 Option Description • WLAN Only - Allows the system to be powered on by special WLAN signals. This option is Disabled by default. Block Sleep Allows you to block entering to sleep (S3 state) in OS environment. This option is disabled by default.
- Page 31 Option Description SERR Messages Controls the SERR message mechanism. This option is not set by default. Some graphics cards require that the SERR message mechanism be disabled. BIOS Downgrade Allows you to control flashing of the system firmware to the previous versions. This option is enabled by default.
-
Page 32: Updating The Bios
Restart the computer. Go to Dell.com/support. Enter the Service Tag or Express Service Code and click Submit. NOTE: To locate the Service Tag, click Where is my Service Tag? NOTE: If you cannot find your Service Tag, click Detect My Product. -
Page 33: Deleting Or Changing An Existing System And/Or Setup Password
To enter the system setup, press F2 immediately after a power-on or re-boot. In the System BIOS or System Setup screen, select System Security and press Enter. The System Security screen appears. In the System Security screen, verify that Password Status is Unlocked. Select System Password , enter your system password, and press Enter or Tab. -
Page 34: Specifications
Specifications NOTE: Offerings may vary by region. For more information regarding the configuration of your computer in: • Windows 10, click or tap Start → Settings → System → About. • Windows 8.1 and Windows 8, click or tap Start →... - Page 35 Table 24. Network Feature Specification Integrated Intel I219 LM Ethernet capable of 10/100/1000 communication Table 25. System information Feature Specification System chipset Intel Q170 chipset Table 26. Expansion bus Feature Specification Bus type USB 2.0, USB 3.0, SATA 3, and PCle up to Gen 3 •...
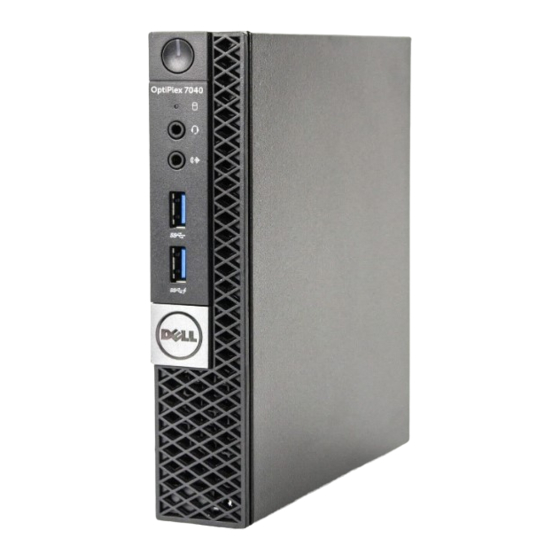
- Page 36 Feature Specification • 19-pin HDMI connector NOTE: Available video connectors may vary based on the optional graphic board selected. Table 30. Controls and lights Feature Specification Front of the computer Power button light White light — Solid white light indicates power-on state; slow blinking white light indicates sleep state of the computer.
- Page 37 Table 33. Environmental Feature Specification Temperature range Operating 5°C to 35°C (41°F to 95°F) Non-Operating –40°C to 65°C (–40°F to 149°F) Relative humidity (maximum) Operating 20% to 80% (non condensing) Non-Operating 5% to 95% (non condensing) Maximum vibration Operating 0.66 Grms Non-Operating 1.37 Grms Maximum shock...
-
Page 38: Contacting Dell
Dell provides several online and telephone-based support and service options. Availability varies by country and product, and some services may not be available in your area. To contact Dell for sales, technical support, or customer service issues: Go to Dell.com/support.
Need help?
Do you have a question about the OptiPlex 7040M and is the answer not in the manual?
Questions and answers