Table of Contents
Advertisement
Quick Links
ASSEMBLY INSTRUCTIONS
RTS 10D12C TARGA FLORIO SANDRO MUNARI HOUSE
CONGRATULATIONS
Congratulations in choosing a unique product to enhance your slot car track
diorama. This can truly be described as a product born from a love for slot cars.
Buying this product have made you a member of a very special family, yes you are
not dealing with a faceless business, but rather a family of slot car fanatics.
We put hours of research and skill and more importantly love into our products and it
is wonderful to share our love for slot cars with you. May you enjoy the build and
have years of joy having it as part of your trackside diorama.
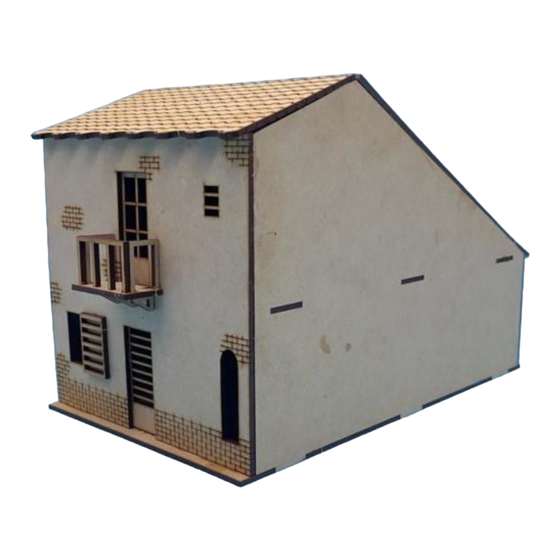
On 6 May 1906 the first edition of the Targa Florio got under way. It is still
considered by many to be the first real car race and an all-time great classic. It took
place next to the sea and on the narrow winding roads of the Sicilian mountains in
Italy and it passed through a couple of towns, including Colessano. In time the
buildings at the hairpin corner in Colessano would become a world renown
landmark. The names of local racing heroes were painted on many buildings in the
town and specifically at the hairpin. The Race Track Scenics collection of Targa
Florio buildings strive to recreate the ambiance of the trackside of the famous race
track with some buildings very close to replicas and certainly all in the style of
Collessano's architecture during the 60s and 70s of the previous century. RTS have
decided to name the different buildings in honour of Italian Targa Florio racers that
excelled over the years in the TF race. SANDRO MUNARI and his co-pilot won the
1972 TF race in a Ferrari
312 PB, shown in the image
below. The second house on
the left side of the Via Isnello just after the hairpin (in the photo below), is the Sandro
Munari house.
1
Advertisement
Table of Contents

Related Manuals for RTS 10D12C


Summary of Contents for RTS 10D12C
- Page 1 Collessano’s architecture during the 60s and 70s of the previous century. RTS have decided to name the different buildings in honour of Italian Targa Florio racers that excelled over the years in the TF race.
- Page 2 WARRANTY This product is covered by a comprehensive money-back warranty to ensure your absolute satisfaction with your purchase. WHO ARE WE? This product is brought to you by racetrackscenics.com. If you have not done so already, please visit our website today. You are also most welcome to visit the Facebook pages “Race Track Scenics Slot Car Scenery”...
- Page 3 choice. Our advice is to see what works best for you, there are no right or wrong, both types will produce a sturdy structure. You will only need a small amount of glue and remember to look for the surfaces that will be in contact in the end and do not only apply glue to the lugs and sleeves.
- Page 4 for the undercoat of all parts works quite well from personal experience. You can choose the paint of your preference, whether it is oil or water based. Cleaning brushes and rollers are just so much easier if you use a water base paint. A chalk paste can give a unique finish to walls and give a weathered look if so desired.
- Page 5 Now have a look at the diagram where all the laser cut parts are shown and numbered from A to R. Next, we will identify which is which and where they fit in. The front wall (A), the rear wall (B) and the side walls (C 1-2) fit into the foundation floor (F).
- Page 6 LET’S GET STARTED WITH THE ASSEMBLY We would suggest that you complete the assembly of the front and rear walls before you start on the main structure. On the rear wall there are two louvres (H 1-2) and two window frames (J 1-2). The louvres can be glued to the outside, but the window frames must be glued on from the inside.
- Page 7 FINISHING & BRANDING We leave the finishing to your imagination and your taste. Do whatever you think will transform this completed building as an integral part of your race track diorama. CONCLUSION We sincerely hoped you have enjoyed this assembly and finishing. Please remember to give us some feedback and either send or post some pictures of this product on your track.
Need help?
Do you have a question about the 10D12C and is the answer not in the manual?
Questions and answers