Advertisement
ASSEMBLY INSTRUCTIONS
RTS 5M10 REIMS-GUEUX MARSHAL HUT
CONGRATULATIONS
Congratulations in choosing a unique product to enhance your slot car track
diorama. This can truly be described as a product born from a love for slot cars.
Buying this product have made you a member of a very special family, yes you are
not dealing with a faceless business, but rather a family of slot car fanatics.
We put hours of research and skill and more importantly love into our products and it
is wonderful to share our love for slot cars with you. May you enjoy the build and
have years of joy having it as part of your trackside diorama.
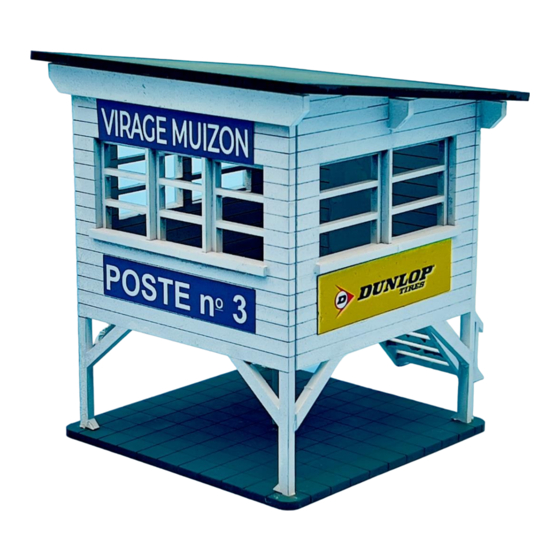
This product is a replica of a Reims-Gueux Raceway Marshal Hut. A number of
these structures were positioned around the track at strategic points to give the
marshals a good viewing position. A number of these were identical and we have
recreated a scale model of one that was salvaged and not demolished. We believe
that we have captured the ambiance of this iconic humble structure and believe that
it will enhance any slot car track diorama.
1
Advertisement
Table of Contents

Summary of Contents for RTS 5M10 REIMS-GUEUX MARSHAL HUT
- Page 1 ASSEMBLY INSTRUCTIONS RTS 5M10 REIMS-GUEUX MARSHAL HUT CONGRATULATIONS Congratulations in choosing a unique product to enhance your slot car track diorama. This can truly be described as a product born from a love for slot cars. Buying this product have made you a member of a very special family, yes you are not dealing with a faceless business, but rather a family of slot car fanatics.
-
Page 2: Warranty
WARRANTY This product is covered by a comprehensive money-back warranty to ensure your absolute satisfaction with your purchase. WHO ARE WE? This product is brought to you by racetrackscenics.com. If you have not done so already, please visit our website today. You are also most welcome to visit the Facebook pages “Race Track Scenics Slot Car Scenery”... - Page 3 choice. Our advice is to see what works best for you, there are no right or wrong, both types will produce a sturdy structure. You will only need a small amount of glue and remember to look for the surfaces that will be in contact in the end and do not only apply glue to the lugs and sleeves.
-
Page 4: Familiarize Yourself
FAMILIARIZE YOURSELF Have a look at two photos of the finished product. - Page 5 Now have a look at the diagram where all the laser cut parts are shown and numbered from A to Q. Next, we will identify which is which and where they fit in.
- Page 6 You will notice that this kit has double skin walls. The four walls are numbered (B1 & B2) for the front wall, (C1 & C2) for the rear wall and (F1 & F2) & (G1 & G2) for the two side walls. All of the outer skins fit into the foundation slab (A) and the inner skins into the suspended floor (E).
- Page 7 WORD OF ADVICE We would strongly advise you to do a quick dry assembly before you start gluing the laser cut parts together. Lay out all the parts on your work surface and make sure that the parts are not upside down or mirrored. In most instances it will make no difference, but in others it may be crucial to ensure a perfect product in the end.
- Page 8 any two parts touch each other. The nubs that fit into the slots stop any movement, but the glue holds all the parts together. The parts must therefore have glue where they touch each other (only a little bit of glue is required). Apply some gentle pressure on the floor to ensure a snug fit.
- Page 9 The following artwork is supplied as part of the kit. CONCLUSION We sincerely hoped you have enjoyed this assembly and finishing. Please remember to give us some feedback and either send or post some pictures of this product on your track.


Need help?
Do you have a question about the 5M10 REIMS-GUEUX MARSHAL HUT and is the answer not in the manual?
Questions and answers