Table of Contents
Advertisement
Quick Links
Download this manual
See also:
Instruction Manual
Advertisement
Table of Contents

Related Manuals for StarTech.com PM1115UMF


Summary of Contents for StarTech.com PM1115UMF
-
Page 1: Quick Installation Guide
MFP Server Quick Installation Guide Version: 1.0 (February, 2006) -
Page 2: Product Introduction
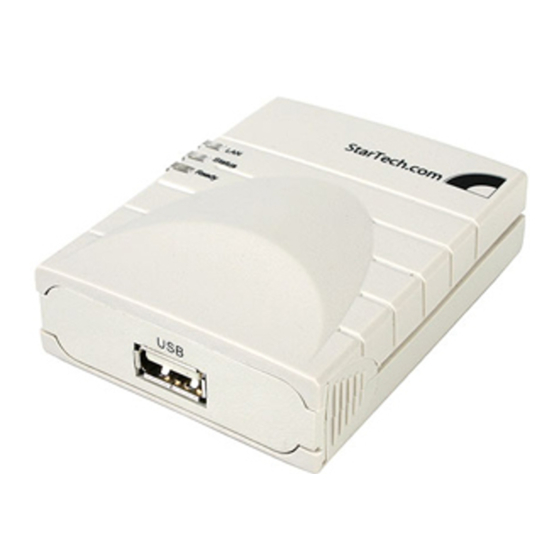
1. Product Introduction Thank you for purchasing and using our MFP server. This MFP server allows your Multi-function, all-in-one printer (called for short: MFP) or printer to become a shared device on the network. Unlike many print servers, it can communicate with MFP and printer as if it is connected directly to your computer. -
Page 3: Product Package
2. Product Package This package contains the following components: One MFP Server One Antenna (Only for Wireless MFP Server) One Power Adapter One Quick Installation Guide One CD-ROM (Including all the software utilities, drivers and User’s Manual) -
Page 4: Getting Started
3. Getting Started Before you start, you should have: One computer with Windows 2000 SP4 above and Windows XP SP1 above One MFP or printer with USB port and an installation CD One Category 5 Ethernet Cable One USB Cable 3.1 Hardware Installation Procedure 1. -
Page 5: Software Installation Procedure
3.2 Software Installation Procedure Before you start, you should check your computer’s operating system. This program can be run in Windows 2000 SP4 above and Windows XP SP1 above. Please follow the steps below to start installation. For the installation procedures in Windows 98SE/ME/NT and other operating systems, please refer to the manual of the MFP Server. - Page 6 3. The “MFP Server Utilities - InstallShield Wizard” is displayed, click "Next".
- Page 7 4. Click “Next” to install the MFP Server utilities in the default folder or click “Change” to specify the destination folder where you would like to install the MFP Server utilities.
- Page 8 5. The system starts installing the MFP Server Utilities.
- Page 9 6. The “MFP Server Configuration” screen is displayed. If you want to configure the MFP Server, please click “”Next” directly. Or you can select “No, I will configure the MFP Server later” and click “Next” to complete the installation. The following steps are for MFP Server Configuration.
- Page 10 7. The MFP Server List will auto search the MFP Servers in the network. Select the MFP Server you wan to setup and click “Next” to continue. 8. Enter the “User Name” and “Password” of the MFP Server you have selected to login the MFP Server.
- Page 11 9. Set the “Alias Name” and the “MFP Server Description” to the MFP Server here. Click on “Next”. Note: You can define the location or other information of the MFP Server for easy to find the MFP by filling “MFP Server Description”.
- Page 12 10. Setup the IP address of the MFP Server and click “Next”. Note: The MFP Server IP Address should be in the same network segment with the connected computer. If you are not sure how to set up the IP Address, you are recommended to select “Assign MFP Server IP Address“...
- Page 13 11. The configurations are finished. Please click “Finish” to apply new settings. 12. Click “Finish” to complete the installation.
- Page 14 3.2 MFP Server Utilities After the installation is completed, there will be three utilities and a text file in the MFP Server’s Program folder. MFP Server Control Manager – Allows you to manage the connection between the MFP and your computer for sharing MFP function. Server Configuration –...
-
Page 15: Install The Mfp Drivers/Utilities
3.3 Install the MFP Drivers/Utilities When the installation is completed, the “MFP Server Control Manager” will be popped up. It will automatically find the MFP Servers and the connected MFPs in the network and show it in the “MFP Server List”. To start installing the MFP Drivers/Utilities, please follow the steps below. - Page 16 2. The following message is displayed to warn you that you have to follow the installation instructions in the manual of the MFP. If the MFP is requiring you to connect the MFP to your computer directly, please click “Connect”. Tip: Some MFP requires users to install the drivers/utilities before connecting the MFP to your computer, please make sure you have followed the...
- Page 17 3. If the MFP has required you to plug the USB cable between the MFP and your computer, please click “Yes”. 4. Before creating the connection, you have to install two kinds of drivers: the drivers for MFP Server and the drivers for MFP. Please click “Next” to start the installation.
- Page 18 6. Select “Install the software automatically (Recommended)” to auto install the “MFP Server Enhanced Controller” driver, then click “Next”. 7. The driver is installed automatically. Click “Finish” to complete this driver installation.
- Page 19 8. The following message is displayed to remind you that you are now installing the MFP Drivers. When you are sure that the MFP has been installed completely, please click “Finish”. Tip 1: The Windows system will auto detect the MFP drivers need to be installed.
-
Page 20: Using The Mfp
4. Using the MFP After you have followed the install wizard to finish the MFP installation, the MFP is now connected to your computer. You can start sharing print, scan or card reader functions provided by the MFP. Tip 1: If you have finished using the MFP, please click “Disconnect”... -
Page 21: Share Print
4.1 Share Print The MFP will be added to “Printers and Faxes” in the Windows after the MFP is installed. When you have connected to the MFP by clicking “Connect” in the “MFP Server Control Manager”, the MFP Server will auto create the connection between the MFP and your computer and then you can print a document just follows the same steps as usual. -
Page 22: Share Scan
4.2 Share Scan Most of the MFP provides scan utility for users. You can scan pictures or documents through the utility. In Windows XP, user can also scan from Windows XP scanning utility. An example: HP 1600 Series Utilities Windows XP Scanning Utility... -
Page 23: Share Card Reader
4.3 Share Card Reader If the MFP supports card reader function, you can read the files from the plugged card reader through the MFP Server.
Need help?
Do you have a question about the PM1115UMF and is the answer not in the manual?
Questions and answers