Follett Performance Plus REF5P Installation, Operation And Service Manual
Undercounter refrigerators
Hide thumbs
Also See for Performance Plus REF5P:
- Installation, operation and service manual (40 pages) ,
- Installation, operation and service manual (40 pages)
Table of Contents
Advertisement
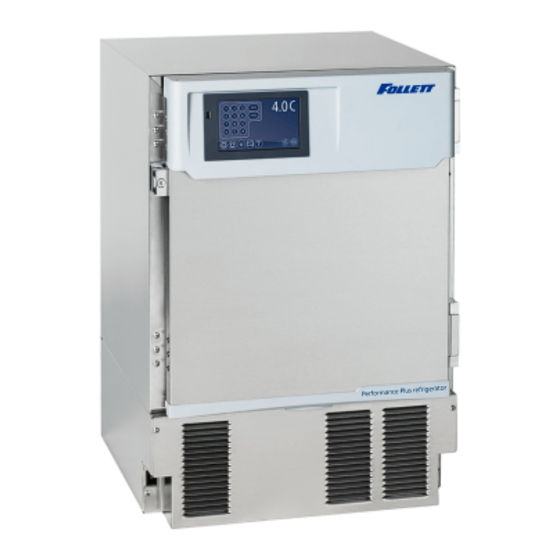
REF4P and REF5P and REF5BBP-T
Performance Plus
Undercounter Refrigerators
Installation, Operation and Service Manual
Serial numbers before K25542
REF4P
REF5P
01041755cvr
REF4P-T
REF5P-T
REF5BBP-T
Following installation, please forward this manual
01041755cvr
to the appropriate operations person.
801 Church Lane • Easton, PA 18040, USA
Order parts online:
Toll free (877) 612-5086 • +1 (610) 252-7301
www.follettice.com
www.follettice.com/healthcare
01041755R10
Advertisement
Table of Contents

Related Manuals for Follett Performance Plus REF5P


Summary of Contents for Follett Performance Plus REF5P
- Page 1 REF4P and REF5P and REF5BBP-T Performance Plus Undercounter Refrigerators Installation, Operation and Service Manual Serial numbers before K25542 REF4P REF5P 01041755cvr REF4P-T REF5P-T REF5BBP-T Following installation, please forward this manual 01041755cvr to the appropriate operations person. 801 Church Lane • Easton, PA 18040, USA Order parts online: Toll free (877) 612-5086 •...
-
Page 2: Table Of Contents
Changing Temperature Display from C to F ......................14 Sleep Function ..............................14 Temp Log ................................15 Alarming Functions ..............................15 Follett Keypad Lock .............................17 Controller Operation - Performance Plus Touchscreen ..................19 Use and care of the LCD Performance Plus Touchscreen .................19 Cleaning ..................................30 Annual Cleaning ..............................30... -
Page 3: Welcome To Follett
Before you Begin After uncrating and removing all packing material, inspect the equipment for concealed shipping damage. If damage is found, notify the shipper immediately and contact Follett Corporation so that we can help in the filing of a claim, if necessary. -
Page 4: Specifications
§ Full load: 4.1A § Minimum circuit ampacity: 15A § Connect to dedicated circuit, fuse or breaker § Maximum size of branch circuit overcurrent device: 15A § Follett recommends circuit be protected by GFCI Refrigeration Specifications Maximum Design Pressures (psi) Refrigerant... -
Page 5: Installation
Installation Installing Levelers Fig. 1 1. Remove levelers from plastic bag packed inside refrigerator (Fig. 1). 2. Tip refrigerator back and screw levelers in all the way to stop (they will extend 1/8" below base of REF). 3. Adjust levelers as needed to level REF in both directions. To access levelers, remove the lower front panel. -
Page 6: Installing Drawer
Installing Drawer Fig. 4 CAUTION! § Do not use casters on units with drawers. Personal injury or damage to unit could result. 1. Remove drawer packed as an accessory (Fig. 4). 2. Install the two rollers to the threaded holes on each side of the inside of the cabinet. - Page 7 3. Remove the screw from the white strap on the hinge side of the Fig. 7 wire channel (Fig. 7). Remove the control wire from the channel at the bottom door cap. The wire should be left hanging in the center of the door.
- Page 8 9. Remove screws and latch from refrigerator cabinet and the lock Fig. 11 from the door (Fig. 11). 10. Support door and remove screws attaching hinge to refrigerator Fig. 12 cabinet and remove the door (Fig. 12). 11. Cover hinge screw holes with screws removed from opposite side of door and door frame.
-
Page 9: Reversing The Door Swing - Optional (Units Serial #H94599 And Above)
Reversing the Door Swing – Optional (units Serial #H94599 Fig. 14 and above) Tools needed: § #2 Phillips head screwdriver § Flat-head screwdriver § Awl § Gloves § Safety glasses 1. Remove kick panel* and disconnect reed switch where applicable (Fig. 14). Disconnect the door sensor switch wires and grey control wire. - Page 10 7. Remove the wire and strain relief from the right side panel and Fig. 17 pull the communication cable through opening (Fig. 17). 8. Remove the screw from the white strap on the hinge side of the Fig. 18 wire channel (Carefully remove the control wire from the channel ensuring the insulation jacket does not tear.) Route through channel to opposite side of door.
- Page 11 14. Remove screws and latch from refrigerator cabinet and the lock Fig. 21 from the door (Fig. 21). 15. Support door and remove screws attaching hinge to refrigerator Fig. 22 cabinet and remove the door (Fig. 22). 16. Remove the hinge from the door. 17.
-
Page 12: Installing Glycerine Solution In Product Simulation Bottle
Installing Glycerine Solution in Product Simulation Bottle Fig. 23 (glycerine not included - P/N00959296) 1. Remove the bottle from the bracket located in the upper left side of the refrigerator (Fig. 23). 2. Remove the top and fill the bottle with a 50/50 solution of glycerine and water. -
Page 13: Operation
Operation The temperature control board and probe indicate when the refrigeration system is required to turn on and off. The refrigeration system removes heat from the cabinet interior and rejects it to the surrounding room air. When the cabinet interior temperature rises above the controller cut-in temperature, the controller turns the refrigeration system on. -
Page 14: Controller Operation - Performance Plus
If this set point does not meet your specific application needs, instructions for changing the set point are found below. Note: Follett presets its refrigeration system to hold product temperature at approximately 4.4 C (40 F). If you are using this in a food service application, and installing in accordance with NSF, you must set the control set- point to 3.3 C (38 F). -
Page 15: Temp Log
Temp Log High and low log display 1. Press the UP arrow to display the highest temperature the refrigerator has recorded since last reset or power cycle. 2. Press the DOWN arrow to display the lowest temperature that the refrigerator has recorded since last reset or power cycle. - Page 16 Alarm Codes When the unit senses an alarm, the display will flash the following codes. Value Description Temperature is above the High Alarm#1 set point. Temperature is below the low Alarm #1 set point. Temperature is above the High Alarm #2 set point. Temperature is below the Low Alarm #2 set point.
-
Page 17: Follett Keypad Lock
Controller Parameter Reset to restore factory parameters. Reset Follett Keypad Lock Default user passcode for first-time users User Code 01 is factory set by default to 1 2 3 4 5 6. Note: In order to continue using 1 2 3 4 5 6 as a default, user-selectable programming codes must be stored in slots 02 to 40. - Page 18 To Enter or Change a User Code 1. Press 3 6 5, the , followed by the Master Code, followed by ENTER. 5 Chirps will be heard. 2. Enter the user ID (a two digit code from 00 to 40), followed by ENTER. 3 chirps will be heard. 3.
-
Page 19: Controller Operation - Performance Plus Touchscreen
Controller Operation - Performance Plus Touchscreen Use and care of the LCD Performance Plus Touchscreen The LCD touchscreen utilizes capacitive touch technology. This will allow you to engage the functionality by touching the screen with your fingers, even while you are wearing latex or cotton gloves. Functionality will not engage by touching with an inanimate object, such as a pen. - Page 20 High and low temperature display Fig. 27 From the home screen touch the temperature display in the upper right corner. The high/low temperatures will appear below the temperature display. To the left of the high/ low temperature a time and date stamp will be displayed.
- Page 21 System Information Fig. 32 § Touch the System Info icon to display the model number, unit serial number and software version. Touch the checkbox icon in the lower right corner of the box to clear. Alarm or Alert Notifications Fig. 33 §...
- Page 22 Start-up alarm delay Fig. 34 The Performance Plus unit has a 120 minute time delay between when the unit is energized to when the temperature alarms become active. HIGH 41.5 F This delay can be changed in parameters in the controller under Alarm 35.1 F Startup Delay.
- Page 23 Fig. 36 Information Logs 38.4 F § All available graphs, data logs and event logs are accessed through HIGH 41.5 F the Information Logs function. The home screen in the Information 35.1 F + Zoom in Logs section displays the product (P3) temperature graph with (1 - 10) - Zoom out one week’s data.
- Page 24 – Master User Code 01 is factory set by default to 1 2 3 4 5 6. – User Codes 01 to 40 are available for user-programming. – Each time a button is pressed, a chirp will be heard. – See Page 12 for detailed Follett Keypad Lock instructions. REF4P, REF5P and REF5BBP-T Undercounter Refrigerators...
- Page 25 Changing and Adding the User Codes Fig. 42 1. Touch Settings icon. 38.4 F Sleep Function Display Setup (cont) 1. Touch Advanced Settings, enter your 4-digit user access Sleep Timer code (factory default is 1 1 1 1) in the keypad that appears, and Screen Saver Function temperature touch the checkmark icon...
- Page 26 Advanced Setting - Touchscreen Parameter Default Value Range Description Set Time and Date Time 7:45 0- 12 Holds Hour AM/PM AM, PM Holds AM/PM Month 1- 12 Month 1- 31 Year 2013 2010- 2099 Year System Information Serial Number E12345 —...
- Page 27 Parameter Default Value Range Description Alarm 1 Low –46 C (–50 F) - 50 - User Set Point Low temperature to activate Alarm 1. Temp Alarm 1 Probe Alarm (P3) Control (P1), Defrost (P2), Probe for Alarm 1. Alarm (P3) Alarm 1 Reset 0- 10 Temperature difference to reset Alarm 1.
- Page 28 Parameter Default Value Range Description Power Alarm Yes, No Defines if relay should open/close on power alarm. Relay Power Alarm 5 minutes 0 - 120 minutes Delay before sounding the power alarm. Timer Battery Level Battery Level Data Storage Yes, No Overwrite circular data? Data Full Alarm Yes, No...
- Page 29 Parameter Default Value Range Description P6 Graph Display No Yes, No Determines whether to graph probe 6 P7 Graph Display No Yes, No Determines whether to graph probe 7 P8 Graph Display No Yes, No Determines whether to graph probe 8 Door Heater Door Heater Yes, No...
-
Page 30: Cleaning
5. Adjust latch and or striker as necessary for proper door closure. Slide-out Compressor Tray Fig. 46 Follett’s slide-out compressor tray allows technicians to partially slide the condensing unit from the freezer back without cutting refrigerant lines. 1. Remove rear panel (Fig. 46.1). -
Page 31: Removing Drawers
Removing Drawers Fig. 47 1. Pull drawer forward to stop (Fig. 47.1). 2. Lift drawer front to free front rollers from sides (Fig. 47.2). 3. Still lifted, pull drawer forward to free back rollers from sides (Fig. 47.3). Removing Slides 1. -
Page 32: Controller Replacement
Controller Replacement 1. Open the door using the keypad lock and prop the door open, Fig. 49 so it doesn’t close during the battery installation. Reference the keypad lock instructions in the service manual on page 11. 2. Turn power switch to the OFF position or unplug the unit from the power supply. -
Page 33: Wiring Diagram
Wiring Diagram All Units (Serial numbers below E98967) 120VAC FZR SERIES ONLY 120VAC 12VDC REF4P, REF5P and REF5BBP-T Undercounter Refrigerators... -
Page 34: Wiring Diagram
Wiring Diagram Touchscreen Units (Serial numbers E98967 and above) FZR SERIES ONLY DEFROST RELAY COMPRESSOR RELAY BLUE REF4P, REF5P and REF5BBP-T Undercounter Refrigerators... - Page 35 Basic Units (Serial Number E98967 and above) REF4P, REF5P and REF5BBP-T Undercounter Refrigerators...
-
Page 36: Refrigeration System
This change can adversely affect the performance of your refrigerator. Therefore, Follett recommends that if hoses are ever connected to the refrigeration system for service, the refrigerant should be recovered, the system evacuated, and recharged by weighing in the correct refrigerant charge. -
Page 37: Compressor Information
Refrigeration System Diagram EVAPORATOR HIGH PRESSURE VAPOR CAPILLARY TUBE CONDENSER COMPRESSOR HIGH PRESSURE LIQUID LOW PRESSURE LIQUID LOW PRESSURE VAPOR FILTER-DRIER Compressor Information Danfoss model NF6.1FX.2 Run load amps (RLA) Lock rotor amps (LRA) 22.2 Ohms start winding to common Ohms run winding to common Ohms start winding to run winding REF4P, REF5P and REF5BBP-T Undercounter Refrigerators... -
Page 38: Troubleshooting
Recover, evaluate and weigh in correct charge. Plugged capillary tube. Replace capillary tube and filter drier. Inefficient compressor. Consult technical services. If problems persist after following this basic troubleshooting guide, call Follett’s technical service group at (877) 612-5086. REF4P, REF5P and REF5BBP-T Undercounter Refrigerators... -
Page 39: Accessories
§ Reference instruction 01057579 (packed with digital data logger) Stacking Kit Legacy to Performance Plus (P/N 01067172) § Reference instruction 01067180 Note: new kickplates may need to be ordered, please contact Follett for more information. Stacking Kit Countertop to Performance Plus (includes one straight kick plate) (P/N 01100759) §... -
Page 40: Replacement Parts
Replacement Parts Evaporator Reference # Description Part # Evaporator REF fan motor with hardware 01053818 Evaporator cover REF4P/FZR4P 01049915 Evaporator cover REF5P/FZR5P 01049881 Evaporator drain pan 01037498 Thermal break cover REFP/FZRP (set of 6) 01053875 Not shown Shelf support REF4P/FZR4P 01062785 Shelf support REF5P/FZR5P 01062793... -
Page 41: Condensing Unit
Condensing Unit Reference # Description Part # REF R134A Compressor Service Kit 01280304 Condenser coil (includes fan and base) 01280320 Condenser fan motor 01062363 Condenser fan blade 01062371 Filter drier cap tube 01034230 Compressor start components 01053842 Not shown Not shown Condensate pan 01012061 REF4P, REF5P and REF5BBP-T Undercounter Refrigerators... - Page 42 0104175518 REF4P, REF5P and REF5BBP-T Undercounter Refrigerators...
-
Page 43: Hardware
Hardware Reference # Description Part # Façade, basic controller with hardware - Serial numbers before K29695 01053586 Not shown Façade, basic controller with key pad & hardware - Serial numbers before K29695 01053594 Not shown Façade mounting bracket 01062702 Not shown Façade, Performance Plus touchscreen controller with hardware - Serial numbers before 01053602 K29695... -
Page 44: Hardware And Electrical Components
Hardware and Electrical Components Reference # Description Part # Not shown Main control board (serial numbers below E98967) 01062934 Not shown Main control board (serial numbers E98967 and above) 01107598 Not shown Main control board with keypad (serial numbers below E98967) 01062959 Not shown Main control board with keypad (serial numbers E98967 and above) - Page 45 REF4P, REF5P and REF5BBP-T Undercounter Refrigerators...
- Page 46 Le rogamos consulte el manual de instalación y de instrucciones adjunto, ya que es muy importante que la instalación se realice según las especificaciones de fábrica para que el equipo funcione a su máxima eficiencia. Follett LLC no se hace responsable de los daños indirectos, costos, gastos por conexión y desconexión o pérdidas por causa de defecto de la máquina.
- Page 47 Registrazione della garanzia e valutazione dell’attrezzatura Grazie per aver acquistato un dispositivo Follett®. Ci auguriamo che il nostro prodotto soddisfi o superi le Sue aspettative, in quanto il nostro obiettivo è quello di offrire prodotti e servizi di alta qualità che soddisfino pienamente le vostre esigenze! La preghiamo di leggere attentamente il manuale per l’installazione e per l’uso allegato.
- Page 48 Garantiregistrering och utvärdering av utrustning Tack för att du köpt utrustning från Follett ® . Vi hoppas att du ska tycka att den uppfyller eller överträffar dina förväntningar, då vårt mål är att leverera produkter och tjänster av högt värde som gör dig helt nöjd! Studera medföljande installations- och bruksanvisning.
Need help?
Do you have a question about the Performance Plus REF5P and is the answer not in the manual?
Questions and answers