Follett REF1 Installation Manual
High-performance compact refrigerators
Hide thumbs
Also See for REF1:
- Installation, operation and service manual (19 pages) ,
- Installation, operation and service manual (28 pages) ,
- Installation, operation and service manual (32 pages)
Table of Contents
Advertisement
Quick Links
H E A LT H C A R E
Welcome to Follett Products LLC
Follett Products equipment enjoys a well-deserved reputation for excellent performance, long-term reliability and
outstanding after-the-sale support. To ensure that this equipment delivers that same degree of service, review this
guide carefully before you begin your installation.
Should you need technical help, please call our Technical Service group at (877) 612-5086 or (610) 252-7301.
Please have your model number, serial number and complete and detailed explanation of the problem when
contacting Technical Service.
Getting Started
After uncrating and removing all packing material, inspect the equipment for concealed shipping damage. All
freight is to be inspected upon delivery. If visible signs of damage exist, please refuse delivery or sign your delivery
receipt "damaged." Follett Customer Service must be notified within 48 hours. Wherever possible, please include
detailed photos of the damage with the original packaging so that we may start the freight claim process.
801 Church Lane • Easton, PA 18040, USA
Toll free (877) 612-5086 • +1 (610) 252-7301
www.follettice.com/healthcare
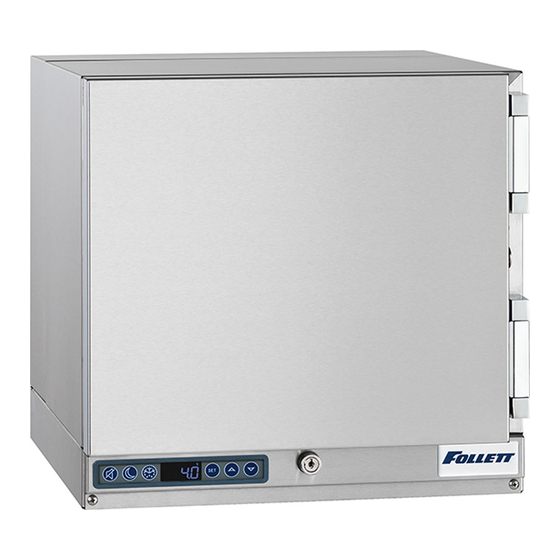
High-Performance Compact Refrigerators
TM
Please visit https://www.follettice.com/technicaldocuments
for the Operation and Service manual for your unit
REF1
REF1/REF2
Installation Guide
After Serial Number H55798
REF2
Order parts online:
www.follettice.com
01351493R00
Advertisement
Table of Contents

Related Manuals for Follett REF1


Summary of Contents for Follett REF1
- Page 1 If visible signs of damage exist, please refuse delivery or sign your delivery receipt "damaged." Follett Customer Service must be notified within 48 hours. Wherever possible, please include detailed photos of the damage with the original packaging so that we may start the freight claim process.
-
Page 2: Specifications
Installation Locating the Refrigerator Performance of REF1 and REF2 is affected by ambient temperature and location. To ensure proper performance, please refer to the following drawings and confirm that the clearance requirements are met. There is no clearance requirement for the back of the refrigerator so it can be placed against the wall. - Page 3 Requires 6" (15.3 cm) clearance on both sides SHELF SHELF 6" (15.3 cm) minimum air clearance required on 6" (15.3 cm) minimum air both sides clearance required on both sides REF1/REF2 Compact Refrigerators H E A LT H C A R E...
- Page 4 NSF, you must remove the probe from the bottle. NSF requires that air temperature be displayed. 5. Plug in the refrigerator and return the power switch to ON Fig. 3 (Fig. 3). REF1/REF2 Compact Refrigerators H E A LT H C A R E...
- Page 5 For protection, safety goggles (and/or face shield) should be worn when removing and/or installing the hinge spring. 1. Use flat screwdriver to carefully remove hinge covers (Fig. 5). REF1/REF2 Compact Refrigerators H E A LT H C A R E...
- Page 6 5. Support door and remove screws attaching hinge to refrigerator Fig. 8 cabinet and remove the door (Fig. 8). 6. Cover hinge screw holes with screws removed from opposite side of door and door frame. REF1/REF2 Compact Refrigerators H E A LT H C A R E...
- Page 7 11. Reinstall the door on the opposite side of the doorframe. Adjust Fig. 10 if needed. 12. Reinstall screws (torqued to 25 in-lbs) (Fig. 10). 13. Insert bottom of spring kit onto bottom hinge pin (Fig. 11). Fig. 11 REF1/REF2 Compact Refrigerators H E A LT H C A R E...
- Page 8 1. Remove the tool and insert it (Phillips screwdriver, Allen key, drift pin) into hole nearest the hinge bracket (Fig. 13). 2. Rotate top of spring counter-clockwise to increase the spring Fig. 14 torque (Fig. 14). REF1/REF2 Compact Refrigerators H E A LT H C A R E...
- Page 9 Installing Third-party Temperature Probe Fig. 17 Facilities using a third-party alarming and/or temperature monitoring system need to install the third-party probe in the refrigerator. Follett recommends removing any stored product before performing this procedure. 1. Move the power switch on lower rear panel to OFF and unplug the refrigerator.
- Page 10 13. Connect non-probe end of wiring to monitoring device. 14. Plug in the refrigerator and return the power switch to ON. * Permagum is a registered trademark of the Presstite Engineering Company. REF1/REF2 Compact Refrigerators H E A LT H C A R E...
-
Page 11: Annual Cleaning
Patient Room (PR) models no less than one (1) time per year. Individual facility guidelines may specify cleaning the condensate pan more frequently. Follett REF 1/2-PR models are equipped with a slide out accessory panel allowing for easy access and cleaning of the condensate drain pan. -
Page 12: Temperature Control
If this set point does not meet your specific application needs, instructions for changing the set point are found below. Note: Follett presets its refrigeration system to hold product temperature at approximately 4.4 C (40 F). If you are using this in a food service application, and installing in accordance with NSF, you must set the control set-point to 3.3 C (38 F). -
Page 13: Controller Security
2. Press the DOWN arrow to display the lowest temperature recorded since last reset or power cycle. Reset high and low log 1. Press UP or DOWN arrow until recorded temperature is displayed. 2. Press and hold SET until RST is displayed. REF1/REF2 Compact Refrigerators H E A LT H C A R E... -
Page 14: Alarming Functions
Error saving new parameter values to permanent storage. Incomplete model configuration. Number/membrane is sticking. Key shorted on user interface. Communication error with user interface. Communication error with Machine Control. REF1/REF2 Compact Refrigerators H E A LT H C A R E... -
Page 15: Advanced Settings
4. Use the UP and DOWN arrows to navigate the sub menu of the parameter. Press SET to accept and the display will return to the parameter list (after 30 seconds the display will return to the temperature display). REF1/REF2 Compact Refrigerators H E A LT H C A R E... -
Page 16: Follett Keypad Lock
3. Press 4 4 3 3 5 5 [ENTER] (3 chirps will be heard). 4. Press 4 4 3 3 5 5 [ENTER] (5 chirps will be heard). The new code has been entered for the ID. REF1/REF2 Compact Refrigerators H E A LT H C A R E... - Page 17 3. Press 3 3 5, # (3 chirps will be heard) (335 = DEL). 4. Press 1 5 [ENTER] (2 chirps will be heard). 5. Press 3 3 5, # (5 chirps will be heard). REF1/REF2 Compact Refrigerators H E A LT H C A R E...
-
Page 18: Wiring Diagram
Wiring Diagram REF1/REF2 Compact Refrigerators H E A LT H C A R E... -
Page 19: Refrigeration System Diagram
Danfoss model TL2.5 Run load amps (RLA) Lock rotor amps (LRA) Ohms start winding to common Ohms run winding to common Ohms start winding to run winding 10.2 REF1/REF2 Compact Refrigerators H E A LT H C A R E... -
Page 20: Refrigerator Troubleshooting
Warranty Registration and Equipment Evaluation Thank you for purchasing Follett ® equipment. We hope you find that our equipment meets or exceeds your expectations, as our goal is to deliver high value products and services that earn your complete satisfaction! Please review the enclosed installation and operations manual.
Need help?
Do you have a question about the REF1 and is the answer not in the manual?
Questions and answers