Table of Contents
Advertisement
Quick Links
INSTRUCTION MANUAL
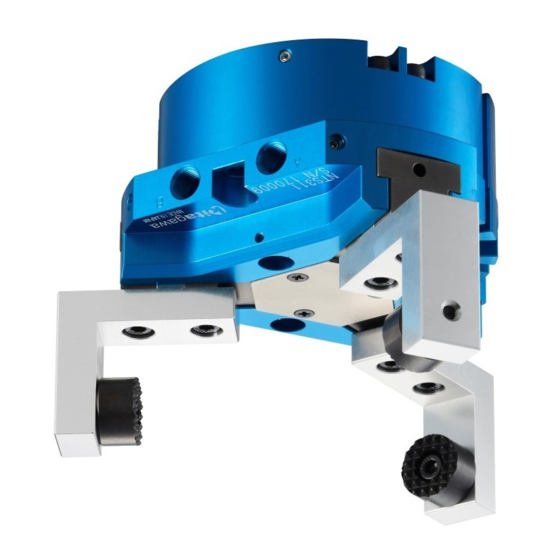
MODEL NTS3
Collaborative Robot Mounting Unit
3-jaw Parallel Gripper
・ This Instruction Manual has been prepared for intended use for
production engineers and maintenance persons who operate this
product. When the beginners use this product, be sure to receive the
guidance from skilled persons, sales agents, or us in advance.
・ Before installing, using, or maintaining this product, read carefully the
safety precautions given in this manual so as to understand them
completely. If you do not heed given instructions or safety
precautions, serious human accidents, death, or physical damage
may occur.
・ Store this manual with care in the specified place at hand, and reread
it as necessary for correct use of the product.
・ Please contact the sales agent if you have any uncertainty or doubt
about this manual.
Ha
za
rd
MA1524YHG
Version1.10 (20230802)
Advertisement
Table of Contents

Subscribe to Our Youtube Channel
Related Manuals for Kitagawa NTS3


Summary of Contents for Kitagawa NTS3
- Page 1 MA1524YHG Version1.10 (20230802) INSTRUCTION MANUAL MODEL NTS3 Collaborative Robot Mounting Unit 3-jaw Parallel Gripper ・ This Instruction Manual has been prepared for intended use for production engineers and maintenance persons who operate this product. When the beginners use this product, be sure to receive the guidance from skilled persons, sales agents, or us in advance.
- Page 3 Preface This manual provides detailed information on the 3-jaw parallel gripper (model NTS3) so that you can understand its performance and functions and use it safely and correctly. Before using this gripper, read this manual carefully to understand how to use the gripper correctly.
- Page 4 Kitagawa. Also, the use of parts other than Kitagawa’s genuine parts will void the warranty.
-
Page 5: Table Of Contents
Contents 1. Structural Drawing and Parts List 1-1. Mounting parts configuration 1-2. Structural drawing 1-3. Seal list 1-4. Parts list 1-5. Mounting parts list 2. Important Safety Precautions 3. Specifications 3-1. Specification table 3-2. Gripping force 4. Use 5. Design of Jaws 5-1. -
Page 6: Structural Drawing And Parts List
ISO9409-1-50-4-M6. It cannot be installed on collaborative robots with other mounting standards. Collaborative Robot Gripper (Prepared by the customer) adapter Base Jaw The model indication is as follows: NTS3 11 Series Size NTS3 NBR seal... - Page 7 The models of the Gripper Mounting Kit are as follows Mounting Standard: Conforms to ISO9409-1-50-4-M6 NTS3 11 - C Series Size Utilization NTS3 Collaborative Robot Air equipment set HP – A188 This equipment set includes solenoid valves, one-touch joints, and other air equipment to operate the grippers.
-
Page 8: Structural Drawing
1-2. Structural drawing Master jaw Cover Plunger Body Piston Rear body 1-3. Seal list Model NTS311 X-ring X118 X-ring X232 O-ring S71 O-ring P4... -
Page 9: Parts List
1-4. Parts list ① Without safety mechanism Parts name Quantity No. Parts name Quantity 1 Body 202 Shaft packing 2 Rear body 203 Piston packing 3 Plunger 204 O-ring A 4 Cover 205 O-ring B 5 Master jaw 206 Parallel pin 6 Piston 207 Setscrew 200 Piston fixing bolt... - Page 10 1-5.Mounting parts list 1-5-1. Hand mounting set Parts name Quantity No. Parts name Quantity Adapter (Conforms to ISO9409-1-50-4-M6 5 Positioning pin mounting standard) 2 Bushing 6 Gripper mounting bolt Speed Controller 3 Positioning pin SC3W-6-6 manufactured by CKD Reed Switch 4 Adapter mounting bolt SW-F2H3 manufactured by CKD (Lead wire length 3m)...
- Page 11 1-5-2. Air equipment set ※ Parts name Quantity No. Parts name Quantity Single elbow 1 Air hose GWL6-M5 manufactured by CKD Solenoid valve Single elbow 4GA230R-C6-E03-3 GWL6-6 manufactured by CKD manufactured by CKD Silencer Single straight SLW-6A manufactured by CKD GWS6-6 manufactured by CKD Filter regulator W1000-6-W-B3W...
-
Page 12: Important Safety Precautions
Important Safety Precautions Important safety precautions that particularly you should know or follow are summarized below. Please read them before starting to use the product. Failure to follow the safety precautions below will result ! DANGER in death or serious injuries. Be sure to turn off the main power supply when installing, checking, oiling, or replacing the gripper. - Page 13 Failure to follow the safety precautions below will result DANGER in death or serious injuries. Do not modify the gripper. ● Not only the gripper is damaged but also the gripper and fixed workpiece may fly out. If using the gripper as a workpiece fixture when the workpiece is drilled, deburred, welded, or modified additionally, confirm the specifications.
- Page 14 Failure to follow the safety precautions below will result DANGER in death or serious injuries. Use the gripper in accordance with the legal safety standards. ● Use the gripper in accordance with the legal safety standards defined by each country, such as installation safeguards safety covers.
- Page 15 Failure to follow the safety precautions below will WARNING result in death or serious injuries. Do not operate the machine after drinking alcohol or taking medicine. ● Impaired judgment or operation mistake may cause serious hazards. Medicine Alcohol Do not wear clothing or accessories such as a necktie, necklace, etc. which are easy to be caught in.
-
Page 16: Specifications
Specifications 3-1. Specification table (Standard gripping force) Model Fluid used Air pressure 0.2 – 0.8 Operating air pressure (MPa) Ambient temperature 5 – 60 (°C) range Jaw stroke in diameter (mm) Cylinder internal volume (reciprocation) Repeatability ±0.01 (mm) Body mass 1.21 (kg) 30 –... -
Page 17: Gripping Force
3-2. Gripping force ① Model selection Perform the following calculation and select the model that provides a gripping force exceeding the calculation result, though a gripping force varies depending on the shapes of jaws created by the customer and conveyed workpiece or the friction coefficient. - Page 18 ■NTS311 2700 2500 2300 2100 1900 1700 1500 1300 1100 100 120 140 160 把持点までの距離 L(mm) Distance up to grip point L (mm) ● Determine the distance up to a grip point L as short as possible when designing the jaws. Also, the distance up to a grip point L should be used within a range shown in graph.
-
Page 19: Use
● Do not modify the gripper. Using the modified product could cause unexpected accidents. Kitagawa shall not be held liable for human accidents, death, damage, or loss that occurred due to the modification. ● If using the gripper as a workpiece fixture when the workpiece is drilled, deburred, welded, or modified additionally, confirm the specifications. -
Page 20: Design Of Jaws
Design of Jaws 5-1. Designing jaws to be installed on the gripper When designing the jaws to be mounted on the base jaws, refer to the base jaw dimensions below. The base jaws do not have grooves for left and right positioning. Model NTS-BJ311C 18.5... -
Page 21: Designing Base Jaws To Be Installed On The Gripper
5-2. Designing base jaws to be installed on the gripper When designing base jaws to be installed on the gripper, form the installation face to the master jaw as shown below. Base jaw Gripper Model NTS 311 28.5 18.5 * Dimensions D, G, and H in the table are used for positioning the jaws. Dimension D is used for positioning in the lateral direction, and dimensions G and H are used for positioning in the longitudinal direction. -
Page 22: Installation
Installation 6-1. Adapter Installation Adapter mounting bolt Install the bushing and positioning Adapter pin on the robot's end effector (Complies with mounting surface and attach the ISO9409-1-50-4-M6) adapter. Secure the adapter with the four adapter mounting bolts. Positioning pin Bushing Collaborative robot End-effector mounting surface 6-2. - Page 23 6-2. Base Jaw Installation Jaw fixing bolt (To be prepared by the When you select our base jaws, customer) install them using Base jaw mounting bolt holes (To be prepared by the positioning pins. The figures in customer) this section are shown with the base jaws to be prepared by the customer, so please prepare the Positioning pin...
-
Page 24: Connecting The Air Piping
6-3. Connecting the air piping Attach a speed controller to the air supply port to open and close the jaws. Refer to the manufacturer's instructions for how to handle the speed controller. After connecting the piping, verify that there are no air leaks and that the gripper operates normally. Lock Nut Speed controller Recommended tightening torque for lock nut... -
Page 25: Installing The Switches
Use clean air that has passed through an air filter (filtration of 5 μm or less). Keep the fluid temperature and ambient temperature within the range of 5 to 60°C. Can be used without lubrication, but if lubricated, please use Class 1 turbine oil (no additives) ISO VG32. - Page 26 ● Installation procedure for the close end side ① Move the master jaws to the close end positions, respectively. ② Install the reed switch using the reed switch bracket. ③ Move up and down the reed switch slowly. ④ Tighten and fix the setscrew provided on the reed switch at the position where the reed switch detected.
-
Page 27: Maintenance And Inspection
・ Be sure to use the specified grease listed below. If unspecified grease is used, adequate effect may not be obtained. Brand Manufacturer Kluberpaste 46 MR 401 Klueber Lubrication: Whole world Kitagawa genuine grease (Kitagawa sales CHUCK GREASE PRO agents in each country) ② Supplying method ① Remove the face plate from the base. -
Page 28: Air Circuit Maintenance
② Safety information on grease and antitrust oil Applicable range ・ Specified grease ・ Antirust agent applied to the product at the delivery First-aid treatment ・ Aspiration: In case of much aspiration, go to a place where there is fresh air, and cover your body with a blanket to keep your body warm. -
Page 29: Disassembly And Assembly Procedure
7-5. Disassembly and assembly procedure Disassembly procedure By referring to the parts list on page 5, disassemble the product through the procedure below: ① Stop the air pressure supplied to the gripper and disconnect the air piping. ② Remove the gripper from the robot or the loader. ③... - Page 30 Oil treatment used Be sure to use the specified oil treatment shown below. Brand Manufacturer S-10 Oil treatment Napolex: Japan ● Be sure to tighten the bolts with the specified torque. Lack or tightening torque or excessive torque could break the bolt, causing the conveyed workpiece to fly out.
-
Page 31: Troubleshooting
Troubleshooting 8-1. In the case of gripper malfunction Check the following, and take corrective actions. Symptom Cause Corrective actions Gripper internal part is broken Replace the gripper with a new one. Disassemble, and correct the seized part with an oilstone, Slideways get seized or replace the gripper with a new one. -
Page 32: Contact Address In Case Of Trouble
● If the gripper failed due to a seizure or damage, disassemble the gripper following the disassembly procedure. If the gripper is in the state that you cannot disassemble, do not disassemble it forcibly but please contact us or our agents. ●... -
Page 33: Others
9. Others 9-1. Standards and directives to which the gripper conforms This product conforms to the following standards and directives: ・ Machinery directive:2006/42/EC Annex Ⅰ ・ EN ISO 12100:2010 9-2. Disposal of gripper Dispose of this unit in accordance with the laws and regulations of your country. - Page 34 EC Machinery Directive 2006/42/EC Annex VII part B. Product : Gripper Model : NTS2 Series, NTS3 Series, NTB Series, NPGT Series, QG(L) Series, NPG Series Serial number : See original declaration Manufacturer : Kitagawa Corporation...
- Page 35 Supply of Machinery (Safety) Regulations 2008 Annex VII part B. Product : Gripper Model : NTS2 Series, NTS3 Series, NTB Series, NPGT Series, QG(L) Series, NPG Series Serial number : See original declaration Manufacturer...
- Page 36 The products herein are controlled under Japanese Foreign Exchange and Foreign Trade Control Act. In the event of importing and/or exporting the products, you are obliged to consult KITAGAWA as well as your government for the related regulation prior to any transaction.
Need help?
Do you have a question about the NTS3 and is the answer not in the manual?
Questions and answers