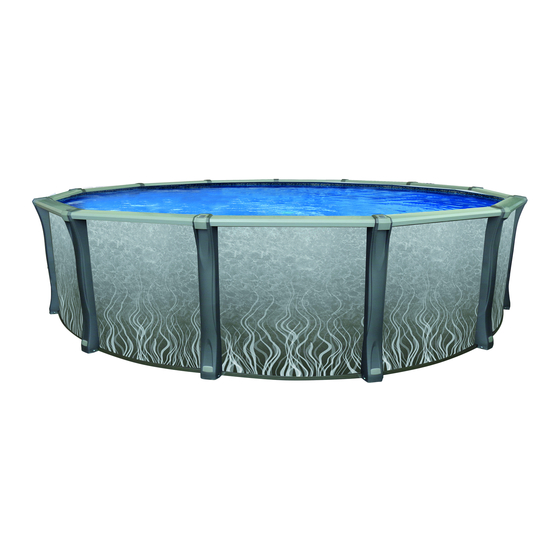
Trevi 211 Assembly Instructions Manual
Oval pools with side supports
Hide thumbs
Also See for 211:
- Assembly instructions manual (10 pages) ,
- Assembly instructions manual (15 pages) ,
- Assembly instructions manual (30 pages)
Advertisement
Quick Links
Dear Customer
Congratulations! You have purchased a pool of superior quality and durability. To achieve the best possible results,
follow the instructions carefully. Failure to follow the installation procedures may result in damage to your pool or
property and void your warranty. We recommend that you make a preliminary study of the instruction booklet to
familiarize yourself with the different parts of your pool. Make sure that you understand each step thoroughly before
you begin assembling.
We strongly recommend having your pool installed by a professional.
WARNING: Be sure you have read and understand the "Safety Information" sheets
before you begin your pool installation.
WARNING: For your safety, your pool is not designed for diving and/or jumping head first.
1
Chart 1.1 - Grass removal area (Figure 1.1)
MODEL
DISTANCE (A-B)
10'x16'
1.82m (6' 0")
10'x19'
2.75m (9' 0")
10'x22'
3.65m (12' 0")
12'x18'
1.82m (6' 0")
12'x21'
2.75m (9' 0")
12'x24'
3.65m (12' 0")
15'x24'
2.75m (9' 0")
15'x30'
4.57m (15' 0")
18'x33'
4.57m (15' 0")
When selecting the site for your pool, take into account city by-laws regarding fences and utilities laws pertaining to electrical cables
as well as the landscaping which you are planning once the pool is installed.
Please do not dive. Diving may result in permanent injury or death.
SITE PREPARATION
RADIUS (R)
1.67m (5' 6")
1.67m (5' 6")
1.67m (5' 6")
1.98m (6' 6")
1.98m (6' 6")
1.98m (6' 6")
2.43m (8' )
2.43m (8' )
2.89m (9' 6")
ASSEMBLY INSTRUCTIONS
We wish you a most pleasant and refreshing summer.
WIDTH (D)
TOTAL LENGHT (E)
3.35m (11')
5.18m (17' 0")
3.35m (11')
6.09m (20' 0")
3.35m (11')
7.01m (23' 0")
3.96m (13')
5.79m (19' 0")
3.96m (13')
6.70m (22' 0")
3.96m (13')
7.62m (25' 0")
4.87m (16')
7.62m (25' 0")
4.87m (16')
9.44m (31' 0")
5.79m (19')
10.36m (34' 0")
OVAL POOLS
WITH SIDE SUPPORTS
Trevi 211 / 213
CORRIDOR (F)
2.08m (6' 10")
2.99m (9' 10")
3.91m (12' 10")
2.08m (6' 10")
2.99m (9' 10")
3.91m (12' 10")
2.99m (9' 10")
4.82m (15' 10")
4.82m (15' 10")
Advertisement

Subscribe to Our Youtube Channel
Related Manuals for Trevi 211


Summary of Contents for Trevi 211
- Page 1 ASSEMBLY INSTRUCTIONS OVAL POOLS WITH SIDE SUPPORTS Trevi 211 / 213 Dear Customer Congratulations! You have purchased a pool of superior quality and durability. To achieve the best possible results, follow the instructions carefully. Failure to follow the installation procedures may result in damage to your pool or property and void your warranty.
- Page 2 SITE PREPARATION (continued) 1) Drive a stake into the ground at points A and B respecting the 4) Verify that the total length is consistent. (E) distance of the straight section between those two points (A-B). 5) Add 89cm (36”) wide trenches on each side, respecting the 2) Draw two half circles respecting the radius (R).
- Page 3 BOTTOM DRAIN ASSEMBLY (if applicable) Dig a hole 30 cm (12") wide by approximately 25 cm (10") deep in the center of the circumference. From the center hole to the projected location of the pool motor, dig a 15 cm (6") wide trench. Place the removed soil aside to be used later to cover the hose.
- Page 4 TENSION STRAPS ASSEMLBY (continued) 2) Refer to Illustration 4.1: If there is more than one metallic 3) Refer to Illustration 4.2.: Attach the assembled tension straps strap per row, assemble the straps together using 4 bolts and nuts to bottom braces on both sides, using four (4) bolts and nuts (BB) (BB) 1/4"...
- Page 5 Using the round section bottom tracks and the bottom plates, start with the first plate of the round section. Repeat this procedure until the half circle is completed. Illustration 7.1 *Resin track 211 only. Illustration 7.2 NUT 1/4” SHORT BOLT FASTENER 1/4”-20 X 5/8”...
-
Page 6: Wall Installation
WALL INSTALLATION Add sand. Choose the filter location beside a round section (never in a straight section). The starting point should be at that location where the skimmer and return holes are, and as close as possible to the fil- tration system. - Page 7 SAND BASE FINISHING You can now spread approximately 10 cm (4") of compacting sand all around the inside base of the wall in order to protect the liner WALL from the cutting edges of the bottom tracks and the stone dust (if 30 cm (12") applicable), or install a prefabricated cove if available.
- Page 8 VINYL LINER INSTALLATION (continued) Installation detail of a bead liner with top track. Fill the pool with water up to the base of the wall before stopping Hang the liner on the top of the wall and install the top track to se- and removing the vacuum cleaner.
- Page 9 UPRIGHT POST INSTALLATION For the round section: Attach the uprights to the bottom plate with two (2) screws “Z”, which you will find in the hardware bag. Uprights must be installed outside the flanged part of the bottom plate and into the two notchs of the bottom track. ‘’Z’’...
- Page 10 SEAT CAP INSTALLATION Put the seat cap on the inside section of the seat and interlock with Snap the solar cap on top of the seat cap and interlock it on the bot- the upright. Secure the seat cap with one (1) screw “Z”. tom.
-
Page 11: Parts List
FILTRATION SYSTEM ASSEMBLY Assemble skimmer, inlet, drain, filter, pumps, hoses according to separate manufacturer’s instructions. Note: See 'Safety Information" Manual. PARTS LIST * SEE DRAWING PARTS NEXT PAGE ITEM DESCRIPTION POOL WALL (finished lenght, inch) BOLT & NUT FOR 52" (OR 54") WALL POOL LINER PLASTIC COUPLER (SOLD SEPARATELY) TOP SEAT - ROUND SECTION... - Page 12 PARTS LIST ROUND SECTION STRAIGHT SECTION...
Need help?
Do you have a question about the 211 and is the answer not in the manual?
Questions and answers