
Related Manuals for Lamona LAM8776


Summary of Contents for Lamona LAM8776
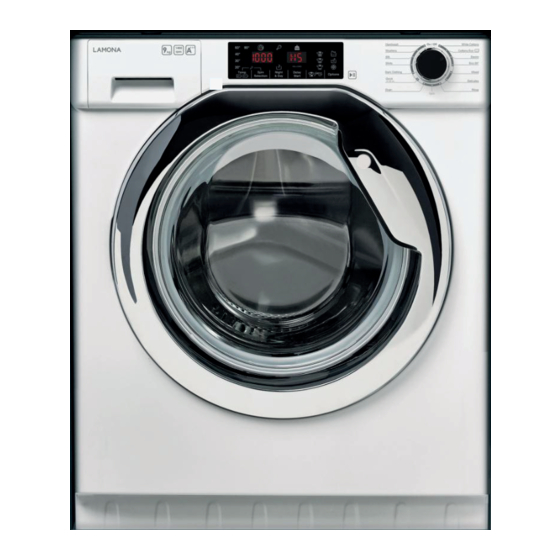
- Page 1 Built-in Washing Machine LAM8776 Instructions and Installation www.howdens.com/appliances-registration...
- Page 3 Free 3 year guarantee YEARS Call now 0333 010 0009 Alternatively, visit www.howdens.com/appliance-registration 3 year guarantee available. Register your appliance within 90 days By registering your appliance and creating an account, we will keep you up to date with the latest product information and notify you immediately of any important product updates Lines are open Monday to Friday 9am to 5pm.
-
Page 4: Table Of Contents
Environmental conditions Only use the washing machine after This appliance is marked according to carefully reading these instructions. We the European directive 2012/19/EU recommend you always keep this manual on on Waste Electrical and Electronic hand and in good condition for future Equipment (WEEE). -
Page 5: General Safety Rules
in a safe way and understand the 1. GENERAL SAFETY hazards involved. RULES Children shall not play with the This appliance is intended to appliance. Cleaning and user be used in household and maintenance shall not be made similar applications such as: by children without supervision. - Page 6 Do not expose the washing Electrical connections machine to rain, direct sunlight safety instructions or other weather elements. Protect from possible freezing. The technical details (supply voltage and power input) are When moving, do not lift the indicated on the product rating washing machine by the knobs plate or detergent drawer;...
-
Page 7: Installation
2. INSTALLATION Remove the 4 transportation screws (A) on the back and remove the 4 flat washers, rubber bungs and plastic spacer tubes (B) as illustrated in figure 1. During the removal of the screws occasionally spacer tubes fall inside the product, these can be remove by tilting the product forward and recovering them from the floor or inside the base of the machine. - Page 8 Instructions for mounting the furniture door Measure, mark and drill upper hinge hole in frontal (387.5 mm © from Howdens lower pre-drilled hole centre position). It is possible to mount the hinges and closure magnet on the right or left-hand side depending on your requirements.
- Page 9 Mount the furniture door to the front of the washer using the Do Not Use hinges. Fix the spacers (I) in Power tool place with the 2 screws (J) and (Self-tap screws) then fix the hinges with 2 screw (H). *Do not over-tighten screws or holes will be damaged* We suggest mounting the...
- Page 10 Hydraulic connections Connect the water hose to the water supply tap (fig. 3) only using the hose supplied with the appliance (do reuse old hose-sets). Setting The washing machine should be installed in its final position such that the water fill hose is not kinked or trapped.
-
Page 11: Detergent Drawer
3. DETERGENT DRAWER detergent draw split into compartments as illustrated in figure: compartment "1": for prewash detergent; compartment “ ”:for fabric softeners, additives etc. (Dilute concentrated softeners). WARNING: only use liquid additive products; the washing machine automatically dose additives at each cycle during the last rinse. -
Page 12: Practical Hints
4. PRACTICAL HINTS Maximise the load size Achieve the best use of energy, water, Load tips detergent time using recommended maximum load size. When sorting laundry, make sure: Save up to 50% energy by washing a full load instead of 2 half loads. - have eliminated metallic objects such as hair clips, pins, coins, from laundry;... - Page 13 - white powder (zeolites) on laundry at When washing heavily soiled whites, the end of the wash: this is normal, the we recommend using cotton programs of powder is not absorbed by fabric and does 60°C or above and a normal washing not change its colour.
-
Page 14: Cleaning And Maintenance
5. CLEANING AND Remove and clean the filter; when finished, replace it turning it clockwise. MAINTENANCE The filter handle will be locked when it is not possible to turn any further and the Looking after your appliance correctly can handle is horizontal. Smearing a small extend its lifespan. -
Page 15: Quick User Guide
6. QUICK USER GUIDE 7. CONTROLS AND PROGRAMS This washing machine automatically adjusts the level of the water to the type and quantity of washing. This system gives a reduction in energy consumption and a saving in washing times. Program selection Turn on the washing machine and select the required program. - Page 16 Press to start the selected cycle. WARNING: Please do not touch the display whilst When the START/PAUSE button has connecting appliance to the power been pressed, the appliance can take supply. The machine calibrates its seconds before starts systems during this time. working.
- Page 17 - Press the delay start button once to It is recommended to use this option for activate it (h00 appears on the display) children's clothes, heavily soiled items, and then press it again to set a 1 hour which may require more detergent to be delay (h01 appears on the display).
- Page 18 If you want to carry out a cold wash all During the phase in which the water is the indicators must be off. held in the tub, the relevant indicator light blinks to show that the machine is at a standstill.
- Page 19 Selecting a different stain level the Close the door BEFORE selecting the relevant indicator will light up. START/PAUSE button. 6) OPTIONS INDICATOR LIGHTS When START/PAUSE is pressed on the The indicator lights show the option that machine with the door closed, the indicator can be selected by the relevant button.
- Page 20 Table of programmes (MAX.) PROGRAMME (MAX.) White Cottons 90° ECO 40-60 60° Denim 40° 20°C 20° Mixed 60° Delicates 40° Rinse Spin Drain 30° Quick 30° 14'-30'-44' 40° Dark Clothing 40° Shirts 30° Silk 30° Woollens 40° Handwash 30°...
- Page 21 Please read these notes: INFORMATION FOR THE TEST LABORATORIES Only with PREWASH option selected (programmes with PREWASH option available). STANDARD PROGRAMMES ACCORDING TO (EU) No 1015/2010 e No 1061/2010 When a programme is selected display shows ECO 40-60 PROGRAMME recommended wash temperature SETTING THE TEMPERATURE TO (the option button may allow this 40°C...
- Page 22 is used for rinsing any type of fabric, for Description of programmes example after a wash carried out by hand. To clean different types of fabrics and Spin various levels of dirt, the washing machine Programme "SPIN" carries out a maximum has specific programs to meet every need spin (which can be reduced by using the of washing (see table of programmes).
- Page 23 Consumption data Remaining Programme Energy Water Max. Moisture Consumption Duration Consumption Temperature Content % kWh/Cycle Hours:Minutes Litres/Cycle °C 1400 Rpm 2,00 3:12 87,8 63,5 43,1 0,94 0,18 3:48 2:54 2:54 0,21 2:19 73,2 44,2 0,65 2:07 61,9 0,25 0:30 34,8 60,8 Consumption data can vary from the nominal values given depending on water pressure, water hardness, water inlet temperature, room temperature, type and volume of load,...
-
Page 24: Troubleshooting And Warranty
2-3 minutes and reopen the door. Any other code Turn off and unplug the washing machine, wait a minute. Turn on the machine and restart a program. If the error occurs again contact the Lamona Service line directly. - Page 25 Problem Possible causes and practical solutions Make sure the product is plugged into a working supply socket. The washing machine Make sure power is on. does not work / start Make sure the wall socket is working, testing it with another appliance such as a lamp.
- Page 26 T h e m a n u f a c t u r e r d e c l i n e s a l l Technical data responsibility for any printing errors in the booklet included with this product. Water pressure: Moreover, it also reserves the right to min 0.05 Mpa / max 0.8 Mpa...
- Page 28 Product serial number (Place sticker here) Howden Joinery Ltd, Thorpe Road, Howden, East Yorkshire, DN14 7PA Howdens Cuisines SAS. Z.A. du Bois Rigault Nord, 1 Rue Calmette, 62880 Vendin-le-Vieil, Cedex, France Product information correct at the time of publication in October 2021. The company has a policy of continuous product development and reserves the right to change any products and specifications given in this manual.
Need help?
Do you have a question about the LAM8776 and is the answer not in the manual?
Questions and answers