Table of Contents
Advertisement
Quick Links
Advertisement
Table of Contents

Related Manuals for RS Feva


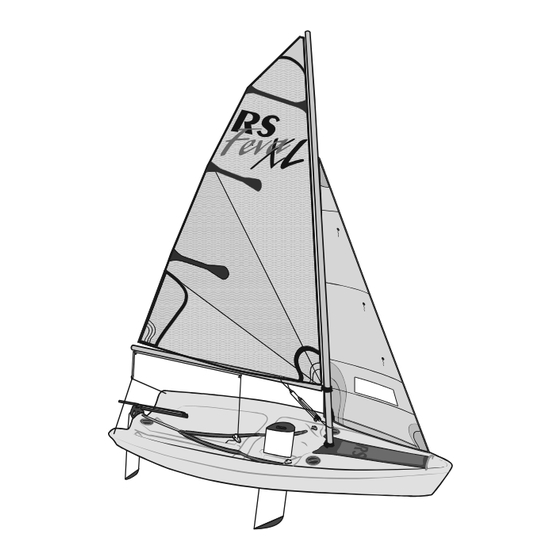
Summary of Contents for RS Feva
- Page 1 Rigging Manual V5...
-
Page 2: Table Of Contents
Contents 1. INTRODUCTION 2. RS FEVA TECHNICAL DATA 3. COMMISSIONING 3.1 Preparation 3.2 Unpacking 3.3 Rigging the Mast 3.4 Rigging the 3.5 Rigging the mast for the Gennaker 3.6 Stepping the Mast 3.7 Rigging the Kicker 3.8 Rigging the Boom 3.9 The... -
Page 3: Introduction
RS Feva, in a safe manner. It contains details of the craft, the equipment supplied Please read this manual carefully and be sure that you understand its contents before using your RS Feva. -
Page 4: Commissioning
73sq ft 3. Commissioning 3.1 Preparation Your RS Feva comes complete with all the components necessary to take the boat sailing. In order to commission it, you will need the following tools: • Pliers, or a shackle key • PVC Electrician’s Tape You may require other tools later, should you wish to make any setting or tuning adjustments to the boat or the rig. -
Page 5: Unpacking
3.2 - Unpacking Having unpacked your RS Feva, you should check that you have all of the items listed below before throwing away any of the packing, as there may be some small items still wrapped. Boat Pack: Hull Lower mast... - Page 6 Customer Fittings Pack: Plastic Bobble Nylon Spring Hook 20mm block Single Jam Block and Becket 100mm Dacron Patch. Rope Pack: Mainsheet Main Halyard Downhaul Boom Strop Jib Sheet Jib Halyard Jib Halyard Block...
- Page 7 S Sail Pack: S Mainsail Club Jib Spinnaker XL Club Sail Pack: XL Mainsail Club Jib Spinnaker XL Race Sail Pack XL Mainsail XL Jib Spinnaker Race Pack...
-
Page 8: Rigging The Mast
3.3 - Rigging the Mast If you have the and/or Gennaker Pack, please refer to Section 3.4 Rigging the Jib, and Section 3.11 Rigging the Gennaker before stepping the mast the boat. To complete this section, you will need: • The mast top section •... - Page 9 3.3 - Rigging the Mast BEFORE PICKING UP THE MAST, CHECK THAT YOU ARE NOT IN THE VICINITY OF OVERHEAD POWER CABLES REMEMBER If you are rigging the Gennaker Packs, you need to read Sections 3.4 and 3.10 before stepping the mast Now the mast...
-
Page 10: Rigging The Jib
3.4 - Rigging the To complete this section, you will need: • 1 x Feva • 2 x Feva shrouds • 1 x shroud shackle • 1 x jib halyard block • 1 x jib halyard • 1 x jib sheet •... - Page 11 3.4 - Rigging the • Thread the other end of the jib halyard block tie through the metal loop at the top of the jib halyard block, pulling the excess through until the block is next to the knot. • Thread the free end of the jib halyard block tie through the shroud...
- Page 12 • 1 x gennaker downhaul bobble HINT Your RS Feva will arrive with the gennaker halyard and bowsprit already rigged. There is no need to unthread the halyard from under the foredeck when you are rigging the gennaker. Should the...
-
Page 13: Stepping The Mast
3.6 - Stepping the Mast • Lay the mast along the boat with the mast foot in the mast well. • Stand the mast up. The mast foot should slide down the mast well and sit comfortably in the mast cup. -
Page 14: Rigging The Kicker
3.7 - Rigging the Kicker To rig the kicker, you will need: • x2 20mm blocks • x1 Single Jam Block and Becket • Kicker cascade rope - 4mm Evo Performance - 2300mm • Take the cascade rope and mark where it will attach to the single jam block with becket (see diagram below). -
Page 15: Rigging The Boom
3.8 - Rigging the Boom To rig the boom, you will need: • The boom • The kicking cascade • The kicker boom strop The standard outhaul will come rigged on the boom, if you have the Race pack, refer to the instructions included within to rig the race outhaul. •... -
Page 16: The Daggerboard
3.8 - Rigging the Boom • Finally, thread the end back through the eyelet on the boom, in the opposite direction to the other end, and tie knot #3 in the end 3.9 - The Daggerboard To complete this section, you will need: •... -
Page 17: The Rudder
3.10 - The Rudder To complete this section, you will require: • The rudder • The rudder stock • The Tiller • The Tiller retaining screw • The Tiller extension • Remove the rudder assembly from the foil pack and locate the components. The self-tapping screw is in a small bag, in with the tiller arm. -
Page 18: Hoisting The Mainsail
3.11 - Hoisting the Mainsail To complete this section, you will need: • The mainsail mainsail, or the Feva XL 3-batten mainsail) • The kick • The mainsheet • Take the mainsheet and thread one end through the large block in the centre of the boat. - Page 19 3.11 - Hoisting the Mainsail • Thread the mainsheet through the block mainsheet bridle. • Lead the mainsheet back up to the end of the boom, and thread it through the hole in the center of the block on the boom. Tie a knot #4 in the end of the mainsheet.
- Page 20 3.11 - Hoisting the Mainsail • When the mainsail is at the top of the mast, lead the halyard tail that you have been pulling around the outside of the shroud, and pull it forward. • Pull the halyard towards the back of the boat, until it locks in the cleat at the top of the mast.
- Page 21 3.11 - Hoisting the Mainsail s stop the halyard mainsail hoisted. To lower the mainsail, release the Kicker, outhaul downhaul unclip the two clips, pull the halyard out of the cleat at the top of the mast, and pull the mainsail down.
- Page 22 3.11 - Hoisting the Mainsail Thread the other end of the downhaul up through gooseneck mast collar, on the port-hand side of the mast. • Pass the end of the downhaul through the bottom eyelet in the tack of the mainsail, and through the cleat on the starboard...
-
Page 23: Hoisting The Jib
A good setting to start with is with the pin in the third hole down on the shroud adjuster plate. HINT The mast on the RS Feva is supported at deck level by the mast gate and the foredeck. The shrouds... - Page 24 #1 Note: Instead of a rope loop, the RS Feva Race has a metal eye at the head. Tie the jib halyard to this in the same way.
- Page 25 3.12 - Hoisting the To attach the sheet, either: • Thread the jib sheet through the middle of the three holes on the clew plate. • Pull the sheet through until there is an equal amount either side of the sail. jib sheet on either side of the clew plate...
-
Page 26: Rigging The Gennaker
3.13 - Rigging the Gennaker Knot #2 Knot #3 Knot #1 Knot #1... - Page 27 3.13 - Rigging the Gennaker TOP TIP Make sure that the gennaker halyard and the downhaul line are on opposite sides of the mast. • Unroll the gennaker. • Take the tack line that emerges from the end of the bowsprit and tie it to the tack of the gennaker, using knot #2.
- Page 28 3.13 - Rigging the Gennaker • With the gennaker on the port-hand side of the boat, pass the end of the gennaker downhaul through the small eyelet in the centre of the gennaker, from the inside to outside. • Run the gennaker downhaul line up the outside of the gennaker.
- Page 29 3.13 - Rigging the Gennaker • With the gennaker on the port side of the boat, thread one end of the gennaker sheet through the block by the port-side shroud adjuster plate. • Take the other end of the gennaker sheet, pass it around the front of the jib, and into the block...
-
Page 30: Completion
3.14 - Completion Now you are almost ready to go Feva sailing. All that is left to do is: • Fit the rudder to the back of the boat • Tidy the halyards away • Check that all knots and shackles are tied securely push down until the retaining clip ‘clicks’... -
Page 31: Sailing Hints
Rigging Guide 4. Sailing Hints PLEASE FOLLOW RIGGING GUIDE IN CORRECT ORDER... -
Page 32: Introduction
4.1 - Introduction The RS Feva is a very rewarding boat to sail – to fully appreciate its handling, you should feel that a refresher is in order, there are many approved sailing schools which use the RS Feva. See www.rya.org.uk for more information, or follow the link from www.rssailing.com considered as a substitute for an approved course in dinghy sailing. -
Page 33: Sailing Close-Hauled And Tacking
When sailing close-hauled, or as close as possible to the wind, it is important to get the boom as near as possible to the centreline, especially when sailing the RS Feva XL with mainsail on, quickly put the boat head to wind. You should hold the... -
Page 34: Sailing Downwind And Gybing
4.5 - Sailing Downwind and Gybing When sailing downwind, both sails should be let out as far as possible. Single- handed sailors should adopt a relaxing, reclined pose astride the thwart area, leaning back against the side deck. To gybe, pull the tiller towards you and, as the boat starts to turn, step across the cockpit facing forward. - Page 35 4.6 - Using the Gennaker Gybing with the gennaker is fairly straightforward. Like the jib, it should be pulled across at the same time as the mainsail singlehanded, the mainsheet tiller extension, and the helm should hold the gennaker sheet at all times. To drop the gennaker, reverse the procedure used to hoist.
- Page 36 There are two ways to reef a RS Feva S mainsail: HINT Round-Mast Furling mainsail, when sailed without a jib. • Detach the clew of the sail from the clew hook.
- Page 37 • Re-attach the clew of the mainsail to the clew outhaul hook, and re-tension the outhaul. • Re-attach the kicking cascade and tension to suit. The number of turns of the mast will determine the degree to which you reduce the power in the rig.
- Page 38 mainsail, when sailed with the jib. • Release the downhaul line out of the cleat. • Ease the kicking cascade. • Ease the main halyard about 7 centimetres. • Pull the mainsail boom.
- Page 39 • Roll up the excess mainsail and tie it to the boom. We recommend using a loop of elastic attached to a plastic hook. • Re-apply tension to the main halyard, as required. • Re-apply tension to the kicking cascade. •...
-
Page 40: Maintenance
Rigging Guide 5. Maintenance PLEASE FOLLOW RIGGING GUIDE IN CORRECT ORDER... -
Page 41: Boat Care
• SMALL – dents, scratching. This type of damage is not boat threatening. material. The joy of owning an RS Feva is that it is very hard wearing, and any dents and scratches it... -
Page 42: Foil Care
Special ‘shock be replaced if damaged. If you are going to trail your boat frequently, you may wish to invest in some RS Racing padded rudder bags. These will protect your RS Feva from any damage caused by the foils. -
Page 43: Fixtures & Fittings
5.5 Fixtures and Fittings... -
Page 44: Warranty
6. Warranty claims shall be made to RS Sailing as soon as practicable and, in any event, within 28 days upon discovery of a defect. No repairs under warranty are to be undertaken without written approval of RS Sailing. - Page 45 7 - Knots Knot #1 Knot #2 Knot #3 Knot #4 Knot #5 Knot #6 Knot #1 - Knot on knot Knot #2 - Bowline...
- Page 46 7 - Knots Knot #3 - Figure of eight Knot #4 - Overhand knot Knot #5 - Double sheet bend Knot #6 - Cow hitch...
Need help?
Do you have a question about the Feva and is the answer not in the manual?
Questions and answers