Page 1
11/2000 GENERAL INFORMATION This manual has been compiled by Draper Tools and is an integrated part of the power tool equipment, which should be kept with the machine. This manual describes the purpose for which this tool has been designed and contains all the necessary information to ensure its correct and safe use.We recommend that this manual is read before any operation of...
This guarantee applies in lieu of any other guarantee expressed or implied and variations of its terms are not authorized. Your Draper guarantee is not effective unless you can produce upon request a dated receipt or invoice to verify your proof of purchase within the 12 month period.
IMPORTANT Draper Tools Limited recommends that this machine should not be modified or used for any application other than that for which it was designed. If you are unsure of its relative applications do not hesitate to contact us in writing and we will advise you.
If a replacement fuse cover is required, ensure it is of the same colour as that visible on the pin face of the plug (i.e. red). Fuse covers are available from your Draper Tools stockist. If the fitted plug is not suitable, it should be cut off and destroyed. *The end of the cable should now be suitably prepared and the correct type of plug fitted.
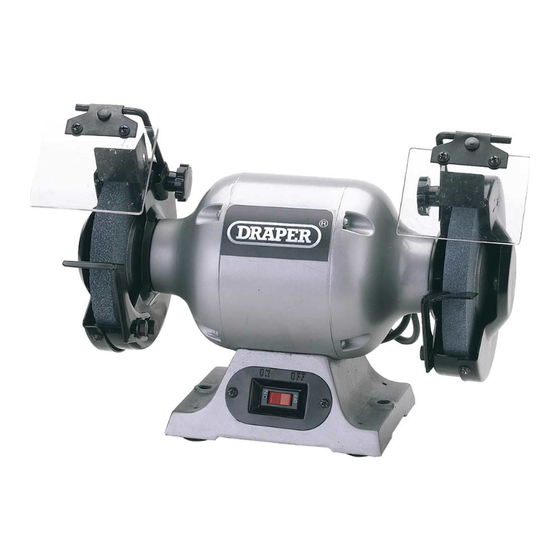
Carefully unpack the bench grinder and all the loose parts from the carton. Fig. 1. illustrates the bench grinder and all the associated parts packed in the carton. Carefully check that all the parts are present. Fig.1. G150B Fig.2. GHD150 GHD200 NOTE:- Model No.
ASSEMBLY (G150B) IMPORTANT: Fig.3. To correctly assemble and adjust the bench grinder, please read the following instructions carefully. ✪✌ TOOL RESTS. ✬✌ Attach the left and right hand tool rests ✪✌ using the two bolts ✫✌ and washers ✬✌ as shown in Fig.3.
Page 9
ASSEMBLY (GHD150 & GHD200) To correctly assemble, fit and adjust the tool Fig.6. rests, spark deflectors and eye shields. Carefully follow these instructions: ✳✌ TOOL RESTS. Attach the left and right hand tool rests ✳✌ using the four bolts ✴✌ and large washers ✵✌ ✵✌...
Page 10
ASSEMBLY (GHD150 & GHD200) To fit the eye shields to the bench grinder Fig.11. attach clamp ❂✌ to the wheel guard using lock ✿✌ knob ❃✌ large star washer ✪✌ and large ✫✌ ✪✌ washer ✫✌ as shown in Fig.11. Insert mounting ❃✌...
OPERATING INSTRUCTIONS A bench grinder is designed for hand grinding operations only, such as sharpening drill bits, chisels and screwdrivers or removing excess metal from workpieces. A coarse grit grinding wheel could be used for grinding rough metals, to remove large amounts of metal, or where a smooth finish is not important.
CHANGING THE GRINDING WHEELS 1. Switch the bench grinder “OFF” and disconnect from the power supply. 2. Remove the screws which secure the grinding wheel side covers then take off covers. 3. Either, hold the opposite wheel firmly and remove the nut and flange, or place a wedge between the grinding wheel and the wheel guard, then remove the nut and flange.
ACCESSORIES The following accessories are available from your local Draper Stockist. GRINDING WHEELS. GENERAL ACCESSORIES Stock No.: ..........29629 Stock No.: ..........30479 Part No.:..........AG150F Part No.: ..........AG100 Type Grit:..........Fine 60 Description:....Grinding Wheel Dresser Diameter: ..........150mm Length: ..........150mm Bore size: ..........12.7mm Stock No.: ..........30634 Width (Face size):........19mm...
Need help?
Do you have a question about the G150B and is the answer not in the manual?
Questions and answers