Table of Contents
Advertisement
Quick Links
Printer Installation Guide & Safety Guide
KN04-00237A (V1.0)
◈ Information
This installation guide contains quick information required for the product
installation. Please refer to the Software and Documents provided on the
Download section of the BIXOLON Website (www.bixolon.com) for more
information on how to setup.
1. Manual: User's Manual, Code Table, Control Commands, etc.
2. Driver: Windows, OPOS, CUPS (Linux, Mac), VCOM(USB, Ethernet)
3. SDK: UPOS SDK (Windows, Android, iOS)
4. Utility: Unified POS Utility, Net Configuration Tool, Android Utility, iOS Utility
We at BIXOLON maintain ongoing efforts to enhance and upgrade the functions
and quality of all our products. In following, product specifications and/or user
manual content may be changed without prior notice.
Please refer to the BIXOLON website for the addresses and phone numbers of
the company's headquarters and branch offices.
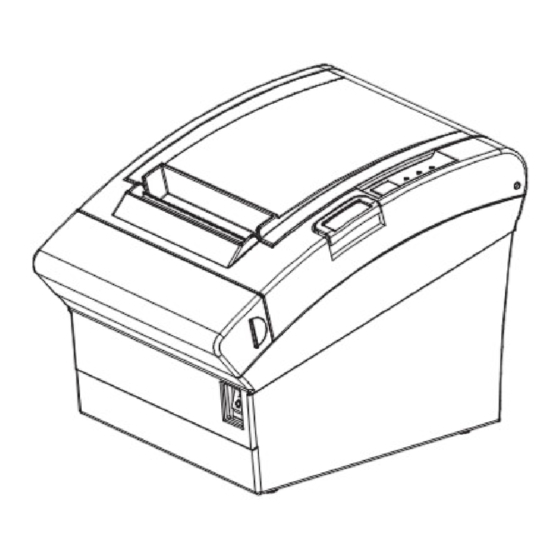
◈ Components
Cable Cover
SRP-380II/382II
DK Gender
AC/DC Adaptor
◈ Cable Connection
1. Turn off the printer and peripheral devices.
2. Connect the power cord to the adapter and connect the adapter to the power
supply connector of the printer.
3. Check the type of the interfaces at the back of the printer (USB, Serial,
Parallel, Ethernet, Powered USB, Wireless LAN, Bluetooth) and connect the
interface cable.
4. Connect the drawer kick-out cable to the drawer kick-out port located on the
underside of the printer.
- Be sure to turn off the printer and connect or disconnect
the adapter jack.
- Only use a power supply provided by Bixolon
- Pay attention to the direction in which you insert the
adapter jack.
Interface port
Interface Cable
(Serial/Parallel/Powered USB/
Wireless LAN/Bluetooth)
◈ Installing Paper Roll
THERMAL RECEIPT PRINTER SRP-380II/382II
USB A-B Cable
Installation Guide
Power Cord
Ethernet Port
USB Port
Power Port
Adapter Jack
Ethernet
USB
Cable
Cable
Power Jack
1. Push the Cover Open Button to open the
Printer Cover.
2. Insert new roll paper in the correct
direction.
3. Pull the paper out slightly and close the
Printer Cover.
◈ Using Control Panel
◈ Self-Test
You can check whether printer works correctly or not through the self-test.
Printing quality, ROM version, and memory switch settings can be checked
through the self-test function.
1. Check whether paper is mounted correctly.
2. Turn on the power while holding down the Feed button and the self-test
procedure will begin.
3. The printer will print out the current status of printer including the version of
Paper Roll
ROM.
4. After printing out the current status of printer, the printer will print following
lines and waits for the next step (paper lamp will keep blinking).
5. Press the Feed button to resume printing or hold down the button for at
least one second to change the VMSM settings.
5-1 If "Continuous SELF-TEST" is selected
(1) Press the Feed button for less than one second to print the preset page.
(2) The self-test ends automatically as it prints the following line and cuts
the paper.
(3) The printer goes into normal print mode upon completion of the self
test.
Drawer
Kick-out
Port
5-2 If "VMSM Selection" is selected
(1) The following lines will be printed when the VMSM opens.
Drawer
Kick-out
Cable
AC/DC Adapter
(2) Press the Feed button to run the above function.
Step 1(Select Options): press the button a number of times as shown
▶
Step 2(Enter Options): hold down the button for at least one second
▶
If you select any items not listed above, the list of "VMSM
Selection" will be printed again. Setting the mode will be canceled
if no item is selected in Step 1.
If "0: Exit and reboot printer" is not executed, the new settings will
not be saved.
(3) Hold down the Feed button for at least 1 second to save the changes.
The following line will be printed before cutting the paper.
6. The new settings will be automatically applied when printer resets.
When closing the cover, press down on the center of the cover
to ensure that the paper is in contact with the roller. Printing
quality may not be optimum if the recommended paper is not
used.
• Power (LED)
The Power LED is on whenever the printer is on.
• Error (LED)
Red light will be on in various error conditions such as out of
paper, cover open, etc.
• Paper (LED)
Red LED will be lit when the paper roll is running low.
The LED keeps blinking when the printer is in self-test standby
mode or macro execution standby mode.
• Feed (Button)
Press this button to feed the paper out.
Hold down this button to feed out the paper continuously.
Self-TEST PRINT COMPLETE
SELECT MODE BY PRESSING THE FEED BUTTON.
End of SELF-TEST : Less than 1 second
VMSM Selection : 1 second or more
*** COMPLETED ***
** VMSM Selection **
0 : Exit and reboot printer
1 : Print current settings
2 : Set Print Density
3 : Set Print Speed
4 : Set Cutting mode
5 : Set Buzzer
6 : Set Near-End Sensor
7 : Set Serial Interface
by each menu.
to apply each item selected.
*** COMPLETED ***
Advertisement
Table of Contents

Related Manuals for BIXOLON SRP-382II


Summary of Contents for BIXOLON SRP-382II
- Page 1 Self-TEST PRINT COMPLETE 2. Connect the power cord to the adapter and connect the adapter to the power SELECT MODE BY PRESSING THE FEED BUTTON. supply connector of the printer. End of SELF-TEST : Less than 1 second 3. Check the type of the interfaces at the back of the printer (USB, Serial, VMSM Selection : 1 second or more Parallel, Ethernet, Powered USB, Wireless LAN, Bluetooth) and connect the 5. Press the Feed button to resume printing or hold down the button for at interface cable. least one second to change the VMSM settings. 4. Connect the drawer kick-out cable to the drawer kick-out port located on the underside of the printer. 5-1 If “Continuous SELF-TEST” is selected - Be sure to turn off the printer and connect or disconnect (1) Press the Feed button for less than one second to print the preset page. the adapter jack. (2) The self-test ends automatically as it prints the following line and cuts - Only use a power supply provided by Bixolon the paper. - Pay attention to the direction in which you insert the *** COMPLETED *** adapter jack. (3) The printer goes into normal print mode upon completion of the self test. Drawer Ethernet Port Kick-out Port 5-2 If “VMSM Selection” is selected USB Port (1) The following lines will be printed when the VMSM opens. Drawer ** VMSM Selection ** Kick-out ...
- Page 2 ◈ Recommended Papers ◈ Safety Precautions - TF50KS-E (Paper Thickness: 65μm): Nippon Paper Industries Co., Ltd. WARNING & CAUTION - PD 150R (Paper Thickness: 75μm): New Oji Paper Mfg, Co., Ltd. It describes death, physical injuries, serious financial losses, and - PD 160R (Paper Thickness: 75μm): New Oji Paper Mfg, Co., Ltd. damage to data etc. that can be caused to the user. - P350 (Paper Thickness: 62μm): Kansaki Specialty Paper, Inc. (USA) - P220AG (Paper Thickness: 65μm): Mitsubishi Paper Mills Limited Do not connect multiple products to Only use authentic products from BIXOLON. The company will not provide post-sale - P220A (Paper Thickness: 65μm): Mitsubishi Paper Mills Limited a single or faulty power outlet. support for damaged or other quality Use only grounded power outlets - F5041 (Paper Thickness: 65μm): Mitsubishi HitecPaper Flensburg Gmbh issues that any fake (or refurbished) that meet the industry standard. - P5047 (Paper Thickness: 60μm): Mitsubishi Paper Mills Limited products may incur. Noncompliance may cause electric Use of papers other than those recommended above may shock or fire. damage TPH or degrade the printing quality and our company. Is not responsible for the damage caused by non-recommended papers. ◈ WEEE(Waste Electrical and Electric Equipment) ...
- Page 3 프린터 설치 안내서 & 안전 가이드 감열식 영수 프린터 SRP-380II/382II ◈ 안내 커버를 닫을 때에는 용지가 롤러에 밀착되도록 커버의 가운데를 눌러주십시오. 권장용지를 사용하지 않을 경우 인쇄품질이 저하될 수 있습니다. (사용자 매뉴얼 참고) 본 설치 안내서는 제품 설치에 필요한 간단한 정보만 기록하고 있습니다. ◈ 조작부 사용 자세한 설치 안내는 빅솔론 홈페이지(www.bixolon.co.kr)의 다운로드 페이지에서 제공되는 소프트웨어 및 문서를 참고하세요. • 전원 (LED) 1. 매뉴얼: 사용자 매뉴얼, 코드표, 제어명령, 소프트웨어 매뉴얼 등 전원 표시 등은 프린터에 전원이 켜져 있을 경우 켜집니다. 2. 드라이버(Driver): Windows, OPOS, JavaPOS, CUPS(Linux, Mac), 가상 시리얼포트 (USB 및 Ethernet 용) • 오류(LED) 3. 소프트웨어 개발도구(SDK): UPOS SDK(Windows, Android, iOS) 용지 없음, 커버 열림 등 오류가 발생하였을 때 적색 표시등이 켜집니다. 4. 유틸리티(Utility): 통합 POS 유틸리티(Unified POS Utility), 네트워크 설정 도구(Net Configuration Tool), • 용지(LED) 안드로이드 유틸리티(Android Utility), iOS 유틸리티(iOS Utility) 이 표시등이 켜지면 용지가 거의 다 소모되었거나 용지가 없음을 나타냅니다. 새 용지로 교환하거나 용지를 넣으십시오. 이 표시등이 깜빡 거리면 셀프테스트 저희 (주)빅솔론은 제품의 기능과 품질 향상을 위하여 지속적인 개선을 하고 있습니다. 대기 상태이거나 매크로 실행 대기중임을 나타냅니다 이로 인하여 제품의 사양과 매뉴얼의 내용은 사전 통보 없이 변경될 수 있습니다. • 이송 (버튼) (주)빅솔론의 본사 및 지사 주소와 전화번호는 빅솔론 홈페이지를 참고하시기 바랍니다. 용지를 배출하고자 할 때 이송버튼을 누릅니다. ◈ 내용물 확인 ...
- Page 4 제품 내부에 이물질이 들어가지 않도록 주의하세요. 제품의 문제가 생겼을 경우 구입처로 연락하세요. 제품 위에 무거운 물건이나 액체류나 금속류를 또한, 빅솔론 홈페이지 (http://www.bixolon.co.kr) 에서 제품 수리 올려놓지 마세요. 화재의 위험이 있습니다. 제품 손상의 위험이 있습니다. 동영상을 제공하고 있습니다. ...
Need help?
Do you have a question about the SRP-382II and is the answer not in the manual?
Questions and answers