Subscribe to Our Youtube Channel
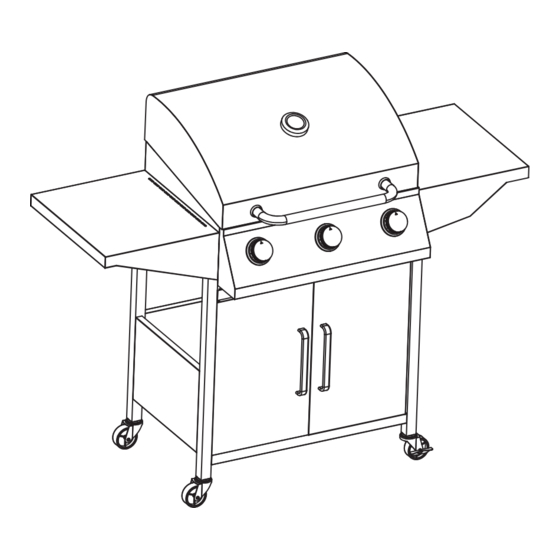
Summary of Contents for Outsunny 846-103V94
- Page 1 INb1a019_ES 846-103V94 IMPORTANT, RETAIN FOR FUTURE REFERENCE: READ CAREFULLY ASSEMBLY & INSTRUCTION MANUAL...
- Page 3 INSTRUCCIONES DE SEGURID 1.Lea cuidadosamente el manual de instrucciones antes de utilizar la parrilla y guárdelo para las referencias futuras. El incumplimiento de las instrucciones puede causar lesiones personales, daños a la propiedad incluso la muerte. 2.Solo es apta para ser utilizada en exteriores. No la utilice en interiores. 3.No la utilice por debajo del nivel del suelo.
-
Page 4: Lista De Piezas
Lista de piezas Pic. Pic. Tornillo M4 * 8 +2(spare) Tornillo M5 * 12 Pasador de la puerta superior Pasador de puerta inferior Tuerca M3 * Tornillo M3 * 10 Tornillo autorroscante M3 * 10... -
Page 5: Montaje
Montaje Nota: No apriete los tornillos y las tuercas firmemente hasta que todos los pasos de montaje se hayan completado. Tornillo M3 * 10 x 2 Tornillo M3*10 x 2 Tuerca M3 x 2 1.Fije los marcos izquierdo y derecho (5C) a las patas izquierdas y derechas (5A, 5B, 6A y 6B) con los 8 tornillos M5 (B). - Page 6 Montaje 2.Fije los marcos izquierdo y derecho al estante inferior (7) con los 4 tornillos M5 (B).
- Page 7 Montaje 3.Fije el estante trasero (9) a los marcos con los 4 tornillos M5 (B).
- Page 8 Montaje 4.Fije la viga frontal (8) a la parte frontal de los marcos con los 4 tornillos M5 (B).
- Page 9 Montaje 5.Coloque las 4 ruedas (10 y 11) a los extremos de las patas de los marcos. Nota: Las 2 ruedas con frenos (10) siempre deben estar en el mismo lado.
- Page 10 Montaje 6.Coloque el cuerpo (1) sobre las patas y fíjelos con los 8 tornillos M5 (vea la imagen). Apriete los tornillos cuando el cuerpo esté en su lugar adecuadamente.
- Page 11 Montaje 7.Fije el estante lateral izquierdo (14) al cuerpo con los 6 tornillos M5 (B).
- Page 12 Montaje 8.Fije el estante lateral derecho (15) al cuerpo con los 6 tornillos M5 (B).
- Page 13 Montaje 9.Fije las asas (13) a las puertas frontales (12) con los 4 tornillos M4 (A).
- Page 14 Montaje 10.Fije la puerta a las patas frontales de los marcos con los pasa- dores superior e inferior (C y E).
- Page 15 Montaje 11.Coloque la rejilla de calentamiento (2), las rejillas de cocción (3) y las carpas térmicas (4) en el cuerpo de la parilla.
- Page 16 Montaje 12.Coloque la taza de aceite (21) en la cacerola de aceite. Apriete todos los tornillos antes de utilizar la parilla. Montaje completado...
- Page 17 Montaje Apriete todos los tornillos antes de utilizar la parilla. Montaje completado...
- Page 18 INb1a019_ES 846-103V94 IMPORTANT, RETAIN FOR FUTURE REFERENCE: READ CAREFULLY ASSEMBLY & INSTRUCTION MANUAL...
-
Page 20: Safety Instructions
SAFETY INSTRUCTIONS 1. Read the instruction manual carefully before use and keep it for future reference. Failure to comply with the instructions can result in death, serious injury or property damage. 2. For outdoor use ONLY! Do not use indoors. 3. -
Page 21: Part List
PART LIST Pic. Pic. M4 *8 screw +2(spare) M5*12 screw Top door pin Bottom door pin M3*nut M3*10 screw M3*10 self-tap screw... - Page 22 Assembly Note: Please do not tight the screws and nuts till all assembly steps completed. M3 * 10 screw x 2 M3*10 st x 2 M3 nut x 2 1. Assemble the LH and RH frame plates (5C) to LH & RH legs (5A, 5B, 6A &...
- Page 23 Assembly 2. Assemble the LH and RH frame to bottom shelf (7) with 4pcs M5 screws (B).
- Page 24 Assembly 3. Assemble the back shelf (9) to the frames with 4 pcs M5 screws (B).
- Page 25 Assembly 4. Assemble the front beam (8) to the front of frames with 4pcs M5 screws (B).
- Page 26 Assembly 5. Assemble the 4pcs wheels (10&11) to the end of frame legs. Note: the 2pcs wheels with break (10) are always in the same side.
- Page 27 Assembly 6. The body (1) is slided into the frame legs with 8 pcs pre-assembled M5 screws (See detailed pic.). Tight screws after body slided into position. Thermometer (23) is fixed to the lid by its own screw. Note: make sure the 8pcs screws are pre-assembled before sliding.
- Page 28 Assembly 7. LH side shelf (14) is asssembled to the body with 6 pcs M5 screws (B).
- Page 29 Assembly 8. RH side shelf (15) is asssembled to the body with 6 pcs M5 screws (B).
- Page 30 Assembly 9. Handles (13) are assembled to front doors (12) with 4pcs M4 screws (A). Totally 2 pcs doors.
- Page 31 Assembly 10. Doors are assembled to frames’ front legs with top and bottom pins (C&E).
- Page 32 Assembly 11. Warming grid (2), cooking grids (3) and heat tents (4) are fixed into the body.
- Page 33 Assembly 12. Oil cup (21) is assembled to the oil pan.
- Page 34 Assembly Tight all screws before use Assembly completed...


Need help?
Do you have a question about the 846-103V94 and is the answer not in the manual?
Questions and answers