Table of Contents
Advertisement
Available languages
Available languages
Quick Links
KURTYNA POWIETRZNA – INSTRUKCJA OBSŁUGI
AIR CURTAIN – USER MANUAL
HC3299 WiFi
POLSKI........................................................................................................................................................................................................s. 2
ENGLISH.....................................................................................................................................................................................................p. 8
1
Advertisement
Table of Contents

Related Manuals for N'oveen HC3299 WiFi


Summary of Contents for N'oveen HC3299 WiFi
- Page 1 KURTYNA POWIETRZNA – INSTRUKCJA OBSŁUGI AIR CURTAIN – USER MANUAL HC3299 WiFi POLSKI........................................s. 2 ENGLISH........................................p. 8...
- Page 2 POLSKI WAŻNE ŚRODKI BEZPIECZEŃSTWA Dziękujemy za zakup naszego produktu. Przeczytaj uważnie niniejszą instrukcję przed uruchomieniem urządzenia. Zachowaj tę instrukcję obsługi na potrzeby ponownego użycia. 1. Urządzenie należy zawiesić na ścianie i skierować wylot powietrza w dół. Nie należy montować urządzenia pospiesznie i w sposób niestabilny. 2.
-
Page 3: Montaż Urządzenia
warunkiem, że zostało ono umieszczone lub zainstalowane w normalnej pozycji roboczej i osoby te zostały objęte nadzorem lub instrukcjami dotyczącymi użytkowania urządzenia w sposób bezpieczny i zrozumiały związane z tym zagrożenia. Dzieci w wieku od 3 do 8 lat nie mogą podłączać, regulować i czyścić urządzenia ani wykonywać konserwacji. 18. -
Page 4: Obsługa Urządzenia
OBSŁUGA URZĄDZENIA 1. Przed włożeniem wtyczki do gniazdka elektrycznego upewnij się, że zasilanie elektryczne jest zgodne z oznaczeniem na tabliczce znamionowej urządzenia. 2. Ostrożnie wyjmij grzejnik z plastikowej torby i kartonu. 3. Zamontuj grzejnik na ścianie, ustaw przycisk główny na pozycję "-". Podłącz wtyczkę do gniazdka elektrycznego AC220-240V ~ Wskaźnik "Power"... -
Page 5: Zabezpieczenie Przed Dziećmi
REGULACJA TEMPERATURY GRZANIA (TERMOSTAT) 1. Aby wyregulować temperaturę, naciśnij „ ”, aby ustawić żądaną temperaturę i temperaturę od 10℃ do 49℃ 2. Gdy temperatura powietrza spadnie o 2 stopnie poniżej ustawionej temperatury, nagrzewnica rozpocznie ogrzewanie z „I/W” (1000 W). 3. Gdy temperatura powietrza spadnie o 4 stopnie poniżej ustawionej temperatury, nagrzewnica rozpocznie ogrzewanie z „II/H”... - Page 6 2. Wybierz kod swojego kraju, wprowadź numer telefonu komórkowego i naciśnij 'Get', aby otrzymać wiadomość, zawierającą weryfikację kodu. 3. Wybierz kategorię produktów „Small Home Appliance”, a następnie wybierz symbol „Heater”. 3. Wprowadź kod weryfikacyjny z wiadomości i naciśnij „Login”, aby zalogować się do aplikacji.
- Page 7 Rys. 5 Rys.6 Obsługa przez WIFI 1. Możesz obsługiwać urządzenie za pomocą telefonu komórkowego w sieci WIFI lub 4G LTE, jak pokazano na rysunku 8, PANEL STEROWANIA HC3299...
- Page 8 2. Wybierz przycisk „Weekly timer”: A) Naciśnij „Add schedule”, jak pokazano na rys. 9 B) Możesz wybrać tygodniowy timer,pamiętaj, że musisz utrzymywać ustawioną temperaturę wyższą niż obecna, gdy zasilanie (Power) jest ustawione na ON, jak pokazano na rys. 10 C) Naciśnij przycisk „Save” w prawym górnym rogu, aby zapisać w trybie "stop/start", jak pokazano na rys.
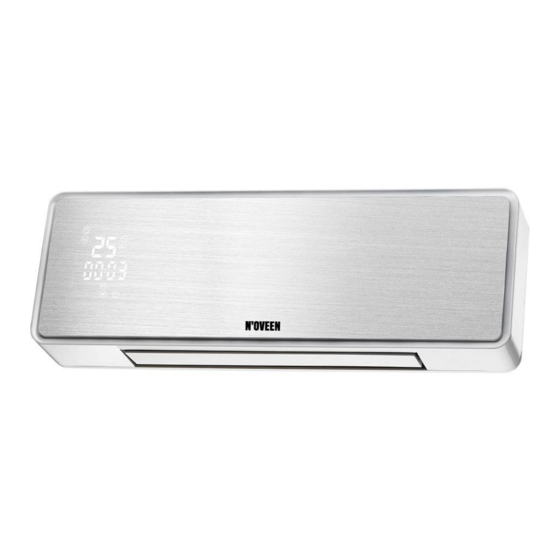
- Page 9 WIDOK PANELU STEROWANIA...
-
Page 10: Zabezpieczenie Przed Przegrzaniem
PILOT ZDALNEGO STEROWANIA HC3299 Pilot działa z baterią CR2025 3V. 1.” ” Główny przycisk zasilania 2. „24H” Ustawianie timera od 1-24 godzin 3. „MODE” 3 funkcje wyboru: ZIMNY NAWIEW, CIEPŁY, GORĄCY 4. "Swing" ruch łopatek góra-dół 5. „LOCK” Funkcja blokady przed dziećmi 6. -
Page 11: Important Safeguards
ENGLISH IMPORTANT SAFEGUARDS Thank you for buying our product. Please read this instruction carefully before operating the heater. Keep this operating instruction for future reference. 1. The heater should be hung on the wall and make the wind outlet down. You must not place it precipitantly or tipsily. -
Page 12: Installing The Device
years shall not plug in, regulate and clean the appliance or perform user maintenance. 18. CAUTION —some parts of this product can become very hot and cause burns. Particular attention has to be given where children and vulnerable people are present. INSTALLING THE DEVICE The heater shall be installed and used according to the safe standard. - Page 13 1.Set time WEEK Press “Set” button again,“Mo”light twinkle ,press “ two buttons set the week from Mo--Su (Mo=Monday...Su=Sunday ect.) HOUR Press “Set” button one time,LED display front “00” twinkle, press“ two buttons set the Hours from 01--00(01=1 o’clock,02=2 o’clock...00=24 o’clock ect.) MINUTE Press “Set”...
-
Page 14: Window Open Function
heating with ”I/W”(1000W). 3. When the air temperature drops 4 degree below the set temperature ,the heater will start heating with”II/H”(2000W). 4. When the air temperature high 1 degree or ≤ the set temperature,the heater will blow the cold air . 5) WINDOW OPEN FUNCTION 1.Press “... - Page 15 4.Switch on the product and make sure the product is in WIFI covered environment. The indicator light will rapidly blinks. If the indicator light do not rapidly blinks, please press “One start Button ”for 5 seconds and the product will have “bi” sound,then go to the App, tap “add device”, as shown in the picture 1, Pic 1 Pic 2...
- Page 17 2.Select “Weekly timer” button to operation: A) Press the “Add schedule”,as shown in pic 9 B) U can choose the weekly and timer what u want,pls note that u must keep the set temperature higher the currently temperate when ON the power ,as shown in pic 10 C) Press the “Save”button in top right corner,to save this during “stop or start”...
-
Page 18: Control Panel View
CONTROL PANEL VIEW... -
Page 19: Remote Control View
REMOTE CONTROL VIEW: 1.Remote control, please use Lithium battery CR2025 3V. 2.The remote control power button is labeled as such ” Main power button 1.” Setting timer from 1-24 hours 2.“24H” COLD,WARM,HOT 3 setting for selection 3.“MODE” 4.“Swing” Louver swing up and down Child-Lock function for heater 5.“LOCK”... - Page 20 To open the filter on the back for cleaning, press the top of plastic net at back. In case of breakdown and/or poor functioning of the appliance, disconnect the appliance from the power supply and contact an authorised repairer. NOTE: As a result of continual improvements, the design and specifications of the product within may differ slightly to the unit illustrated on the packaging.
-
Page 21: Karta Gwarancyjna
KARTA GWARANCYJNA IMPORTER / GWARANT : COMTEL GROUP spółka z ograniczoną odpowiedzialnością sp.k. PLAC KUPIECKI 2, 32-800 BRZESKO, TEL: +48 14 68 49 418 , FAX: +48 14 68 49 419. www.comtelgroup.pl e-mail: biuro@comtelgroup.pl , serwis@comtelgroup.pl Nazwa i model Data sprzedaży Podpis i pieczątka sprzedawcy Adnotacje o naprawie Data przyjęcia do naprawy... - Page 22 Kupiecki 2, 32-800 Brzesko, Tel: 14 68 49 418 nazywana w dalszej części gwarancji Gwarantem/ Autoryzowanym Serwisem. Niniejsza gwarancja dotyczy wyłącznie produktów pod marką N'OVEEN zakupionych na terytorium Rzeczpospolitej Polskiej. Aby skorzystać z gwarancji należy przekazać kompletne urządzenie wraz z kartą gwarancyjną i dowodem zakupu w miejsce zakupu lub do importera –...
Need help?
Do you have a question about the HC3299 WiFi and is the answer not in the manual?
Questions and answers