
Subscribe to Our Youtube Channel
Related Manuals for Leuwico go2basic


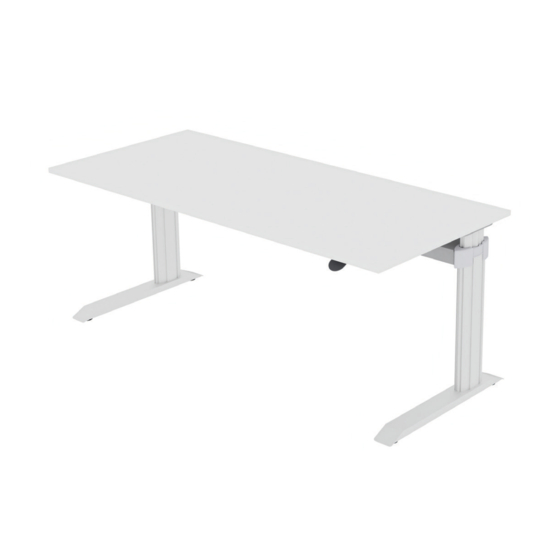
Summary of Contents for Leuwico go2basic
- Page 1 Bedienungsanleitung Montageanleitung User Manual Assembly Instruction Die Bedienungs- und Montageanleitung liegt in der Quertraverse Please find user manual and assembly instruction in the cross rail...
-
Page 2: Table Of Contents
INHALTSVERZEICHNIS | CONTENT Typenschild | Type label �������������������������������������������������������������������������������������������������������������������������������������������������������������������������������� 2 Wichtige Benutzerinformation | Important user information ������������������������������������������������������������������������������������������������������������������������ 3-5 Verkabelung | Cabling ����������������������������������������������������������������������������������������������������������������������������������������������������������������������������������� 6 Bedienung manuell verstellbarer Tische | Operating of desks with manual height adjustment ������������������������������������������������������������������ 7-8 Bedienung motorisch verstellbarer Tische | Operating of desks with motor height adjustment ���������������������������������������������������������������... -
Page 3: Typenschild | Type Label
Monteur assembler: week/year: Hauptstraße 2-4 Assembler 96484 Wiesenfeld ackn.no.: Tel. 09566/88-0 gas springs [N]: info@leuwico.com www.leuwico.com input: 230V AC / 50Hz / 2,5A duty cycle: 30sec/270sec max. 75 kg Adresse des Herstellers Address of the manufacturer Elektrische Angaben Maximalbelastung Tischplatte... -
Page 4: Wichtige Benutzerinformation
WICHTIGE BENUTZERINFORMATION | IMPORTANT USER INFORMATION Hinweise zur sicheren Benutzung des Bedie- Observe the instructions for safe use on the nungshebels beachten! control panel! Die sichere Nutzung des Sitz-Steh-Tisches ist nur Safe use of the sit/stand desk is only possible if the möglich, wenn die Anweisungen aus der Bedienungsan- instructions in the user manual are followed in total�... - Page 5 WICHTIGE BENUTZERINFORMATION | IMPORTANT USER INFORMATION Quetsch- und Scherstellen Crush Rund um die höhenverstellbare Tischplatte muss ein A minimum distance of 25 mm must be maintained Mindestabstand von 25 mm eingehalten werden, um around the height adjustable desk top in order to avoid so Quetschstellen für Finger zu vermeiden.
- Page 6 You can find more information in the brochure "Care nur feucht mit fettlösendem Haushaltsreiniger und wei- instructions for surfaces" on our homepage at: chem Tuch abwischen. Keine Lösungsmittel, scharfe, www�leuwico�com/en/public-download-area/ scheuernde bzw� ätzende Reinigungsmittel verwenden! Further information Weitere Informationen finden Sie in der Broschüre "Pfle- geanleitung Oberfläche"...
-
Page 7: Verkabelung | Cabling
Ergonomics Die ergonomischen Anforderungen entnehmen Sie bitte der The ergonomic requirements can be found in the catalogue „Ergonomie Broschüre“ von LEUWICO. „Ergonomie Broschüre“ from LEUWICO. In ihr finden Sie einen Leitfaden zur idealen Gestaltung bzgl. There you can find a useful guideline for individual placement Akustik, Licht und Bewegungsraum und sinnvoller Tischhöhen. -
Page 8: Operating Of Desks With Manual Height Adjustment
BEDIENUNG MANUELL VERSTELLBARER TISCHE | OPERATING OF DESKS WITH MANUAL HEIGHT ADJUSTMENT Transportsicherung Bei Arbeitstischen mit Handverstellung (H1, H2) ist die Höhenver- stellmechanik gegen unbeabsichtigtes Herausfahren gesichert� Drehen Sie vor Inbetriebnahme rot gekennzeichnete Kreuz- schlitzschraube komplett heraus und bewahren Sie sie für einen eventuellen späteren Umzug auf. - Page 9 BEDIENUNG MANUELL VERSTELLBARER TISCHE | OPERATING OF DESKS WITH MANUAL HEIGHT ADJUSTMENT Gewichtsklassen | weight groups H1: Handverstellung, H1: manual height adjustment, 3 Gewichtsklassen 3 weight groups: kein Gewichtsausgleich without weight compensation 0 - 15 kg (nur voreingestellter Lastausgleich) (preset load compensation only) H1-Z1: 15 - 30 kg H1-Z2:...
-
Page 10: Operating Of Desks With Motor Height Adjustment
BEDIENUNG MOTORISCH VERSTELLBARER TISCHE | OPERATING OF DESKS WITH MOTOR HEIGHT ADJUSTMENT Merkmale Features • im Gestell integrierter, leise laufender Elektromotor • quiet electro motor, integrated in the frame • Verstellgeschwindigkeit ca� 70 mm/s • speed of adjustability: approx� 70 mm/s •... - Page 11 BEDIENUNG MOTORISCH VERSTELLBARER TISCHE | OPERATING OF DESKS WITH MOTOR HEIGHT ADJUSTMENT M2: Motorverstellung mit Komfortsteu- M2: motor height adjustment with comfort erung (4 Speicherplätze) control (4 memory positions) Display Positionstasten position keys display down Speichertaste memory button Beispiel | example 1 mit den Tasten „Auf“...
- Page 12 MONTAGE TISCHPLATTE | MOUNTING OF WORK TOP Tischplatte auf die Plattenauflagen legen Put the desktop on the top supports and fix it und mit je vier Schrauben (Pos� 24*) an den with four screws (pos� 24*) at each column� Säulen befestigen� Handverstellung Manual adjustment Bedienteil mit zwei Schrauben (Pos�22)
- Page 13 MONTAGE CPU-HALTER | MOUNTING OF CPU STAND Für Arbeitstische mit Option Kabelkette Wird der CPU-Halter innen montiert, muss die Kabelkette eingerutscht werden (siehe Montageanleitung Kabelkette) CPU-Halter Workstations with an optional cable chain CPU stand If you install the CPU stand at the inner part, you have to change the position of the cable chain (see assembly instruction for cable chains) 14-24 cm...
-
Page 14: Mounting Of Vertical Cable Channel
MONTAGE KABELWANNE | MOUNTING OF CABLE TRAY Kabelwanne cable tray Position Bohrungen Position holes Kabelwanne mittig unter der Tischplatte Place the cable tray in the center under the platzieren und in die vorgefertigten Bohrungen tabletop and screw it into the pre drilled holes� schrauben�... - Page 15 MONTAGE KABELKETTE | MOUNTING OF CABLE CHAIN • Montage der Kabelkette links und/oder rechts am Tisch möglich� • Ist ein CPU-Halter innen am Seitenteil des Tisches montiert, muss die Kabelkette um 28 cm eingerückt werden� Krallen außen! • The cable chain can be fixed on the left and/or right clamps outside! side of the desk�...
- Page 16 MONTAGE KABELKETTE | MOUNTING OF CABLE CHAIN Winkel 2 an Tischplatte befestigen, mit 2x Fix the angle 2 at the desk top with 2x Schraube Pos� 9* screw pos� 9* Winkel 2 angle 2 Pos� 9 Das erste Krallenpaar durch Herausziehen Remove the first pair of clamps from the vom Strang lösen�...
- Page 17 Serviceabteilung (Telefon: +49 (0) 9566 88- 224; https://www� ment (phone: +49 (0) 9566 88- 224; leuwico�com/service/)� https://www�leuwico�com/service/)� *Genaue Bezeichnung des Montagematerials siehe S� 24 | *Exact description of the assembly material see page 24...
-
Page 18: Readjustment Of Bowden Cable
AUSTAUSCH GASFEDER | REPLACEMENT GAS SPRING 09 Die beiden Sechskant-Einstellschrauben (SW8; siehe 02) 09 Turn the hexagon adjusting screws SW8 (see 02) on and turn eindrehen und ca� jeweils eine Umdrehung nach merkbarem each with one revolution after noticeable resistance clockwise� Widerstand im Uhrzeigersinn drehen�... -
Page 20: Fehlermeldungen Im Display Des Handschalters Bei Option M2
STÖRUNGSBEHEBUNG MANUELLE HANDVERSTELLUNG Fehler Ursache Behebung Rote Sicherungsschraube herausdrehen Tisch sitzt in der obersten Stel- Tisch klemmt nach Transport im Innenprofil/Führung verkantet; Tisch- lung fest oberen Anschlag platte vor dem Herunterdrücken kurz anheben Rot markierte Sicherungsschraube auf Transportsicherung nicht gelöst der Unterseite der Quertraverse lösen Tisch lässt sich nicht nach oben verfahren... -
Page 21: Technische Daten: Elektrischer Antrieb Option M1, M2
TROUBLESHOOTING MANUAL ADJUSTMENT Problem Cause Remedy Unscrew the red head locking screw Desk is stuck in the topmost Desk is stuck in the upper end Inner profile/guide canted; position after transport Briefly lift the desk top before pressing it down Transport safety mechanism is Loosen the red marked safty screw on the not released... - Page 22 STÖRUNGSBEHEBUNG MOTORISCHE VERSTELLUNG Antriebe funktionieren nicht Mögliche Ursache Behebung Stecken Sie das Stromversorgungskabel der Motorsteue- Stromversorgungskabel ist nicht angesteckt rung an Antriebe sind nicht angesteckt Stecken Sie die Motorkabel an der Motorsteuerung an Stecken Sie Motorkabel, Stromversorgungskabel und Schlechter Steckerkontakt Handschalter ordnungsgemäß...
- Page 23 TROUBLESHOOTING MOTOR ADJUSTMENT Drives not working Possible cause Remedy Power cord is not connected Plug the power cord into the motor adjustment Drives are not connected Plug the motor cables into the motor adjustment Plug the motor cables, power cord and Poor plug contact control panel in properly Contact customer service.
-
Page 24: Eg-Konformitätserklärung
STÖRUNGSBEHEBUNG MOTORISCHE VERSTELLUNG Ursache Behebung Am Display wird HOT angezeigt Die Motorsteuerung COMPACT ist mit einem Warten Sie bis die Motorsteuerung abgekühlt ist und die Mel- Überhitzungsschutz ausgestattet dung HOT am Display erlischt Aufgrund von Überhitzung wurde dieser Dann ist die Motorsteuerung COMPACT wieder betriebsbereit aktiviert Am Display wird E + eine Fehlernummer angezeigt An der Motorsteuerung COMPACT liegt ein... -
Page 25: Eg Declaration Of Conformity
TROUBLESHOOTING MOTOR ADJUSTMENT Cause Remedy The display reads HOT The COMPACT motor adjustment is fi tted with Wait until the motor adjustment has cooled down and HOT is no overheating protection longer displayed Overheating has caused it to stop the motor The COMPACT motor adjustment is then operational again adjustment The display reads E + an error code... - Page 26 STÖRUNGSBEHEBUNG MOTORISCHE VERSTELLUNG Stecken Sie das Stromversorgungskabel ab und wenden Sie Zu hohe Spannung sich an den Kundendienst� Hierfür Auftragsbestätigung und Tischtyp bereithalten (siehe Typenschild) Änderung der Antriebskonfiguration Kundendienst verständigen� Hierfür Auftragsbestätigung und Tischtyp bereithalten (siehe Typenschild) Änderung der Anti-Pinch-Konfiguration Führen Sie einen Reset durch Stecken Sie das Stromversorgungskabel ab und wieder an (12 Sek�...
-
Page 27: Technical Data: Manual Height Adjustment H1, H2
TROUBLESHOOTING MOTOR ADJUSTMENT Unplug power cord and contact the High voltage customer service. Have the order confirmation and deck type ready for this purpose (see type label) Motor configuration changed Contact customer service. Have the order confirmation and deck type ready for this purpose (see type label) Anti-Pinch configuration changed Make a manual reset�... - Page 28 BEFESTIGUNGSMATERIAL | FIXING MATERIAL Pos. / item Bezeichnung Denotation Gewindeprofil ETXX-01591 Thread profile ETXX-01591 Gewindestift M5x10 DIN 913 DI Threaded pin M5x10 DIN 913 DI Hutmutter M5 DIN 917 VZ Cap nut M5 DIN 917 VZ Scheibe 5,3 DIN 125 VZ Washer 5,3 DIN 125 VZ Nivellier-Hülsenschraube ETXX-0028 Levelling screw ETXX-0028...
- Page 32 LEUWICO GmbH Hauptstraße 2-4 D - 96484 Wiesenfeld Telefon +49 9566 88-0 Telefax +49 9566 88-114 E-Mail: info@leuwico.com www.leuwico.com...
Need help?
Do you have a question about the go2basic and is the answer not in the manual?
Questions and answers