
Related Manuals for Living Spaces LUCA Y2103W-340


Summary of Contents for Living Spaces LUCA Y2103W-340
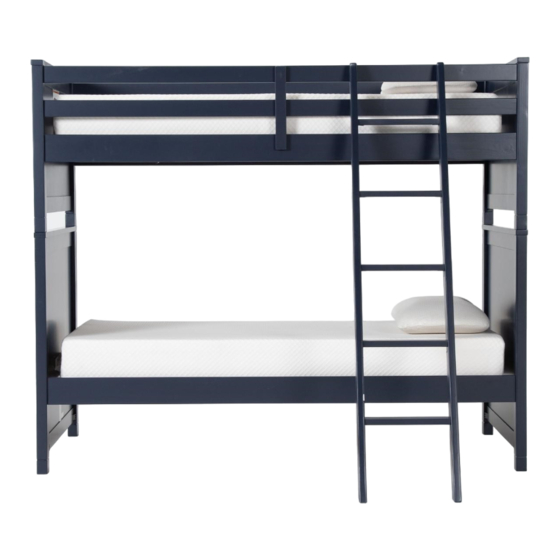
- Page 1 ASSEMBLY INSTRUCTIONS LUCA TWIN-TWIN BUNK BED SKU: 314663/314664/314665 ITEM NO: Y2103W-340/341/342 314575/314576/314577 Y2103B-340/341/342 314619/314620/314621 Y2103G-340/341/342 30 min...
- Page 2 Ensure thickness of mattress does not exceed 6" and mattress is at least 5" below upper edge of guardrails. Ensure thickness of mattress doest not exceed 6" for lower bunk. REPLACEMENT PARTS Replacement parts, including additional guardrails, may be requested from Living Spaces, usually at a cost.
- Page 3 Always use the ladder or Stairway Chest for entering and leaving the upper bunk. You will buy ladder/Stairway as options.
-
Page 4: Description Qty
BOX 1-TW /TW + TW /FL UPPER ENDS/SLATS BUNK BED DESCRIPTION QTY PART IMAGE SKU# 1987TT-A-W: (White) Upper Ends 1987TT-A-B: (Blue) 1987TT-A-G: (Grey) Slats 1987TT-J BOX 2: TW /TW LOWER ENDS/SLATS BUNK BED IMAGE DESCRIPTION QTY SKU# PART 1987TT-B-W:(White) Lower Ends 1987TT-B-B:(Blue) 1987TT-B-G:(Grey) Slats... - Page 5 BOX 3- TW /TW SIDE/GUARD RAILS BUNK BED IMAGE SKU# DESCRIPTION QTY PART 1987TT-C-W: (White) 1987TT-C-B: (Blue) Upper Rails 1987TT-C-G: (Grey) 1987TT-D-W: (White) 1987TT-D-B: (Blue) Guard rails 1987TT-D-G: (Grey) 1987TT-E-W: (White) Guard rail 1987TT-E-B: (Blue) supports 1987TT-E-G: (Grey) 1987TT-F-W: (White) 1987TT-F-B: (Blue) Lower rails 1987TT-F-G: (Grey)
-
Page 6: Detail View
Hardware List of Twin-Twin Bunk Bed IMAGE DESCRIPTION Part SKU# Bolt and nut M8*90mm 1987TT-1(16) 1987TT-2(6) Bolts M8*35mm Screws Ø6.5*83mm 1987TT-3(8) 1987TT-4(16) Dowel Ø8*40mm 1987TT-5(28) Screws 8#*30mm 1987TT-6(4) Metal dowel Ø10*100mm 1987TT-7(1) Allen key 60*22*4mm Note: Screwdriver will be prepared by yourshelf. THE HARDWARE IS LOCATED IN THE PACKING ITEM NOTE: MUST TIGHTEN SCREWS PERIODIACLLY. - Page 7 STEP 1: Assembly Rail (C): Please locate two rails (C) to Ends (A) by Dowel (4) firstly, and then fasten gradually by Bolt+nut (1) BUT NO TIGHTEN. Assembly Guard Rail (D): Please locate Guard rails (D) to Ends (A) by Dowel (4) firstly, and then fasten gradually by Bolt (3).
- Page 8 STEP 3: Please fasten slats (J ) by screw (5) into corresponding holes. 5=14Pcs STEP 4: Insert dowel (4) to Ends (B) firstly, then the Rails (F) are fastened by Bolt+nut (1). Pay attention to rail orientation. 4=4Pcs 1=8Pcs...
- Page 9 STEP 5: Please fasten slats (J ) by screw (5) into corresponding holes. 5=14Pcs STEP 6: Assemble the upper bunk to lower bunk by Metal dowel (6). 6=4Pcs...
- Page 10 Combining with Ladder ( Option 1) Attaching the ladder to Guard rail by Screw (this hardware is placed in ladder box)
- Page 11 Combining with Stairway Chest (option 2) Please attach the Stairway Chest to Bunk bed by metal bracket and screw (are placed in Stairway box). Please place Stairway Chest is next to Bunkbed Side and wall.
- Page 12 Option 1: Option 2: That's it ! You've finished assembling your item. Thank you!
- Page 13 ASSEMBLY INSTRUCTIONS LUCA PANEL/BUNK/DAYBED TRUNDLE SKU: 314671 ITEM NO: Y2103W-348 314583 Y2103B-348 314627 Y2103G-348 15 min...
-
Page 14: Part List
Part list PART SKU# IMAGE DESCRIPTION 1996-A-W: (White) 1996-A-B: (Blue) Front 1996-A-G: (Grey) 1996-B-W: (White) 1996-B-B: (Blue) Back rail 1996-B-G: (Grey) 1996-C-W: (White) 1996-C-B: (Blue) Side rails 1996-C-G: (Grey) Slats 1996-D... -
Page 15: Cleaning Instructions
Hardware List of Luca Trundle IMAGE DESCRIPTION Part SKU# 1996-1(8) Bolt and nut M8*70mm 1996-2(2) Bolts M4*20mm 1996-3(4) Dowel Ø8*40mm 1996-4(14) Screws 8#*30mm 1996-5(1) Handle 1996-6(1) Allen key 60*22*4mm Note: Screwdriver will be prepared by yourshelf. THE HARDWARE IS LOCATED IN THE PACKING ITEM NOTE: MUST TIGHTEN SCREWS PERIODIACLLY. - Page 16 Detail view...
- Page 17 STEP 1: Firstly, please locate Side Rail (C) to Front (A), Back (B) Before assembly: Move the nut out by dowel (3) . Fasten Side Rail (C) by (Bolt+nut) (1). 1=8 Pcs 3=4 Pcs STEP 2: Please fasten slats (D) by screw (4) into corresponding holes. 4=14 Pcs...
- Page 18 STEP 3: Assemble the handle (5) into Front (A) 2=2 Pcs 5=1 Pc That's it ! You've finished assembling your item. Thank you!
Need help?
Do you have a question about the LUCA Y2103W-340 and is the answer not in the manual?
Questions and answers