Advertisement
Quick Links
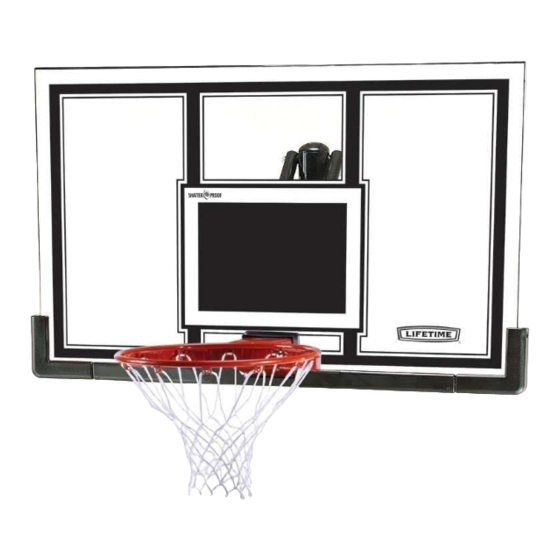
BACKBOARD & RIM
BASKETBALL SYSTEM
MODEL 71526
• Before you start
Decide where you would like to mount your system.
A mounting kit is required for Roof and Wall
mounts and is available through our Customer
Service Department (see page 9).
• Recruit friends and family
Assembly should take 2 people about 2-3
hours to complete.
WATCH
3D ANIMATION
OF THE FULL ASSEMBLY
SCAN THE
CODE
Save this instruction in the event that the manufacturer has
to be contacted for replacement parts.
TOOLS REQUIRED
1/2" (13 mm)
(2)
(1)
QUESTIONS?
CONTACT LIFETIME CUSTOMER SERVICE:
Call: 1-800-225-3865
7:00 am-5:00 pm (Monday-Friday) MST
and 9:00 am-1:00 pm Saturday MST
OR SEARCH
1187885,
1210180
3/8" (10 mm)
(1)
Live Chat:
www.lifetime.com/customerservice
ASSEMBLY INSTRUCTIONS
*Backboard Brackets (included with the Lifetime
(sold separately) are required to complete the assembly as instructed in
this manual.
7/16" (11 mm)
(1)
(1)
For Customer Service in Mainland
Europe and the United Kingdom,
E-mail: cs@lifetimeproducts.eu
Universal Mounting Kit
®
TABLE OF CONTENTS
Icon Legend................................2
Warnings & Notices.....................2
Backboard-to-Rim Assembly.........3
Mounting the System..................9
Registration........................10
Warranty................................11
Model Number: 71526
Product ID:
Advertisement

Subscribe to Our Youtube Channel
Summary of Contents for Lifetime 71526
-
Page 1: Table Of Contents
Assembly should take 2 people about 2–3 hours to complete. WATCH 3D ANIMATION OF THE FULL ASSEMBLY *Backboard Brackets (included with the Lifetime Universal Mounting Kit ® (sold separately) are required to complete the assembly as instructed in this manual. -
Page 2: Icon Legend
ICON LEGEND • Indicates special heed should be taken when reading. • Indicates the parts to be used for a section. • Indicates no parts required for a specifi c section. • Indicates the hardware to be used for a section. •... -
Page 3: Backboard-To-Rim Assembly
BACKBOARD-TO-RIM ASSEMBLY HARDWARE REQUIRED Hardware Bag AAR (x2) AAV (x2) ABK (x6) ABD (x2) Hardware Bag ADR (x4) ABC (x2) AAQ (x2) BNP (x1) 25% of actual size ABQ (x1) AJW (x2) 25% of actual size ACS (x2) 25% of actual size ADP (x10) PARTS REQUIRED Plastic Parts... - Page 4 The actual Brackets may vary, but the assembly steps still apply. See page 9 for more details. • The Backboard Brackets shown represent Lifetime Products ® components and are for illustration purposes only. If using...
- Page 5 • The Backboard Brackets shown here are not included with this system. • Bend the Backboard Brackets (not included) so the lower holes go over the Carriage Bolts. Lifetime Backboard ® Brackets are designed to be bent by hand. Secure the Brackets to the Carriage Bolts through the lower of the two holes in the Bracket.
- Page 6 SECTION 1 (CONTINUED) TOOLS AND HARDWARE REQUIRED ABQ (x1) 1/2" (≈13 mm) 25% of actual size (x2) AAQ (x2) • Use the 1/2” socket head from the socket-head wrench to press one Push Nut (AAQ) onto one end of the Axle (ABQ). •...
- Page 7 SECTION 1 (CONTINUED) TOOLS AND HARDWARE REQUIRED 1/2" (≈13 mm) (x2) ADR (x4) AJW (x2) AOW (x1) 25% of actual size 25% of actual size AAV (x2) ABK (x2) • Thread the Jam Nuts (AAV) as far as they will go on the ends of the U-Bolt. Then slide the Springs (AJW) into place and secure them with the hardware shown.
- Page 8 SECTION 1 (CONTINUED) TOOLS AND HARDWARE REQUIRED ADP (x10) • Remove the plastic fi lm from the Backboard (AJI), and attach the Center Frame Pad (AJQ) to the Backboard in the location shown with the hardware indicated. Make sure that the Center Frame Pad is oriented and centered on the metal piece of the Backboard.
-
Page 9: Mounting The System
• For mounting the Backboard & Rim Combo to a roof, wall, or existing pole mount that does not provide an extension, you must use a Mounting Kit designed for this purpose. Lifetime Products offers a Universal Mounting Kit, Model #9594, through our Customer Service Department. -
Page 10: Registration
. And you can rest assured that Lifetime will not sell or provide your ® ® personal data to other third parties, or allow them to use your personal data for their own purposes. We invite you to read our privacy policy at www.lifetime.com REGISTER today! -
Page 11: Warranty
2. This warranty is nontransferable and is expressly limited to the repair or replacement of defective product. If the product is defective within the terms of this warranty, Lifetime Products, Inc. will repair or replace defective parts at no cost to the purchaser. - Page 12 ENHANCE YOUR LIFETIME ® PURCHASE BY ADDING ACCESSORIES OR OTHER GREAT PRODUCTS To purchase accessories or other Lifetime products, visit us at: ® www.lifetime.com Or call: 1-800-424-3865 7:00 am–5:00 pm (M–F) MST and 9:00 am–1:00 pm Saturday MST www.lifetime.com © 2021...


Need help?
Do you have a question about the 71526 and is the answer not in the manual?
Questions and answers