Table of Contents
Advertisement
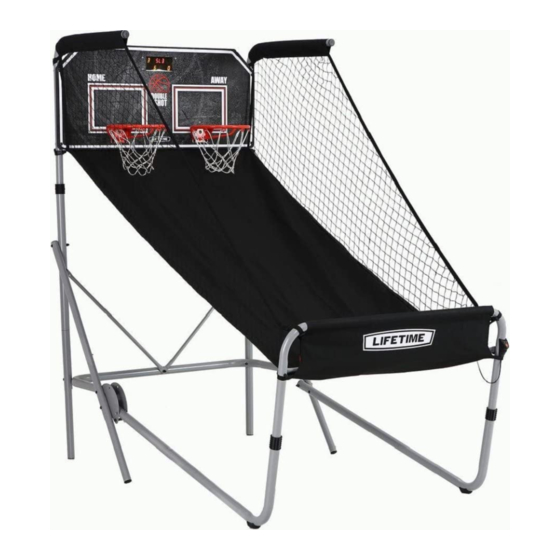
DOUBLE SHOT
ARCADE BASKETBALL
SYSTEM
MODEL #60091
MODEL 90648
BEFORE ASSEMBLY:
• 2+ people recommended for setup
• Videos and help guides available
Scan the code below to see how it all comes together.
http://go.lifetime.com/90648playlist
CAUTION – ELECTRICALLY OPERATED
PRODUCT –
years of age. As with all electric products, precautions should be
observed during handling and use to prevent electric shock.
THIS PRODUCT IS INTENDED FOR INDOOR USE ONLY.
TOOLS REQUIRED
9/16" (14 mm)
(1, included)
QUESTIONS?
CONTACT LIFETIME CUSTOMER SERVICE:
Call: 1-800-225-3865
7:00 am–5:00 pm (Monday–Friday) MST
and 9:00 am–1:00 pm Saturday MST
®
Not recommended for Children under 3
(1, included)
Live Chat: www.lifetime.com
(click on "Ask An Expert" tab)
Video Instructions:
www.youtube.com/lifetimeproducts
ASSEMBLY INSTRUCTIONS
(1)
(1)
For Customer Service in Mainland
Europe and the United Kingdom,
E-mail: cs@lifetimeproducts.eu
WARNING – ADULT
ASSEMBLY REQUIRED:
Small parts, sharp edges and points
may be present during assembly.
TABLE OF CONTENTS
Icon Legend................................2
Warnings & Notices.....................3
Frame Assembly..........................4
Backboard To Rim Assembly.........9
Parts Identifi er..........................i-iv
Ramp Assembly........................13
Adjusting The System................20
Maintenance..........................21
Registration........................21
Warning Stickers.......................22
Warranty................................23
MODEL# AND PRODUCT ID
(you will need both when contacting us)
Model Number: 90648
Product ID:
Advertisement
Table of Contents

Related Manuals for Lifetime DOUBLE SHOT 90648


Summary of Contents for Lifetime DOUBLE SHOT 90648
- Page 1 Adjusting the System....20 Maintenance......21 Registration......21 Warning Stickers.......22 Warranty........23 QUESTIONS? MODEL# AND PRODUCT ID CONTACT LIFETIME CUSTOMER SERVICE: (you will need both when contacting us) Model Number: 90648 Call: 1-800-225-3865 Live Chat: www.lifetime.com For Customer Service in Mainland Product ID: Europe and the United Kingdom, (click on “Ask An Expert”...
- Page 2 ICON LEGEND • Indicates special heed should be taken when reading. • Indicates the parts to be used for a section. • Indicates no parts required for a specifi c section. • Indicates the hardware to be used for a section. •...
- Page 3 WARNINGS & NOTICES SAFETY INSTRUCTIONS FAILURE TO FOLLOW THESE WARNINGS MAY RESULT IN SERIOUS INJURY OR PROPERTY DAMAGE AND WILL VOID WARRANTY. Owner must ensure that all players know and follow these rules for safe operation of the system. To ensure safety, do not attempt to assemble this product without following the instructions carefully. Check entire box and inside all packing material for parts and/or additional instruction material.
- Page 4 FRAME ASSEMBLY HARDWARE REQUIRED Hardware Blister Pack ETX (x2) ETZ (x4) EUD (x1) EUA (x9) EYF (x1) EUC (x3) BPW (x1) EUB (x3) ETY (x2) BMK (x2) ETZ (x2) EUA (x2) PARTS REQUIRED Metal Parts BMC (x2) BMA (x1) BLT (x2) EXV (x1) BLY (x2) BMF (x2)
- Page 5 (BMA) and Left Bottom Leg (EXV) with the hardware shown. • http://go.lifetime.com/doubleshot-frame • Attach the Bottom Legs (BMA & EXV) to the Rear Top Leg Assemblies as shown. Press down on the push button and insert the swaged end of the Rear Bottom Leg into the Rear Middle Leg (BMB) until the push button snaps into the hole.
- Page 6 SECTION 1 (CONTINUED) TOOLS AND HARDWARE REQUIRED EYF (x1) BPW (x1) BMK (x2) EUA (x2) 9/16" (14 mm) ETZ (x2) • Align the holes in the Top Arm (ETL) and Rear Top Leg (BMC), then secure them with the hardware shown. Only fi...
- Page 7 SECTION 1 (CONTINUED) TOOLS AND HARDWARE REQUIRED EYF (x1) BPW (x1) EUB (x3) 9/16" (14 mm) EUA (3) ETZ (x2) • Attach the Rear Cross Braces (BLZ) to the Rear Leg Assemblies and the Bottom Brace (BLU) with the hardware shown. •...
- Page 8 SECTION 1 (CONTINUED) TOOLS AND HARDWARE REQUIRED EYF (x1) EUC (x3) BPW (x1) EUA (x4) 9/16" (14 mm) EUD (x1) • Turn the Frame over and attach the Side Leg Assembly to the frame with the hardware as shown. • Attach the other Side Leg Assembly. Attach a Fold-Up Plate (BLT) to each side of the Bottom Brace (BLU).
- Page 9 BACKBOARD TO RIM ASSEMBLY HARDWARE REQUIRED Hardware Blister Pack BMJ (x8) EUA (x8) ETZ (x8) BNZ (x4) BOA (x4) EUE (x8) BMN (x2) PARTS REQUIRED Plastic Parts Metal Parts AJI (x1) ALX (x2) BLQ (x1) AKZ (x2) EYB (x4) TOOLS REQUIRED 9/16"...
- Page 10 • If you have trouble with this section, scan the code below to view a video on on its assembly. • http://go.lifetime.com/doubleshot-backboard • Remove and discard the plastic shield from the Electronic Scoreboard (BLQ), and snap the four Sensors (EYB) into...
- Page 11 SECTION 2 (CONTINUED) TOOLS AND HARDWARE REQUIRED EYF (x1) BNZ (x4) EUE (x8) BMJ (x8) EUA (x8) BPW (x1) 9/16" (14 mm) ETZ (x8) BOA (x4) • Attach the Electronic Scoreboard and Sensors to the Backboard (AJI). • Make sure the digital display is installed right side up, and the Sensors are oriented as shown.
- Page 12 SECTION 2 (CONTINUED) TOOLS AND HARDWARE REQUIRED EYF (x1) BPW (x1) BMN (x2) 9/16" (14 mm) • Remove the hardware shown. • Remove the hardware shown • Place the backboard in position on the frame, then reattach the hardware from the previous step, adding a Retaining Hook (BMN) between the Cap Nut (EUA) and the back of the tube.
- Page 13 SECTION 2 (CONTINUED) TOOLS AND HARDWARE REQUIRED • Attach the Nets (AKZ) to the Rims (ALX). • With the help of another adult, rotate the Rear Frame Assembly upright as shown. • The Double Shot Arcade Basketball System has two height settings. Make sure the Frame has been adjusted to the proper height setting for your ceiling.
- Page 14 RAMP ASSEMBLY HARDWARE REQUIRED Hardware Blister Pack EUD (x1) EUR (x1) EUC (x1) ETZ (x2) BMK (x2) BML (x2) EUA (x6) BOB (x2) EUB (x1) PARTS REQUIRED Metal Part Plastic Parts BLV (x2) BOF (x1) BLP (x6) BLR (x1) EUQ (x1) BMD (x1) BLX (x2) BQB (x1)
- Page 15 PARTS IDENTIFIER This page intentionally left blank Remove this section to reference during assembly...
- Page 16 AJI (x1) PARTS IDENTIFIER PARTS IDENTIFIER / IDENTIFICADOR DE PIEZAS / IDENTIFICATEUR DE PIÈCES Metal Parts BMA (x1) BMC (x2) BLT (x2) EXV (x1) BLY (x2) BMB (x2) BMF (x2) BOF (x1) BLX (x2) BMD (x1) BLV (x2) ETL (x2) BLZ (x2) BLW (x1) ALX (x2)
- Page 17 PARTS IDENTIFIER Plastic Parts AJI (x1) AKZ (x2) BLQ (x1) EYB (x4) BLS (x1) BLR (x1) BLP (x6) EUQ (x1) BQB (x1) HARDWARE REQUIRED...
- Page 18 PARTS IDENTIFIER PARTS IDENTIFIER / IDENTIFICADOR DE PIEZAS / IDENTIFICATEUR DE PIÈCES This page intentionally left blank Remove this section to reference during assembly...
- Page 19 • If you have trouble with this section, scan the code below to view a video on on its assembly. • http://go.lifetime.com/doubleshot-ramp • Slide the Lean Bar (BLW) through the sleeve of the Ball Return Ramp (BLS) with the the Push Buttons on the Lean Bar facing the Canvas Ramp as shown.
- Page 20 SECTION 3 (CONTINUED) TOOLS AND HARDWARE REQUIRED • Insert the Side Rail with Push Button (BMD) and Side Rail without Push Button (BOF) into the Front Legs (BLX) until the push buttons snap into the holes indicated. Double-headed Push Button No Push Button Press down on push button...
- Page 21 SECTION 3 (CONTINUED) TOOLS AND HARDWARE REQUIRED EUD (x1) EYF (x1) BOB (x2) EUA (x3) EUC (x1) BPW (x1) 9/16" (14 mm) EUB (x1) EUR (x1) • Attach the Front Frame Assembly to the Rear Frame Assembly with the hardware shown. Press down on the double headed push button on the Front Leg Assembly on the left side of the system and insert the button into the holes indicated on the Fold-up Plate (BLT).
- Page 22 SECTION 3 (CONTINUED) TOOLS AND HARDWARE REQUIRED EYF (x1) BMK (x2) EUA (x2) BPW (x1) 9/16" (14 mm) ETZ (x2) • Slide the Ball Return (BLS) over the Top Arms (ETL). Hook the Upper Straps of the Ball Return under the Retaining Hooks (BMN) as shown.
- Page 23 SECTION 3 (CONTINUED) TOOLS AND HARDWARE REQUIRED EYF (x1) BML (x2) BPW (x1) EUA (x1) 9/16" (14 mm) • Attach the Cross Bar (BLV) and the Controller (EUQ) to the Lean Bar (BLW) with the hardware as shown. The Controller may be installed on either side of the system.
- Page 24 SECTION 3 (CONTINUED) TOOLS AND HARDWARE REQUIRED • Run the cord for the Controller (EUQ) through the loops on the side of the Ramp. Plug the end of the cord into the remaining input in the Scoreboard. • The controller can be attached to the right leg or the left leg on the system.
- Page 25 ADJUSTING THE SYSTEM • The Double Shot Arcade Basketball System can be adjusted to accommodate lower ceilings and younger players. To adjust the system, locate the Push Buttons shown below. Press the Push Buttons and slide the tubes to the desired height.
- Page 26 . And you can rest assured that Lifetime ® will not sell or provide your personal data to other third parties, or allow them to use your personal data for their own purposes. We invite you to read our privacy policy at www.lifetime.com REGISTER today!
- Page 27 WARNING STICKERS • If a Warning Label or Sticker is illegible, destroyed or removed, contact Customer Service for a replacement. WARNING AVERTISSEMENT ADVERTENCIA • Do not climb on the structure of the Double Shot system. • The Pinch Warning stickers are •...
- Page 28 NOTES...
- Page 29 NOTES...
- Page 30 NOTES...
- Page 31 2. This warranty is nontransferable and is expressly limited to the repair or replacement of defective product. If the product is defective within the terms of this warranty, Lifetime Products, Inc. will repair or replace defective parts at no cost to the purchaser.
- Page 32 ® ENHANCE YOUR LIFETIME PURCHASE BY ADDING ACCESSORIES OR OTHER GREAT PRODUCTS ® To purchase accessories or other Lifetime products, visit us at: www.lifetime.com Or call: 1-800-424-3865 7:00 am–5:00 pm (M–F) MST and 9:00 am–1:00 pm Saturday MST www.lifetime.com...
Need help?
Do you have a question about the DOUBLE SHOT 90648 and is the answer not in the manual?
Questions and answers