Table of Contents
Advertisement
Quick Links
Advertisement
Table of Contents

Related Manuals for Diamond FCT/G25


Summary of Contents for Diamond FCT/G25
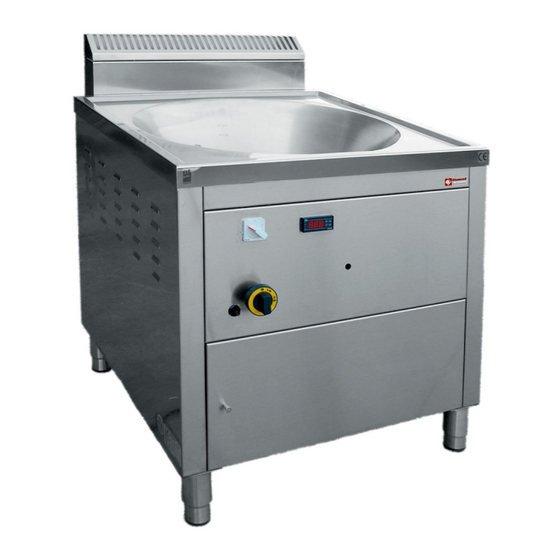
- Page 1 02/2021 Mod: FCT/G25 Production code: IBERICA/CG-80...
- Page 2 TECHNICAL INSTALLATION INSTRUCTIONS USE AND MAINTENANCE INSTRUCTIONS GAS FRYER / CHURRERA MODEL: FCT/G25...
-
Page 3: Table Of Contents
TECHNICAL INSTRUCTIONS FOR INSTALLATION, USE AND MAINTENANCE INDEX TECHNICAL DATA 1.1. MAIN DIMENSIONS TECHNICAL INFORMATION 2.1. SPECIFICATIONS CHART 2.2. INJECTORS / GAS CONSUMPTION CHART 2.3. CATEGORIES, GASES AND PRESSURES INSTALLATION 3.1. PLACE OF INSTALLATION 3.2. ELIMINATION OF COMBUSTION PRODUCTS 3.3. GAS CONNECTION 3.4. -
Page 4: Technical Data
TECHNICAL INSTRUCTIONS FOR INSTALLATION, USE AND MAINTENANCE 1. TECHNICAL DATA 1.1. MAIN DIMENSIONS MODEL CG-80 3 / 16... -
Page 5: Technical Information
TECHNICAL INSTRUCTIONS FOR INSTALLATION, USE AND MAINTENANCE 2. TECHNICAL INFORMATION 2.1. Specifications chart MODEL CG-80 Width (mm) External Dimensions Depth (mm) Height (mm) Nominal Caloric Consumption (Kw.) 24.5 Caloric Consumption burner (Kw) Gas Connection according to EN 10226-1,2 ½” Type Nominal level fry pot (l) Maximum frying capacity (Kg) 2.2. -
Page 6: Categories, Gases And Pressures
TECHNICAL INSTRUCTIONS FOR INSTALLATION, USE AND MAINTENANCE 2.3. Categories, gases and pressures. COUNTRY CATEGORIES SUPPLY PRESSURE AT, CH, CZ, DK, EE, ES, FI, GB, GR, IE, IT, LT, LV, NO, PT, RO, SE, SI, SK 20 mbar DE, LU, PL, RO BE, FR I2E+ 20 (25) mbar... -
Page 7: Installation
TECHNICAL INSTRUCTIONS FOR INSTALLATION, USE AND MAINTENANCE 3. INSTALLATION The fryer must be installed either by the manufacturer’s qualified and experienced technicians, by an authorized installer or by the gas supplying company. Before installing and turning on the fryer, read the instructions in this manual thoroughly and in particular the safety standards. -
Page 8: Gas Connection
TECHNICAL INSTRUCTIONS FOR INSTALLATION, USE AND MAINTENANCE 3.3. GAS CONNECTION Before connecting the fryer, consult your gas supplier and check whether your gas network supplies the necessary pressure and flow in order to ensure a proper operation of the fryer. This device is equipped with a gas connection threaded ½”... -
Page 9: Technical Maintenance
TECHNICAL INSTRUCTIONS FOR INSTALLATION, USE AND MAINTENANCE Inlet pressure control Check whether the device is configured for the desired type of gas. Revise the information mentioned on the plate of the device as well as charts of Chapter 2 of this manual. In case the gas type is different, adapt the fryer to the new gas type as shown in chapter 2.3. - Page 10 TECHNICAL INSTRUCTIONS FOR INSTALLATION, USE AND MAINTENANCE a. Unscrew and remove the protective stainless steel front panel. b. Unscrew the nut of the inlet and outlet gas pipe. c. Unplug the connections. d. Install the new spark control or solenoid valve and adjust. e.
-
Page 11: Gas Conversion
TECHNICAL INSTRUCTIONS FOR INSTALLATION, USE AND MAINTENANCE Electronic regulation thermostat sensor Before starting with this operation, drain the oil from the fry pot at room temperature and subsequently carry out following steps: a. Unscrew the sensor and remove it from the fry pot. b. - Page 12 TECHNICAL INSTRUCTIONS FOR INSTALLATION, USE AND MAINTENANCE Photo 1 Once conversion is done, you must REPLACE the label with information on the gas type by the new label. This label is supplied together with the injectors. 7. PROBLEMS AND SOLUTIONS During normal operation of the fryer, problems can arise.
-
Page 13: Use And Maintenance
TECHNICAL INSTRUCTIONS FOR INSTALLATION, USE AND MAINTENANCE 8. USE AND MAINTENANCE This fryer is designed for professional use and may only be used by qualified and trained personnel. This is a fryer and may only be used as a fryer. Remove the fried food out of the fryer with a slotted spoon. - Page 14 TECHNICAL INSTRUCTIONS FOR INSTALLATION, USE AND MAINTENANCE 9º Do not cut the safety systems. Do not modify the fryer. 10º Never take the warning signs off of the fryer. Replace the warning signs immediately when they are illegible, damaged or missing. ...
-
Page 15: Turning Off
TECHNICAL INSTRUCTIONS FOR INSTALLATION, USE AND MAINTENANCE a) By pressing and releasing button "SET", it is possible to access the menu “State of the machine”. The menu contains information about the values of the two intervention points. After visualizing information 'SP1', press key "SET" to visualize the value of the intervention point. -
Page 16: Maintenance And Cleaning
TECHNICAL INSTRUCTIONS FOR INSTALLATION, USE AND MAINTENANCE Before draining the oil, always turn off the fryer first and allow the oil to cool to room temperature. 8.4. MAINTENANCE AND CLEAN UP Clean stainless steel parts daily with soapy temperate water. Rinse thoroughly with water. Eventually, clean the fryer with stainless steel wool following the direction of the profile of the stainless steel. -
Page 17: Electrical Scheme
TECHNICAL INSTRUCTIONS FOR INSTALLATION, USE AND MAINTENANCE 8.6. ELECTRICAL SCHEME 16 / 16...
Need help?
Do you have a question about the FCT/G25 and is the answer not in the manual?
Questions and answers