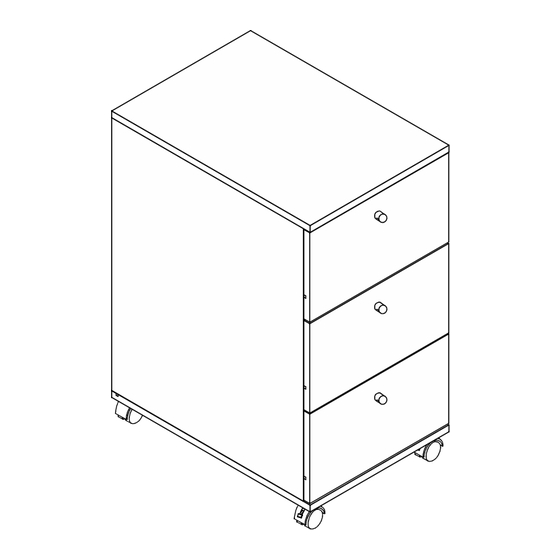
Mocka Brixton Assembly Instructions Manual
Desk drawers
Hide thumbs
Also See for Brixton:
- Accessories assembly (9 pages) ,
- Assembly instructions (5 pages) ,
- Assembly instructions manual (15 pages)
Advertisement
Quick Links
Brixton
Desk Drawers
Thank you for purchasing a Mocka
Brixton Desk
manufacturer's assembly instructions in detail to ensure the safety
d
s
features of the
rawers i
not compromised.
C
A
B
bolt & nut
PVC sticker
dowel
set x20
x20
x8
K
I
J
18mm
handle
lock castor
bolt x3
x3
x2
Phillips & Flathead screwdrivers required
mocka.co.nz I mocka.com.au
D
rawers
. Please follow the
D
E
F
E3
E4
E1
E2
50mm
14mm
slide rail
s
x12
s
x48
x3
crew
crew
L
M
N
castor
25mm
w
all
x2
s
x2
x2
crew
Hardware Supplied
WARNING:
Any furniture that is not anchored to a wall has the potential to tip over in certain
circumstances, i.e. if a child attempts to climb up on the furniture or in the event of an
earthquake. Accordingly, we recommend that all furniture is anchored to a wall. We supply a
free safety wall anchor with all furniture sold and we recommend these are used to prevent
your product tipping. The fixing device provided should fit most wall types, but please note
that different wall materials may require different fixing devices from those supplied.
G
H
18mm
brace
s
x6
x6
crew
O
plug
safety strap
x2
Advertisement

Subscribe to Our Youtube Channel
Summary of Contents for Mocka Brixton
- Page 1 Accordingly, we recommend that all furniture is anchored to a wall. We supply a Thank you for purchasing a Mocka Brixton Desk rawers .
- Page 2 Brixton Desk Drawers Insert the 8 x nut(A) into panel [3] and [4]. Insert the 12 x nut(A) into 3 x panel [7] and 3 x panel [8]. mocka.co.nz I mocka.com.au ...
- Page 3 Brixton Desk Drawers Attach the 2 x lock castor (L) and 2 x castor (K) with 16 x screw (F). Attach slide rails (E1) and (E3) to panels [3] and [4] with 18 x screws (F).Tighten Tighten with a screwdriver.
- Page 4 Brixton Desk Drawers Attach panel [3] and [4] to panel [2] with 4 x bolt (A) and 4 x dowel (C). Tighten Slide panel [5] into the position as shown. with a screwdriver. mocka.co.nz I mocka.com.au ...
- Page 5 Brixton Desk Drawers Attach panel [1] to panel [3] and [4] with 4 x bolt (A) and 4 x dowel (C). Insert 6 x braces (H) into panel[5] with 6 x screws (G).Tighten with a screwdriver. Tighten with a screwdriver.
- Page 6 Brixton Desk Drawers Attach panel [7] and [8] to panel [9] with 12 x screw( D). Tighten with a Attach handle (J) to panel [6] with bolt (I). Tighten with a screwdriver. screwdriver. Then slide panel [10] into the position as shown.
- Page 7 Brixton Desk Drawers Attach panel [6] to panel [7] and [8] with 12x bolt (A). Tighten with a screwdriver. Attach E2 and E4 to panel [7] and [8] with 12x bolt (F). Tighten with a screwdriver. mocka.co.nz I mocka.com.au ...
- Page 8 Brixton Desk Drawers Insert the drawers to the cabinet as shown. Then you can stick the PVC sticker Attach safety strap (O) to panel [1] with 2 x screw(F). Tighten with a on visible nut (A) to make the cabinet more pretty.
- Page 9 Brixton Desk Drawers Move the unit to the desired location against a wall. Attach the other end of the You're done, enjoy! 2 x safety straps (O) to the wall using 2 x wall plugs (N) and 2 x screws (M).


Need help?
Do you have a question about the Brixton and is the answer not in the manual?
Questions and answers