Table of Contents
Advertisement
Quick Links
Advertisement
Table of Contents

Related Manuals for Watts pure water PWS30


Summary of Contents for Watts pure water PWS30
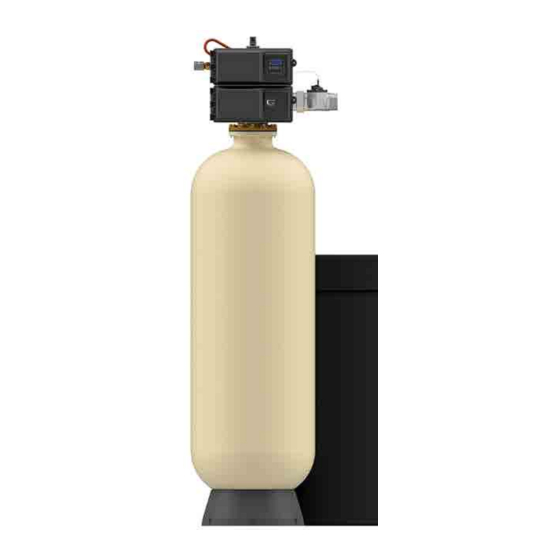
- Page 1 IOM-WQ-PWS30_PWS30-2_PWS30-P Installation, Operation and Maintenance 3" Commercial Water Softeners Series: PWS30, PWS30-2 & PWS30-P PWS30 Simplex Systems PWS30-2 Duplex Alternating Systems PWS30-P Duplex, Triplex and Quadplex Progressive Systems...
- Page 2 Congratulations on your purchase of this Watts commercial water softening solution. ® You have made a great choice to protect your plumbing system against the damaging effects of hard water. This system has been engineered for trouble free operation and produced using top quality components. Simple programming, corrosion resistant mineral tank(s) and an easy to service design ensures this system will be durable and easy to maintain.
-
Page 3: Safety Information
If you are unsure about installing your Watts water softener • To disconnect power, unplug the AC adapter from its power contact a Watts representative or consult a professional water source. -
Page 4: Table Of Contents
Introduction Table of Contents Page Safety Information ........3 Principals of Softening- Ion Exchange How To Use This Manual . -
Page 5: Project Data Sheet
Project Data Sheet Job Details Job Number: _____________________________________________ Model Number/Serial Number: ______________________________ Water Hardness: _______________ppm or gpg Capacity Per Unit: Mineral Tank Size: _____________Diameter: _____________ Height: Salt Setting per Regeneration: Regenerant Flow:_____________Upflow _____________ Downflow 1. Meter Size: A. 3/4" Paddle Wheel B. -
Page 6: System Specifications
System Specifications Dimensions - Weights PWS30-2 PWS30 & PWS30-P FRONT SIDE FRONT SIDE FRONT SIDE NOTICE Dimensional data is for a single mineral tank system ONLY. PWS30-P models are composed of multiple PWS30 systems which can be arranged accordingly to suit floor space availability. See Space Required in table below for single tank systems and estimate 2 spaces for duplex, 3 spaces for triplex and 4 spaces for quadplex PWS30-P series systems. - Page 7 System Specifications General System Information for 3" Simplex (PWS30) and Duplex Alternating (PWS30-2) Softeners SPACE SHIPPING MODEL NO. ORDERING CODE DESCRIPTION REQUIRED WEIGHT D X W X H PWS30151H11 7100045 10 Cubic Foot 3" Simplex Softener with Flow Meter 39" X 74" X 103" 1070 PWS30151I11 7100046...
-
Page 8: Set Up
Hardness (maximum) ... Depends on customer’s series number. If any components are missing or damaged acceptable hardness contact your Watts representative. If they can not be reached leakage level contact Watts customer service at 800-224-1299. -
Page 9: System Installation
O-ring applica- 4i. Press the factory suppled stainless steel upper diffuser tions. Watts recommends Ordering Code #7300948 Silicone Lubricant. The use of other types of lubricants may attack basket, flared side up, into the top flange port of the min- the control’s plastic or rubber components. - Page 10 8*. Install an inlet water sample port in the supply line and close it. elevation as the mineral tank and within 10 feet of the water 9*. If risk of vacuum exists, install Watts # 0556031 vacuum softener control valve. Add enough water (6") to the brine relief valve in the supply line to protect the system against tank so that water covers the top of the air check.
-
Page 11: Start Up Instructions
System Installation Start Up Instructions 11. Put the appropriate amount of salt in each brine tank. Do Not fill the salt level past the brine well lid. 1. Ensure all inlet and outlet isolation valves and the bypass 12. Fully open the outlet isolation valve(s). valves are in the closed position and the treated water faucet 13. -
Page 12: Installation Diagrams - Series Pws30 Simplex Systems
Point arrow on drain line flow control housing in direction of flow. vacuum relief valve Watts ordering code # 0556031 on inlet line. 9. Brine tank dimensions shown on table are factory selected for use with the specified system size. -
Page 13: Installation Diagrams - Series Pws30-2 Duplex Alternating Systems
Installation Diagrams - Series PWS30-2 Duplex Alternating Systems Top View Side View MINERAL TANK POWER CORD (SEE NOTE 13) BRINE TANK (SEE NOTE 14) 1" SCH 40 PVC PIPING (SEE NOTE 15) BRINE LINE FLOW CONTROLLER Drain and Brine Connection Detail for PWS30-2 Series Drain water out to drain Drain Line Flow Control Housing &... -
Page 14: Installation Diagrams - Series Pws30-P Progressive 2-4 Tank Systems
Installation Diagrams - Series PWS30-P Progressive 2-4 Tank Systems Top View Side View MINERAL TANK POWER CORD (SEE NOTE 13) BRINE TANK (SEE NOTE 14) 1" SCH 40 PVC PIPING (SEE NOTE 15) Front View INLET UNION ISOLATION VALVE (SEE NOTE 4) VACUUM RELIEF BYPASS VALVE (SEE NOTE 8) -
Page 15: Controller Electrical Connections
Controller Electrical Connections Power Supply Connections Network / Communication Cables and Connections Installing the Power Supply: Note: Power Supply includes a harness with 2 black wires Use a shielded CAT5 Network/Communication cable. that connect to circuit board, see page 16. Connect the network/communication cable first before programming. -
Page 16: Wiring Diagram
Wiring Diagram 44403 Rev A... -
Page 17: Nxt2 Controller Programming And Operation
NXT2 Controller Programming and Operation Features This system uses the NXT2 controller which is capable of operating single or multi-tank systems. On-screen multilingual support: English, Francais, Deutsch, Italiano, Espanol, Nederlands, Portugues • Time of day super capacitor backup for 12-hour power loss •... -
Page 18: Controller Display
Controller Display... -
Page 19: Controller Operation
Controller Operation Setting the Time of Day Note: Set Time of Day on any unit and the rest of the units in the system will update the Time of Day automatically. 1. Press and hold the Up button for 2 seconds. The “Time” value is displayed. -
Page 20: Controller Features
Controller Features Remote Lock Regeneration Types The controller does not allow the unit/system to go into Softener/Filter Meter Delayed - When volume remaining Regeneration until the Regeneration Lockout Input signal to the reaches zero and the scheduled regeneration time is reached unit is cleared. - Page 21 Controller Features Push Settings System 8 (2 Units) Alternating Delayed The ability to transmit user settings from one unit to all other con- Immediate Transfer Delayed Regeneration One tank online nected units. Select the desired Master Programming settings supplying treated water, one tank in Standby. Only #1 control on one unit then push the same settings to all other connected will monitor its flow meter/sensor input.
-
Page 22: Master Programming Mode Flow Chart
Master Programming Mode Flow Chart Example: On: View settings without the ability to alter settings. Off: User has ability to alter settings. Before entering Master Programming, please contact your local professional water dealer. Example: English, Francais, Duetsch, Italiano, Espanol, Nederlandse, Portugues NOTICE Example: To identify your model softener, locate the diameter and... -
Page 23: User Programming Mode Flow Chart
Master Programming Mode User Programming Mode Flow Chart - Cont’d Flow Chart Example: User Programming Mode Range: 0 - 23 Hours 59 Minutes 1. Press and hold the Down and Up buttons simultaneously for 3 seconds to enter the User Programming mode. 2. -
Page 24: Diagnostic Programming Mode Flow Chart
Diagnostic Programming Mode Flow Chart Diagnostic Programming Mode Example: 1. Press and hold the Left button to enter Diagnostic Record of error events chronologically Programming mode. 2. To navigate, press the Extra Cycle button to advance to the next value. Press the Left button to retreat to the previous value. Example: 3. -
Page 25: Time Of Day Programming Mode Flow Chart
Time of Day Programming Mode Flow Chart Setting the Time of Day NOTE: Set Time of Day on any unit and the rest of the units in the system will update the Time of Day automatically. 1. Press and hold the Up button for 2 seconds. The “Time” value is displayed. -
Page 26: Nxt2 Programming Parameters And Ranges
NXT2 Programming Parameters and Ranges SYSTEM TYPE PROGRAMMING PARAMETER RANGES SOFTENER/ SOFTENER/ PROGRESSIVE TIME FILTER FILTER REGEN TYPE OF THE INTERLOCK SERIES ALTERNATING ALTERNATING ALTERNATING DEMAND METRIC CLOCK METERED METERED WEEK RECALL IMMEDIATE DELAYED Settings Review On, Off English Francais Deutsch Language Italiano... -
Page 27: Replacing The Media
Replacing the Media 11. Note the top of the distributor tube. It must be flush with the NOTICE top of the tank. If it is above the top of the tank by more than Ion exchange resin may need to be replaced periodically 1/2"... - Page 28 Replacing the Media - Cont’d 22. Open the inlet isolation valve slightly, until water can be heard flowing through the isolation valve and allow the mineral tank to fill with water. Air will come out of the drain line until the mineral tank is full of water.
-
Page 29: Replacement Parts - Major System Components
Replacement Parts - Major System Components MAJOR SYSTEM COMPONENTS ITEM NO. ORDERING CODES DESCRIPTION 68103969 K4041-NTH VALVE 3900/1800 120V HWBP FOR SIMPLEX MODELS 68103966 K4041-NT VALVE 3900/1800 120V NHWBP FOR ALTERNATING & PROGRESSIVE MODELS 68104692 K4560710-2.0 BRINE FLOW CONTROLLER ASSEMBLY 2.0 GPM 1" MXF F/24" SOFTENER 68104693 K4560710-5.0 BRINE FLOW CONTROLLER ASSEMBLY 5.0 GPM 1"... - Page 30 C1039 FIBERGLASS MINERAL TANK 42X72 ALMOND W/ 6" TOP & BOTTOM FLANGE 68100712 C1040 FIBERGLASS MINERAL TANK 48X72 ALMOND W/ 6" TOP & BOTTOM FLANGE 7300100 A4000 SOFTENING RESIN MEDIA WATTS BRAND HIGH CAPACITY SAC NA FORM 68100354 A7005A MEDIA GRAVEL #20 FLINT .06"X.125" 7300102 A7006A MEDIA GRAVEL .25"X.125"...
-
Page 31: Replacement Parts - 3900 Upper Powerhead
Replacement Parts - 3900 Upper Powerhead 3900 UPPER POWERHEAD ITEM NO. PART NUMBER DESCRIPTION 68104640 K4560416-NT UPPER POWERHEAD F/ 3900 24V NTXT2 W/POWER SUPPLY F/120V USA WO/COVER 68104580 K4560240 COVER F/3150 & 3900 UPPER POWERHEAD 68104399 K4519791-02 ELECTRONIC METER CABLE 25' 68104471 K4544164 POWER SUPPLY CABLE 120V/24VDC F/NXT2... -
Page 32: Replacement Parts - Nxt2 Controller Assembly
NXT2 Controller Assembly NXT2 CONTROLLER ASSEMBLY ITEM NO. PART NUMBER DESCRIPTION 68104777 K4562115 CONTROLLER ASSEMBLY NXT2... -
Page 33: Nxt To Nxt2 Conversion Kit
NXT to NXT2 Conversion Kit NXT TO NXT2 CONVERSION KIT ITEM NO. PART NUMBER DESCRIPTION 68104778 K4562121-01 CONTROLLER ASSY CONV KIT NXT TO NXT2 W/ POWER SUPPLY FOR USA... -
Page 34: Replacement Parts - 3900 Lower Powerhead
Replacement Parts - 3900 Lower Powerhead 3900 LOWER POWERHEAD ITEM NO. PART NUMBER DESCRIPTION 68104642 K4560058-03 LOWER POWERHEAD F/ 3900 24V NTXT2 WO/ COVER 68104581 K4560240-22 COVER F/3900 LOWER POWERHEAD... -
Page 35: Replacement Parts - 3900 Control Valve Body
Replacement Parts - 3900 Control Valve Body 3900 DOWNFLOW CONTROL VALVE BODY ASSEMBLY ITEM NO. ORDERING CODES DESCRIPTION VALVE BODY 3900 MACHINED, NPT U.S. TAP 7300799 K4560102-00 PISTON ASSEMBLY DOWNFLOW F/3150 & 3900 UPPER 7300800 K4560131 SEAL & SPACER KIT F/3150 & 3900 UPPER 7300801 K4560107-00 PISTON ASSEMBLY DOWNFLOW HWBP F/ 3900 LOWER 7300802... -
Page 36: Replacement Parts - 1800 Brine Valve
Replacement Parts - 1800 Brine Valve 1800 BRINE VALVE ASSEMBLY ITEM NO. PART NUMBER DESCRIPTION 68104501 K4560036-02 BRINE VALVE ASSEMBLY 1800 BRASS DESIGN #3 68104582 K4560276-01 BRINE VALVE ASSEMBLY 1800 BRASS RETROFIT KIT TO UPDATE TO DESIGN #3... -
Page 37: Replacement Parts - 1800 Injector Assembly
Replacement Parts - 1800 Injector Assembly 1800 INJECTOR ASSEMBLY ITEM NO. PART NUMBER DESCRIPTION 68104583 K4560277-05 INJECTOR ASSEMBLY 1800 W/#5 INJECTOR 68104584 K4560277-07 INJECTOR ASSEMBLY 1800 W/#7 INJECTOR 68104585 K4560277-08 INJECTOR ASSEMBLY 1800 W/#8 INJECTOR 68104244 K4515128-04 INJECTOR NOZZLE 1800 #4 GREEN 68104245 K4515128-05 INJECTOR NOZZLE 1800 #5 RED 68104246... -
Page 38: Replacement Parts - 3" Stainless Steel Electronic Meter
Replacement Parts - 3" Stainless Steel Mech/Electronic Meter 3 INCH STAINLESS STEEL METER ASSY ITEM NO. PART NUMBER DESCRIPTION 68104758 K4561935-10 METER ASSEMBLY 3" STAINLESS STEEL ELECTRONIC/MECHANICAL 68110068 K4561939 METER DOME MECH/ELEC STANDARD RANGE FOR .75"-3" METER W/ O-RING... -
Page 39: Troubleshooting
Troubleshooting Problem Cause Correction Water conditioner Electrical service to unit has been Assure permanent electrical service (check circuit breaker, GFCI, fails to regenerate interrupted fuse, plug, pull chain, or switch) Controller is defective Replace controller Power failure Reset time of day Softener delivers By-pass valve is open Close by-pass valve... - Page 40 Push correct system settings in Master Settings System Type Mismatch not match on Network Microcontroller Error Calibration or manufacturing test was Contact your Watts representative not performed 100 Days Without Regen 100 Days have expired without a regeneration Trigger a manual regeneration...
-
Page 41: Water Softener Flow Diagrams
Water Softener Flow Diagrams - Down Flow Brining 1 Service Position 3 Brine Position Service Outlet Inlet Drain Drain Regeneration Valve Inlet Service Inlet Valve Hard water enters at valve inlet – flows thru injector nozzle and Hard water enters at valve inlet and flows down thru mineral to throat to draw brine from the brine tank. - Page 42 Water Softener Flow Diagrams - Down Flow Brining 5 Rapid Rinse Position 6 Brine Tank Refill Position Service Outlet Inlet Drain Drain Inlet Inlet Hard water enters at valve inlet – flows thru the regeneration valve directly down thru the mineral – into the bottom distributor Hard water enters at valve inlet –...
-
Page 43: Flow Data And Injector Draw Rates - Down Flow
Flow Data and Injector Draw Rates - Down Flow 3900 Valve & 3" Dist. Tube on 24" Tank 3900 on Empty Tank... -
Page 44: Injector Nozzle And Throat Chart For 1800 Brine Systems
AND FITNESS FOR A PARTICULAR PURPOSE, ARE LIMITED IN DURATION TO ONE YEAR FROM THE DATE OF ORIGINAL SHIPMENT. Watts Regulator Co. 815 Chestnut Street North Andover, MA 01845-6098 USA: T: (800) 224-1299 • F: (978) 794-1848 • Watts.com/PureWater Canada: T: (888) 208-8927 • F: (905) 481-2316 • Watts.ca/PureWater Latin America: T: (52) 55-4122-0138 • Watts.com/PureWater IOM-WQ-PWS30_PWS30-2_PWS30-P 2203 EDP# 7100998 ©...
Need help?
Do you have a question about the pure water PWS30 and is the answer not in the manual?
Questions and answers