
Related Manuals for Jetson LX10


Summary of Contents for Jetson LX10
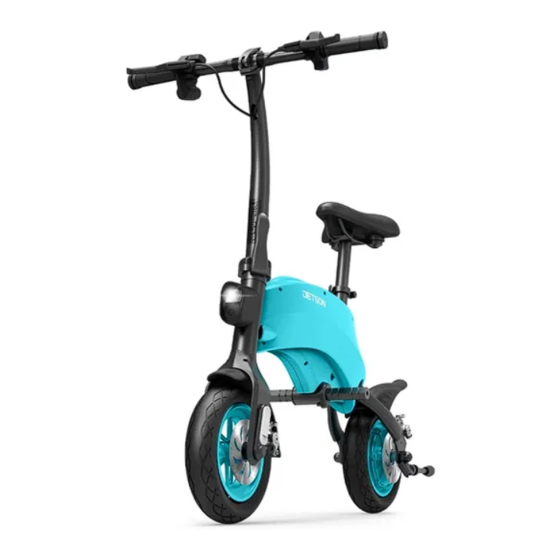
- Page 1 LX10 Folding Electric Ride-On. A guide for your ride. IMPORTANT, RETAIN FOR FUTURE REFERENCE: READ CAREFULLY MODEL: JLX10-BLK | JLX10-BLU | JLX10-RED Designed in Brooklyn | Made in China...
- Page 3 Remember to be safe and, most importantly, have fun!
-
Page 5: Table Of Contents
........................1 8 Unfolding the Handlebar ....................19 Operating the LX10 ......................21 Helmet Safety .. -
Page 6: Safety Warnings
Safety Warnings • Before use, please read the user manual and safety warnings carefully, and make sure you understand and accept all the safety instructions. The user will be responsible for any loss or damage caused by improper use. • Before each cycle of operation, the operator shall perform the preoperation checks specified by the manufacturer: That all guards and pads originally supplied by the manufacturer are in proper place and in serviceable condition;... - Page 7 For more information go to www.p65warnings.ca.gov/product MODIFICATIONS Do not attempt to disassemble, modify, repair, or replace the unit or any components of the unit without instruction from Jetson Customer Care. This will void any warranty, and can lead to malfunctions which may cause injury.
- Page 8 LIMITED LIFETIME WARRANTY Limited Life Time Warranty only applies to the Frame & Fork for manufacture defects. Contact Jetson Customer Care for detailed information via support.ridejetson.com Limited Lifetime Warranty does NOT cover: •...
-
Page 9: Safe Checklist
Safety Checklist INSTRUCTIONS PERTAINING TO RISK OF FIRE OR ELECTRIC SHOCK. IMPORTANT SAFETY INSTRUCTIONS A) READ ALL THE INSTRUCTIONS BEFORE USING THE PRODUCT. B) TO REDUCE THE RISK OF INJURY, CLOSE SUPERVISION IS NECESSARY WHEN THE PRODUCT IS USED NEAR CHILDREN. C) DO NOT PUT FINGERS OR HANDS INTO THE PRODUCT. -
Page 10: What's In The Box
What’s in the Box 1. HANDLEBAR 9. REAR FENDER 2. HANDBRAKE 10. REAR LIGHT 3. STEM QUICK RELEASE 11. SEAT CLAMP 4. HEADLIGHT 12. SEAT 5. FRONT FENDER 13. FOOT RESTS 6. FRONT TIRE 14. CHARGING PORT 7. KICKSTAND 15. CHARGER 8. - Page 11 PLEASE NOTE: IMAGES MAY NOT REFLECT EXACT APPEARANCE OF ACTUAL PRODUCT.
-
Page 13: Specs & Features
Specs & Features • PRODUCT UNFOLDED DIMS: 38” × 19” × 36” • MOTOR: 250W • PRODUCT FOLDED DIMS: 38” × 9” × 27” • MAX SPEED: UP TO 15.5 MPH • PRODUCT WEIGHT: 36 LB • BRAKE TYPE: HAND & DISC BRAKE •... -
Page 14: Attaching The Seat
1. Get Started Attaching the Seat • INSERT SEAT POST INTO SEAT TUBE. SLIDE SEAT INTO STEM TUBE. - Page 15 • TURN THE KNOB CLOCKWISE TO TIGHTEN SEAT CLAMP. CLOSE THE SEAT CLAMP. SEAT CLAMP KNOB...
- Page 16 • MAKE SURE SEAT CLAMP IS SECURED AND SEAT IS STABLE.
-
Page 17: Foot Rest Assembly
Foot Rest Assembly • INSTALL FOOT RESTS TO AXEL, TURN FOOT RESTS CLOCKWISE TO TIGHTEN CAUTION: IT’S IMPORTANT TO STOP IF YOU FEEL RESISTANCE WHEN PUTTING ON THE FOOT RESTS. IT COULD MEAN THE FOOT REST SPINDLE IS ENTERING THE CRANK ARM AT AN ANGLE. -
Page 18: Attaching The Rear Fender
Attaching the Rear Fender • REMOVE BOLT AND NUT WHICH COME PRE-ATTACHED TO REAR FENDER. • RUN THE BOLT THROUGH THE FENDER AND FRAME. • SECURE USING THE NUT. -
Page 20: Stay Charged
• ONLY USE THE INCLUDED CHARGER • PLUG THE CHARGER INTO THE WALL BEFORE THE CHARGING PORT • DON’T TURN ON THE LX10 WHILE IT’S CHARGING CHARGING PORT • CHARGE THE BATTERY UNTIL IT IS FULLY CHARGED - UP TO 4 HOURS •... -
Page 21: Unfolding The Handlebar
2. Make Moves Unfolding the Handlebar SLOWLY LIFT THE HANDLEBARS UP... - Page 22 • PRESS THE STEM QUICK RELEASE TO THE LOCK POSITION. • TO FOLD, UNLOCK THE STEM QUICK RELEASE. STEM QUICK RELEASE...
-
Page 23: Operating The Lx10
CRUISE CONTROL: TO ACTIVATE CRUISE MODE, TWIST AND HOLD THE TWIST THROTTLE FOR AROUND 6 SECONDS. BATTERY LEVELS: • 4 LIGHTS: 76-100% POWER • 3 LIGHTS: 51-75% POWER • 2 LIGHTS: 26-50% POWER • 1 LIGHT: 1-25% POWER (PLEASE CHARGE THE LX10 IMMEDIATELY!) -
Page 24: Helmet Safety
Helmet Safety THE FOREHEAD IS COVERED THE FOREHEAD IS EXPOSED. BY THE HELMET. COULD CAUSE SERIOUS INJURY. -
Page 25: Riding The Lx10
Riding the LX10 • BEFORE EACH RIDE, CHECK THAT THE HANDLEBAR AND SEAT ARE SECURE, THE TIRE PRESSURE IS SUFFICIENT, AND THE BRAKE SYSTEM WORKS CORRECTLY. • KEEP YOUR FEET ON THE FOOT RESTS. DO NOT RIDE WITH YOUR FEET DANGLING OVER THE SIDES AND ALWAYS STAY SEATED WHILE RIDING. -
Page 26: Care And Maintenance
• Carefully wipe with a damp cloth, then dry with a dry cloth. • Do not use water to clean the LX10, as the electrical and electronic systems may get wet, resulting in personal injury or malfunction of the LX10. - Page 27 Enjoying the ride? Leave a review on ridejetson.com/reviews or share your photos with us online using the #RideJetson hashtag! Follow us @ridejetson #MakeMoves...
- Page 28 Questions? Let us know. support.ridejetson.com Hours of Operation: 7 Days a Week, 10am-6pm Manufactured in Shenzhen, China. Imported by Jetson Electric Bikes LLC. 86 34th Street 4th Floor, Brooklyn, New York 11232 www.ridejetson.com Made in China Date Code: 08/2021...
Need help?
Do you have a question about the LX10 and is the answer not in the manual?
Questions and answers
How is the Jetson lx10 for climbing Hills
The Jetson LX10 performs well on hills. One user who is 5'8" and 170 pounds reported that the bike carries them easily up neighborhood hills. Another user, riding with a child, mentioned the bike still performs well and maintains good speed on hilly terrain.
This answer is automatically generated