Table of Contents
Advertisement
Quick Links
Important Information ................................................ 2
Safety Information ..................................................... 3
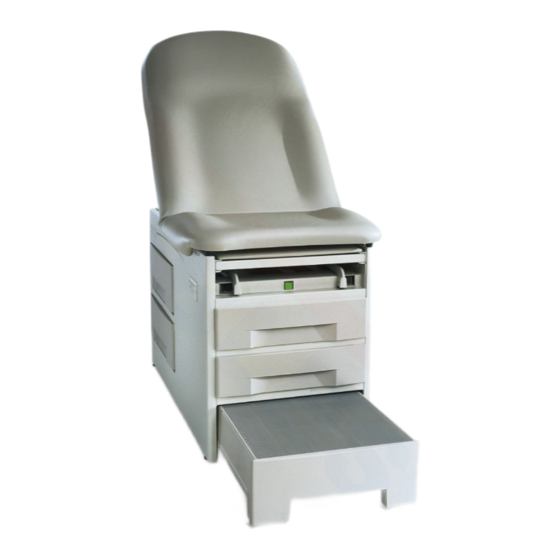
Component Identification .......................................... 3
Specifications ............................................................ 4
Installation ................................................................. 5
Document #100578 RevJ
Shop tables & accessories at
ExamTablesDirect.com
Model 5000/5001
Operation ....................................................................8
Table adjustments .....................................................11
Maintenance ..............................................................15
Accessories ...............................................................15
Service ......................................................................16
Warranty ....................................................................16
The Brewer Company, LLC
N88 W13901 Main Street, Suite 100
Menomonee Falls, WI 53051
P 1.888.Brewer.1
F 262.251.2332
www.brewercompany.com
Printed in USA © 2017
Advertisement
Table of Contents

Subscribe to Our Youtube Channel
Related Manuals for brewer 5000


Summary of Contents for brewer 5000
-
Page 1: Table Of Contents
Component Identification .......... 3 Maintenance ..............15 Specifications ............4 Accessories ...............15 Installation ..............5 Service ..............16 Warranty ..............16 The Brewer Company, LLC N88 W13901 Main Street, Suite 100 Menomonee Falls, WI 53051 P 1.888.Brewer.1 F 262.251.2332 www.brewercompany.com Document #100578 RevJ Printed in USA ©... -
Page 2: Important Information
Please fill in the following information for use when The Model 5000/5001 is primarily used in examination calling The Brewer Company or your distributor with rooms for general examinations and minor procedures. -
Page 3: Safety Information
Safety Information This is the safety alert symbol. It is used to alert you to potential physical injury hazards. The primary concern of The Brewer Company is Obey all safety messages that follow this that the equipment is operated and maintained symbol to avoid possible injury or death. -
Page 4: Specifications
SPECIFICATIONS Weight of Table ...........220 lbs. Operation • With carton and skid ...........265 lbs. Temperature ..........50°F to 104°F Humidity............30% to 75% Table Weight Capacity ........500 lbs. Electrical Requirements Stirrup Extension (maximum) ......16 in... . .120 VAC nominal, 60 Hz, 3 amps maximum Stirrup Lateral Positions ....4 Lateral Positions ... -
Page 5: Installation
INSTALLATION NOTICE NOTICE Inspect Carton and Contents No Sharp Tools Inspect all boxes and contents for To avoid damaging the table’s damage. Report any damage to the upholstery or painted surfaces, DO carrier immediately. NOT use a knife or other sharp object to open the packaging. - Page 6 INSTALLATION (CONTINUED) 3. Remove the table from the shipping pallet lifting at the correct lift points indicated in Figure 3. The leg support may be used for lifting. NOTICE NOTICE Table weighs approximately 315 lbs. AVOID HANDLING DAMAGE • To avoid damaging the table lift only at points indicated in Figure 3.
- Page 7 INSTALLATION (CONTINUED) Installing the Paper Rod A dowel rod for supporting a paper roll is shipped with each table. 1. Slide the dowel rod through the paper roll (see Figure 5). 2. Place one end of the dowel rod on one of the paper roll brackets, located on the rear side of the table’s back section.
-
Page 8: Operation
OPERATION Leg Support The leg support is located under the seat cushion Horizontal Positioning (Figure 6). It can be extended 15” for the patient prone position. Pull leg support out to the desired position. The leg support pad will extend along with the leg support. To return the leg support to its stored position simply push the leg support in. - Page 9 OPERATION (CONTINUED) Footstep 1. Place hand into opening in front of step and gently lift while fully extending footstep (Figure 8). 2. To retract step to stowed position, gently lift while pushing step fully back into cabinet. Footstep Retracted Footstep Extended Figure 8.
- Page 10 OPERATION (CONTINUED) Adjustable Stirrups Operating the Stirrups 1. To operate the stirrups, grasp end of stirrup and pull straight out of the table (Figure 9). Lift up slightly while sliding the stirrup out. NOTE: Applying downward pressure when pulling stirrup from table may make it difficult to move.
- Page 11 TABLE ADJUSTMENTS Patient Positioning The table is designed to accommodate the following examination positions (Figure 12): • Full Flat Table Position • Chair Position • Lithotomy (Pelvic) Position Chair Position Full Flat Table Position Lithotomy (Pelvic) Position Figure 12. Patient Positioning Document #100578 RevJ Printed in USA ©...
- Page 12 TABLE ADJUSTMENTS (CONTINUED) Back Section 1. Press and hold the release handle, lift back section upward to raise (Figure 13). Releasing the handle will automatically lock the table in the desired position. 2. While actuating the release handle upwards, push down on the back section to lower it. Back Section Release Handle Figure 13.
- Page 13 TABLE ADJUSTMENTS (CONTINUED) Pelvic Tilt (Model 5001 Only) The pelvic tilt feature sets the seat angle at 0° (horizontal) or 5° (up) position. Raising the seat section to the Pelvic Tilt Position: 1. Raise the front edge of the seat section (Figure 14).Rotate the pelvic tilt support bar upward to its full upright position.
- Page 14 TABLE ADJUSTMENTS (CONTINUED) Drawer Warmer (Model 5001 Only) The drawer warmer warms the contents of the top drawer on the foot end of the table. To operate the warmer, turn the warmer power switch to the ON or “illuminated” position (Figure 15). The switch will illuminate to indicate that the warmer is operating.
-
Page 15: Maintenance
MAINTENANCE Preventative Maintenance Table Care NOTICE NOTICE Loose Fasteners and Damaged Components Wipe Spills Immediately! Failure to perform periodic inspections of the table could The upholstery material is resistant to most medicinal result in equipment damage. type stains, but may be damaged by solvents and dyes. Remove any spilled fluids from the upholstery immediately. -
Page 16: Service
Figure 18. Fuse Holder Cap Figure 19. Fuse Removal Show Fuse Location CLEANING WARRANTY For Brewer Warranty Information: Visit www.brewercompany.com or contact the Brewer Customer Service Department at (1-888-Brewer1). Document #100578 RevJ Printed in USA © 2017 Shop tables & accessories at ExamTablesDirect.com...
Need help?
Do you have a question about the 5000 and is the answer not in the manual?
Questions and answers