Table of Contents
Advertisement
Available languages
Available languages
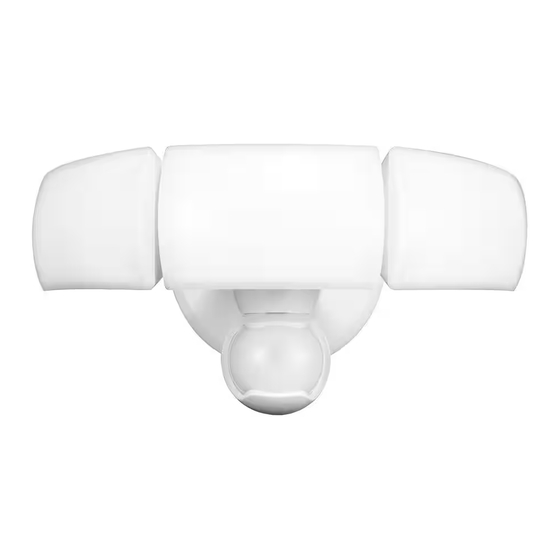
We appreciate the trust and confidence you have placed in Defiant through the purchase of this motion security light.
We strive to continually create quality products designed to enhance your home. Visit us online to see our full line of
products available for your home improvement needs. Thank you for choosing Defiant!
USE AND CARE GUIDE
MOTION SECURITY LIGHT
Questions, problems, missing parts?
Before returning to the store, call Defiant Customer Service
8 a.m.-7 p.m., EST, Monday-Friday, 9 a.m. - 6 p.m., EST, Saturday
1-866-308-3976
HOMEDEPOT.COM
THANK YOU
Item #1009195263
1009195261
Model #17000051
17000148
Advertisement
Chapters
Table of Contents

Related Manuals for Defiant 17000051


Summary of Contents for Defiant 17000051
- Page 1 THANK YOU We appreciate the trust and confidence you have placed in Defiant through the purchase of this motion security light. We strive to continually create quality products designed to enhance your home. Visit us online to see our full line of...
-
Page 2: Table Of Contents
Table of Contents Table of Contents ........2 Tools Required ........3 Safety Information ........2 Hardware Included .........4 Warranty ...........2 Package Contents ........4 5-Year Limited Warranty ......2 Installation ..........5 Pre-Installation .........3 Operation...........7 Planning Installation ......3 Care and Cleaning ........9 Specifications ........3 Troubleshooting ........10 Safety Information PRECAUTIONS WARNING: Turn the power off at the circuit breaker or... -
Page 3: Pre-Installation
Pre-Installation PLANNING INSTALLATION Before installing the light fixture, ensure that all parts are present. Compare parts with the Hardware Included and Package Contents sections. If any part is missing or damaged, do not attempt to assemble, install, or operate this light fixture. -
Page 4: Hardware Included
Pre-Installation (continued) HARDWARE INCLUDED NOTE: Hardware shown to actual size. ___AA ___BB ___CC ___EE ___DD Part Description Quantity Mounting bracket screw Mounting bracket screw Rubber plug Mounting bolt Mounting bracket with ground wire and connector attached. PACKAGE CONTENT Part Description Quantity Lamp head Light fixture... -
Page 5: Installation
Installation Determining the mounting Removing the mounting plate location NOTE: This fixture comes with a mounting plate (D) It is pre-assembled on the light fixture (B) for shipping. □ Unscrew the two decorative screws (E) (the screws do not come out of the canopy) connecting the light fixture (B) to the mounting plate (D) and remove the mounting plate (D). - Page 6 Installation (continued) Installing the mounting plate NOTE: If necessary strip 3/8inch of insulation from junction box wires. □ Connect the house ground wire to the ground wire on the mounting bracket using the wire connector installed on the mounting bracket (EE) □...
-
Page 7: Operation
Installation (continued) Caulking around the light fixture □ Caulk around the mounting plate (D) and mounting surface with silicone sealant (not included). Operation Adjusting the lamp heads Setting the sensor for testing NOTE: When the on-time “1 Min - 5 Min - 20 Min - Test” WARNING: Risk of fire. - Page 8 Operation (continued) Adjusting the motion sensor detection zone □ Perform a “walk test”: walk in an arc across the front of the motion sensor (C). □ Watch the light. The light will come on indicating motion has been detected. □ Stop, wait for the light to turn off, and then begin walking again.
-
Page 9: Care And Cleaning
Operation (continued) Using manual mode NOTE: Manual mode overrides the motion sensor (C) and “TIME” control so the light will operate full bright. This feature only works at night and only for one night at a time. The motion sensor (C) will reset to motion sensing mode after 6 hours or sunrise, whichever comes first. - Page 10 Troubleshooting (continued) Problem Possible Cause Solution □ □ The light comes on for no The motion sensor may be sensing Reposition the motion apparent reason. small animals or automobile traffic. sensor. □ □ The light fixture is wired through a Do not use a dimmer or dimmer or timer.
- Page 11 Questions, problems, missing parts? Before returning to the store, call Defiant Customer Service 8 a.m.-7 p.m., EST, Monday-Friday, 9 a.m. - 6 p.m., EST, Saturday 1-866-308-3976 HOMEDEPOT.COM Retain this manual for future use. 01-032-23...
- Page 12 HOMEDEPOT.COM GRACIAS Agradecemos la fe y la confianza que usted ha depositado en Defiant al comprar esta luz de seguridad por movimiento. Procuramos crear continuamente productos de calidad diseñados para mejorar su hogar. Visítenos en internet para ver nuestra línea completa de productos disponibles que necesita para el mejoramiento de su hogar.
- Page 13 Contenido Contenido ..........13 Herramientas Requeridas ....15 Información de seguridad ......13 Ferretería Incluida ........15 Garantía...........13 Contenido del Paquete ......15 5 años de garantía limitada ....13 Instalación ..........16 Antes de la instalación ......15 Operación ..........18 Cuidado y limpieza .........20 Planificación de la Instalación .....15 Especificaciones ........15 Análisis de averías .........20 Información de seguridad...
-
Page 14: Antes De La Instalación
Antes de la instalación PLANIFICACIÓN DE LA INSTALACIÓN Antes de instalar el aparato de luz, esté seguro que estén todas las piezas. Compare las piezas con la Ferretería incluida y las secciones de Contenidos del paquete. Si cualquier pieza falta o está dañada, no intente ensamblar, instalar ni operar este aparato de luz. -
Page 15: Ferretería Incluida
Antes de la instalación (continuación) FERRETERÍA INCLUIDA NOTA: La ferretería se muestra en su tamaño real. ___AA ___BB ___CC ___EE ___DD Pieza Descripción Cantidad Tornillo del soporte de montaje Tornillo de montaje Tapón de caucho Tornillo del soporte de montaje Soporte de montaje con cable a tierra y conector ensamblado. -
Page 16: Instalación
Instalación Determinación del Instalación del soporte de montaje sitio de montaje NOTA: Esta lámpara viene con un soporte de montaje (D) Está preensamblada en la lámpara (B) para el envío. Desatornille los dos tuercas decorativas (E) (las tuercas no salen del dosel) que conectan la lámpara (B) al soporte de montaje (D) y retire la el soporte de montaje (D). - Page 17 Instalación (continuación) Instalación de la placa de montaje NOTA: Si es necesario, pele 3/8 de pulgada del aislamiento de los cables de la caja de conexiones. □ Conecte el cable a tierra al cable a tierra en el soporte de montaje usando el conector de cable instalado en el soporte de montaje (EE).
-
Page 18: Operación
Instalación (continued) Calafateado alrededor de la lámpara □ Calafatee alrededor de (D) y la superficie de montaje con sellador de silicona (no incluido). Operación Ajuste de los focos Controles de sensores giratorios ADVERTENCIA: Riesgo de incendio. No enfoque las NOTA: Cuando el control “Prueba de 1 min - 5 min - 20 bombillas a una superficie combustible que esté... - Page 19 Operación (Continuación) Adjusting the motion sensor detection zone □ Realice una “prueba de caminata”: camine en un arco a través del frente del sensor de movimiento (C). □ Mira la luz. La luz se encenderá indicando que se ha detectado movimiento. □...
-
Page 20: Cuidado Y Limpieza
Operación (Continuación) Uso del modo manual NOTE: El modo manual anula el sensor de movimiento (C) y el control de “TIEMPO”, por lo que la luz funcionará a plena potencia. Esta característica sólo funciona por la noche y sólo para una noche a la vez. El sensor de movimiento (C) se restablecerá... - Page 21 Solución de problemas (Continuación) Problema Posible causa Solución □ □ La luz se enciende sin motivo El sensor de movimiento puede estar Vuelva a colocar el sensor aparente. detectando animales pequeños o de movimiento. tráfico de automóviles. □ □ La lámpara está conectada a través de No utilice un atenuador un atenuador o temporizador.
- Page 22 ¿Tiene preguntas, problemas o piezas faltantes? Antes de devolverlo a la tienda, llame a Servicio al Cliente de Defiant de 08 a.m.-7 p.m., EST, Lunes - Viernes, 09 a.m.-6 p.m., EST, sábado. 1-866-308-3976 HOMEDEPOT.COM Guarde este manual para uso futuro.
Need help?
Do you have a question about the 17000051 and is the answer not in the manual?
Questions and answers
Headlights coming down the street tripped my defiant 17000052 Motion detector light what can I do? The camera is not pointed towards the street, but the lights flash across the yard
Can the light bulb be changed when it finally burns out?