Table of Contents
Advertisement
Quick Links
S
EE
IMPORTANT OPERATOR INFORMATION
DATE INSTALLED: _____________________________________________________________
SERIAL NUMBER: _____________________________________________________________
Waste Water Tank
Fresh Water Tank
Printed in Canada
L
EVE
Tank Monitor
MODEL 709-LL
MANUAL
Signal Level
L II
TM
Sender Height
INSTRUMENTS LTD.
INSTRUMENTS LTD.
Advertisement
Table of Contents

Related Manuals for Garnet SEELEVEL II 709-LL


Summary of Contents for Garnet SEELEVEL II 709-LL
- Page 1 L II Tank Monitor MODEL 709-LL MANUAL IMPORTANT OPERATOR INFORMATION DATE INSTALLED: _____________________________________________________________ SERIAL NUMBER: _____________________________________________________________ Signal Level Sender Height Waste Water Tank Fresh Water Tank Printed in Canada INSTRUMENTS LTD. INSTRUMENTS LTD.
-
Page 2: Table Of Contents
GARNET L II Tank Monitor MODEL 709-LL Table of Contents CHAPTER 1 - OVERVIEW .....................3 CHAPTER 2 - SYSTEM DESCRIPTION ..............4 CHAPTER 3 - OPERATING INSTRUCTIONS ............6 CHAPTER 4 - DISPLAY CALIBRATION ..............7 CHAPTER 5 - SENDER PROGRAMMING ...............9 CHAPTER 6 - INSTALLATION GUIDE (NEW OEM INSTALLATIONS ONLY) ....13... -
Page 3: Chapter 1 - Overview
CHAPTER 1 - OVERVIEW he S Tank Monitor represents a massive leap L II forward in level measurement technology for the Recreational Vehicle industry. The SeeLeveL has a combination of features, accuracy, reliability, and diagnostic capability that have never been available before. -
Page 4: Chapter 2 - System Description
CHAPTER 2 - SYSTEM DESCRIPTION he SeeLeveL consists of a display unit that mounts inside the RV, and sender panels that stick to the side of the holding tank. A single two conductor wire is used to connect all the sender panels to the display. - Page 5 If a sender is operating properly and connected to the display with good wiring, then the display will show the level normally. If the wiring is disconnected, shorted, or cut, or if the sender panel is defective, then the display will indicate an error code. The various error codes are shown in the troubleshooting chapter.
-
Page 6: Chapter 3 - Operating Instructions
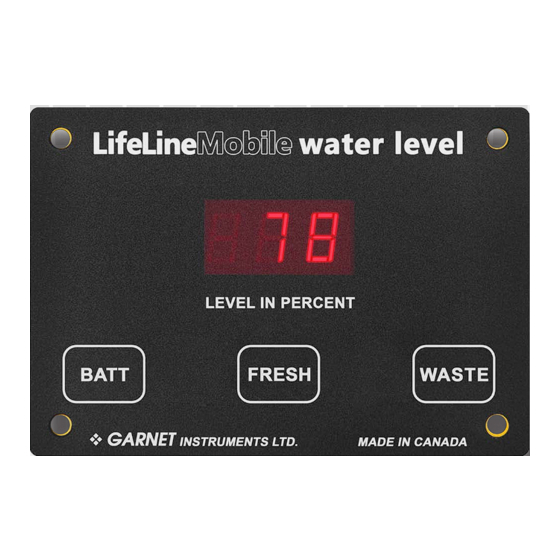
CHAPTER 3 - OPERATING INSTRUCTIONS he display is the only system component that is accessed by the user. All user input to the display is done using the three buttons along the bottom of the display. Operation of the display is as follows To read a water or sewer tank level: 1. -
Page 7: Chapter 4 - Display Calibration
CHAPTER 4 - DISPLAY CALIBRATION To program the LED brightness: 1. If the display is to be used inside the coach, the LED brightness should be low. If it is to be used in the service bay area where sunlight can reach it, the LED brightness should be high. 2. - Page 8 4. When the programming mode is entered, the display will show “FrS” if doing the number of senders for the fresh tank or “GrS” if doing the waste tank. When this occurs release both buttons. 5. The display will now show “1SE” (one sender) or “2SE” (two senders), based on what is currently programmed into the display.
-
Page 9: Chapter 5 - Sender Programming
CHAPTER 5 - SENDER PROGRAMMING To program the 710ES sender for the correct tank: 1. Since the senders are all connected in parallel to save wiring and to simplify installation, the senders must be programmed so they know which tank they are on. The senders can be programmed for either the fresh, grey, or black tank. - Page 10 2. The senders default to single or bottom operation if the programming is not altered. Consequently, if the sender is for single or bottom operation, nothing further needs to be done to it (beyond programming it for the correct tank). 3.
- Page 11 710ES SENDER PROGRAMING 709-LL Manual Page 11...
- Page 12 710JS SENDER PROGRAMING Page 12 709-LL Manual...
-
Page 13: Chapter 6 - Installation Guide (New Oem Installations Only)
CHAPTER 6 - INSTALLATION GUIDE (NEW OEM INSTALLATIONS ONLY) 1. Please refer to the “Troubleshooting and Installation Tips” section in Chapter 7 for details on avoiding installation issues. 2. The installation consists of mounting the display inside the RV, cutting and fastening the senders to the sides of the holding tanks, connecting wiring, and programming the display. - Page 14 in length, for example, a system with a tank height of 11.75 inches, cut the sender to be 10.5 inches long, this allows 5/8” at each end when the sender is centered vertically on the tank. The JS sender is cut to the nearest 1.0 inch in length. IMPORTANT: Do not cut the 710ES sender shorter than 4-1/2 inches! The sender will not work if it is cut less than 4-1/2 inches.
- Page 15 710ES SENDER 709-LL Manual Page 15...
- Page 16 710JS SENDER Page 16 709-LL Manual...
- Page 17 backing paper off the adhesive. Do this slowly to prevent the adhesive from being ripped off the sender, and to prevent the backing paper from ripping. Be careful not to bend the sender sharply in the process. Position the sender over the side of the tank and carefully stick it down.
- Page 18 buildup in the tank. Note that the system “learns” about the characteristics of the tank with use, so the readings may be inaccurate when the tank is empty or almost empty when the system is first tested. Once the tank has been filled at least 1/4 full the system will be properly “taught”...
- Page 19 Typical Dual Stacked 710ES Sender Installation 709-LL Manual Page 19...
-
Page 20: Chapter 7 - Troubleshooting Guide
CHAPTER 7 - TROUBLESHOOTING GUIDE Display trouble codes: If a sender or its wiring is not operating properly, the following codes are shown on the display: 1. If a sender is unresponsive or there is an open circuit in the wiring so that the sender is not connected, the display will indicate an open circuit by showing “OPn”... - Page 21 The diagnostics can be used to check the wiring and the senders: 1. If a short circuit is showing, disconnect the senders one at a time at the sender location. If the short circuit indication goes away when a sender is removed, then that sender is bad. If all the senders are removed but a short circuit still shows, then the wiring may be shorted.
- Page 22 this diagnostic allows the user to confirm the length and to make sure that the auto calibration is working properly. 3. To check the diagnostics, press and hold the button for the tank to be checked, the display will show the level for that tank.
- Page 23 What to do if the system indicates a residual or non-zero water level even though the tank is drained completely: 1. This can be due to a convex tank bottom or a sloped tank bottom. In the case of the convex bottom tank a ring of water may remain after draining.
- Page 24 metal such as steel, aluminum, copper, or brass can affect the sender reading if it is closer than about 2 inches from the face of the sender. If there are metal frame pieces, brackets, straps, pipes, ducts, etc. close to the sender you may have to move the sender away from them.
- Page 25 9. There may be a buildup on the inside walls of black and grey tanks. We get calls occasionally about older coaches that have been in service for a few years in which the black tank will now indicate a level even though it is empty. The likely cause is that the tank has a significant build-up, probably exceeding ¼...
- Page 26 What to do if sender delamination occurs: 1. We have had reports of the senders literally falling off the tanks or showing serious delamination. This is likely caused by a lack of tank surface preparation. Surface prep is very simple, wipe the area to be adhered to with products like Pro Bond, alcohol, or acetone.
- Page 27 2. When fastening the display to the panel, make sure that it is centered in the hole and not resting on one edge. 3. Non-conductive mounting spacers are available to help prevent damaging the display. Contact Garnet for further details. How to avoid damaging the display or pump switch due to excessive current: 1.
-
Page 28: Chapter 8 - Service And Warranty Information
Garnet or an Authorized Dealer. The warranty period will start from the date of purchase or installation as indicated on the warranty card. Under these warranties, Garnet shall be responsible only for actual loss or damage suffered and then only to the extent of Garnet’s invoiced price of the product. -
Page 29: Chapter 9 - Specifications
CHAPTER 9 - SPECIFICATIONS Resolution: ES sender: 3/8 inch (10 mm) JS sender: 1/4 inch (6 mm) Accuracy: +/- 8% or better, limited by resolution and tank height and shape Temperature range: +32 to +140 oF (0 to + 60oC) Sender materials: 0.008”... - Page 30 NOTES:...
Need help?
Do you have a question about the SEELEVEL II 709-LL and is the answer not in the manual?
Questions and answers