Table of Contents
Advertisement
Quick Links
Advertisement
Table of Contents

Subscribe to Our Youtube Channel
Related Manuals for Gorenje BD 2116 AX


Summary of Contents for Gorenje BD 2116 AX
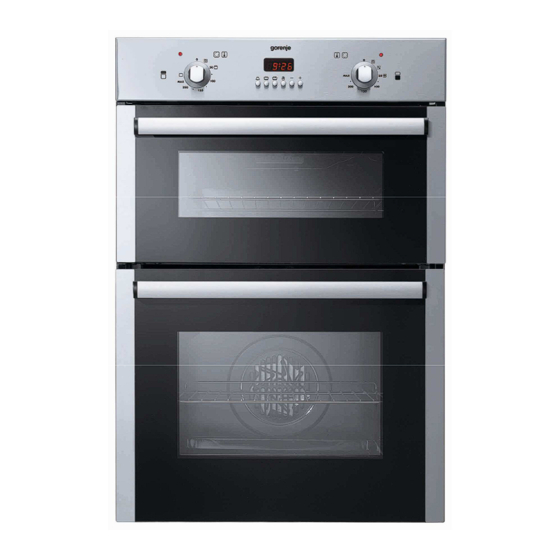
- Page 1 BD 2116 AX BUILT-IN MULTI-FUNCTION DOUBLE OVEN INSTALLATION AND OPERATING INSTRUCTIONS As part of our commitment to constantly improving our products, we reserve the right to make changes to them based on advances to their technical, functional and/or aesthetic properties.
-
Page 2: Before Installation
Introduction This quality oven has been designed to provide trouble-free service provided it is installed and maintained correctly. This oven is for domestic use only. Please read these instructions carefully before installing or using your appliance. It is advisable to keep your purchase and installation receipts with these instructions in a safe place for future reference. -
Page 3: Housing Dimensions
Location Avoid installing the oven too close to a fridge or boiler. The oven should be installed into an oven housing unit as shown in Figure 1. Ensure that the surrounding material is heat resistant and non-combustible. Certain minimum clearances must be allowed for when planning the unit’s location. Housing dimensions Figure 2 shows the housing dimensions in millimetres. -
Page 4: Electricity Supply
Electricity supply Once a satisfactory location has been established, the electrical supply to the appliance must be arranged. The mains voltage must correspond to that which is specified on the data plate. The supply should be from a 30 amp fused spur, with an isolator switch installed above the work surface and to one side of the unit in case of emergency. -
Page 5: Electrical Connection
Electrical connection The appliance must be properly connected to the mains supply by a qualified electrician according to current safety regulations. This appliance must be earthed. 1. Lift up the cover (Figure 4). 2. Loosen the cable clamp (Figure 4). 3. - Page 6 Please read these safety notes before using the oven • Make sure you understand what the oven • Never leave children unsupervised where the controls do before using the oven. oven is installed as the appliance will get hot • Always turn the oven controls to the OFF during and after use.
-
Page 7: Using The Oven
Using the oven Please note: When using for the first time the oven may smell for a short time while burning off dust and manufacturing residues from the heating elements. This is normal and does not indicate a fault with the oven. The oven is fan assisted and evenly distributes the heat throughout the oven. -
Page 8: Top Oven Controls
Top oven controls The thermostat determines the temperature inside the oven during cooking. Turn the control knob clockwise to align the cooking temperature with the marker on the control panel. The temperature indicator will light up when a temperature is set, and turn off when the temperature has been reached. -
Page 9: Electronic Programmer
Electronic programmer The electronic programmer incorporates the following functions: - 24 hour clock with luminous display - 10 hour timer - automatic oven cooking - semiautomatic oven cooking The electronic programmer operate only on the “large” oven. Programming buttons and their functions. Luminous symbols When “AUTO”... - Page 10 Automatic cooking (programmed start and stop times) To cook food in the oven using the automatic timer, proceed as follows: establish how long the food needs to cook enter the cooking stop time select the temperature and the cooking method. Once these steps have been completed, the “AUTO”...
-
Page 11: Using The Grill
Using the grill KEEP THE DOOR OPEN WHILST GRILLING Move the shelf to the first or second position from the top. Select the symbol on the top oven control selector, and preheat the grill for 5 minutes. Place the food in the middle of the grill pan and position the pan so the food is near but not touching the top element. -
Page 12: Cleaning The Oven
Cleaning the oven Before cleaning the oven, wait for it to cool down. It is best to clean the bottom of the oven after every use and not allow the food or spots of oil to remain and become permanent stains. Wash surfaces in warm soapy water. -
Page 13: Changing The Lamps
Changing the lamps Wait for the oven to cool. Unscrew and remove the diffuser. Unscrew the lamp from the lampholder. Replace lamp and diffuser (Figure 11). The replacement lamp must be of the same type, voltage and wattage (25W SES 300° C). Mains lead replacement Do not attempt to repair or replace the mains connecting cable yourself, consult a qualified electrician. -
Page 14: Troubleshooting Guide
Troubleshooting guide...
Need help?
Do you have a question about the BD 2116 AX and is the answer not in the manual?
Questions and answers