Hans Grohe Talis S 100 72020 1 Series Installation/User Instructions/Warranty
Hide thumbs
Also See for Talis S 100 72020 1 Series:
- Installation/user instructions/warranty (16 pages)
Table of Contents

Related Manuals for Hans Grohe Talis S 100 72020 1 Series


Summary of Contents for Hans Grohe Talis S 100 72020 1 Series
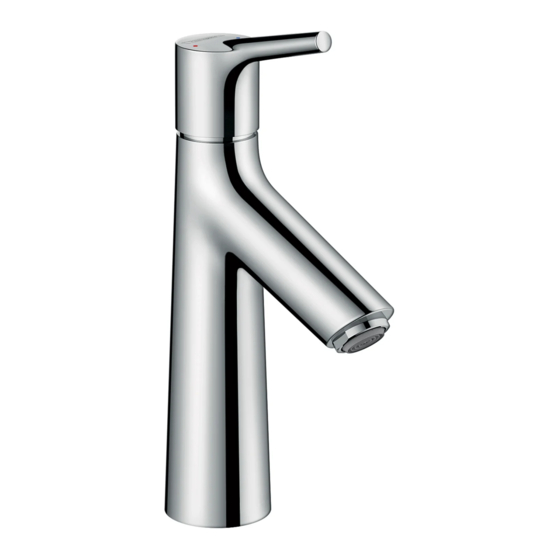
- Page 1 EN Installation / User Instructions / Warranty FR Instructions de montage / Mode d'emploi / Garantie ES Instrucciones de montaje / Manejo / Garantía Talis S 100 72020xx1 72025001 Talis S 72200xx1 Talis S 80 72010xx1 72018001...
-
Page 2: Technical Information
English Français Technical Information Données techniques Recommended water pressure 15 - 75 PSI Pression d’eau recommandée 15 - 75 PSI Max. water pressure 145 PSI Pression d’eau maximum 145 PSI Recommended hot water temp. 120° - 140° F* Température recommandée 120° - 140° F* Max. hot water temp 176°F* d'eau chaude Flow rate Température maximum d'eau chaude 176°F* 72020xx1, 72010xx1 1.2 GPM Capacité nominale 72025001, 72018001 1.0 GPM 72020xx1, 72010xx1 1.2 GPM 72200xx1 2.2 GPM 72025001, 72018001 1.0 GPM Hole size in mounting surface 1⁵⁄₁₆"-1⁷⁄₁₆" 72200xx1 2.2 GPM Max. depth of mounting surface 1⅝"... -
Page 3: Consideraciones Para La Instalación
Español Datos tecnicos Tools Required / Outiles Utiles / Herramientas Útiles Presión recomendada en servicio 15 - 75 PSI Presión en servicio max. 145 PSI Temperatura recomendada del 120° - 140° F* agua caliente 10 mm Temperatura del agua caliente max. 176° F* 9 mm Caudal máximo 16 mm 72020xx1, 72010xx1 1.2 GPM 72025001, 72018001 1.0 GPM 72200xx1 2.2 GPM Tamaño del orificio en la superficie 1⁵⁄₁₆"-1⁷⁄₁₆" de montaje Profundidad máxima de la 1⅝" superficie de montaje * Debe conocer y cumplir todos los códigos locales aplicables para ajustar la temperatura del calenta- dor de agua. - Page 4 Talis S 80 Talis S 100 72010xx1 72020xx1 72018001 72025001 Ø 1¾" Ø 1¾" Ø 1⅜" Ø 1⅜" 3⅞" 3⅝" ⅜ ⅜ Talis S 72200xx1 Ø 1¾" 2⅛" 2⅛" Ø 1⅜" 4¼" ⅜...
-
Page 5: Installation / Installation / Instalación
Installation / Installation / Instalación 1⁵⁄₁₆"-1⁷⁄₁₆" 1⁵⁄₁₆"-1⁷⁄₁₆" 98996000 English Français Español Install the centering ring on the Installez la bague de centrage Instala el aro de centrado en el faucet. sur le robinet. grifo. If the hole is large, add acces- Si le trou est grand, ajoutez Si el orificio es grande, añadir sory centering ring 98996000. anneau de centrage № aro de centrado accesorio 98996000. 98996000. When installing the faucet, push it toward the front of the hole. Poussez le robinet vers l'avant Al instalar el grifo, hacia la du trou. parte delantera del orificio. If the mounting surface is less Si la surface de montage est Si la superficie de montaje es de than ³⁄₁₆" thick, trim the centering inférieure à ³⁄₁₆ po (4 mm) menos de ³⁄₁₆" (4 mm) de espe- ring. d'épaisseur, découpez la sor, recortar el aro de centrado. rondelle. - Page 6 English Français Español Install the drain pull rod. Installez la tirette. Instale el tirador. Place the faucet and centering Placez le robinet et la rondelle Instale la arandela y el collar de ring(s) on the mounting surface. de centrage sur la surface de montaje. montage. Install the washer and the mount- Apriete el collar de montaje. ing collar. Installez la rondelle et le collier de montage. Coloque el grifo y el aro de centrado sobre la superficie de montaje.
- Page 7 5.9 ft-lb 8 Nm 5.2 ft-lb / 7 Nm English Français Español Tighten the collar using a flat Serrez le collier de montage. Conecte las mangueras de sumi- head screwdriver. nistro de agua caliente y fría a los topes. Connect the hoses to the stops. Connectez les tuyaux d’arrivée Use las dos llaves fijas como se d’eau chaude et d’eau froide ilustra, Use two wrenches, as shown in aux butées d’arrêt. the diagram. No permita las man- Utilisez deux clés, tel qu’illustré. gueras se retuerzan. Do not allow the hoses to twist. Assurez-vous que les tuyaux ne s’entortillent pas.
- Page 8 22 mm 22 mm 1.47 ft-lb / 2 Nm > 2 min English Français Español Remove the aerator. Retirez l’aérateur. Retire el aireador. Flush the faucet for at least two Rincez le robinet pendant au Lave el grifo durante al menos minutes. moins 2 minutes. 2 minutos. Reinstall the aerator. Installez l’aérateur. Instale el aireador.
- Page 9 Installation / Installation / Instalación shorter longer plus court plus long más corto más largo Petroleum-based plumbers Le mastic de pétrole-basé Masilla de petróleo-basó putty can damage the surface peut endommager la surface puede dañar la superficie de of some sinks. Please consult de quelque baignoires. S'il algún bañeras. Consulte por the manufacturer of the sink regard- vous plaît consulter le fabricant favor al fabricante del bañera con ing compatible sealants. du baignoire quant aux enduits respecto a selladores aceptables. d'étanchéité acceptables.
- Page 10 Set the high temperature limit stop / Réglage de la butée limite d’eau chaude / Ajuste el tope de límite de alta temperatura 140 °F 50 °F 44 PSI 3 mm 3 mm 1.5 ft-lb 2 Nm...
- Page 11 Replacement Parts / Pièces détachées / Repuestos Talis S 80 Talis S 72010xx1 72200xx1 72018001 Talis S 100 72020xx1 95704000 92626000 92625000 92527000 92627000 (27x1.5) 96050000 95973001 95379000 98865000 92628000 98865000 98866000 98398000 (23x2) 88509000 96657000 98422000 (7x1.5) 97736000 98722000 96016000 96321001 xx = Colors / Couleurs / Acabados...
- Page 12 Talis S 100 72025001 95704000 92626000 92625000 92527000 92627000 (27x1.5) 95973000 98865000 92628000 98865000 98866000 98398000 (23x2) 98422000 (7x1.5) 97736000 98722000 96016000 96321001...
- Page 13 Cleaning Recommendation for Hansgrohe Products Modern bathroom faucets, kitchen faucets and shower products are made from different materials to comply with the needs of the market with regard to design and functionality. To avoid damage to the product, it is necessary to take proper care of it. For best results: • Prevent the buildup of mineral scale and /or soap residue by cleaning your Hansgrohe product(s) when needed. • Select a cleaning agent specifically intended for the type of product. • Do not use these types of cleaners as they will cause damage to your Hansgrohe product: ´ Any cleaning agent containing hydrochloric acid, formic acid, lye, or acetic acid. ´ Abrasive cleaning powders, pads, or brushes. ´ Steam cleaners. ´ “No rinse” cleaning agents. • Always follow the instructions provided by the manufacturer of the cleaning agent. • Do not mix cleaning agents, unless directed by the manufacturer. • Do not spray cleaners directly onto the product as drops could enter openings and gaps and cause damage. When using spray cleaners, spray the cleaner onto a soft cloth or sponge. • Always rinse your Hansgrohe product thoroughly with clear water and polish dry with a soft cloth after cleaning. Important •...
- Page 14 Important • Les residus de produits pour le corps comme les savons liquides, shampooings, gels de douche, teintures pour cheveux, parfums, apres-rasage et vernis a ongles peuvent causer des deteriorations. Rincez le produit avec de l’eau propre après chaque utilisation. • Le résidu provenant des nettoyants pour cuvette/baignoire/carrelage peut endommager les robinets et les raccords de tuyauterie. Rincez immédiatement toute surpulvérisation sur le produit Hansgrohe. • De meme, il est interdit de stocker des detergents ou des produits chimiques sous les produits, par ex. dans un meuble sous lavabo, car les vapeurs qui s’en degagent risquent d’abimer les produits. • Les dommages au produit causés par un mauvais entretien ou par l’utilisation de produits de nettoyage inadéquats ne sont pas couverts par la garantie. • Si un composant du produit est endommagé, remplacez-le, car il existe un risque de blessure.
-
Page 16: Limited Consumer Warranty
Limited Consumer Warranty This warranty is limited to products manufactured by Hansgrohe, conditions in the home such as excessive water pressure Inc. (“Hansgrohe”) that are purchased by a consumer in the United or corrosion. States or Canada after March 1, 1996, and installed in either the C. Labor and other expenses for disconnection, deinstallation, United States or in Canada. or return of the product for warranty service (including but not limited to proper packaging and shipping costs), or for WHO IS COVERED BY THE WARRANTY installation or reinstallation of the product. D. Accessories, connected materials and products, or related This limited warranty extends to the original purchaser only. This products not manufactured by Hansgrohe. warranty is non-transferable. Hansgrohe neither assumes nor Any Hansgrohe or Axor product sold for display purposes. authorizes any person to create for it any other obligation or liability in connection with this product. HANSGROHE SHALL NOT BE LIABLE TO PURCHASER OR ANY OTHER PERSON FOR ANY INCIDENTAL, SPECIAL OR LENGTH OF WARRANTY CONSEQUENTIAL DAMAGES, ARISING OUT OF BREACH...
Need help?
Do you have a question about the Talis S 100 72020 1 Series and is the answer not in the manual?
Questions and answers