Table of Contents
Advertisement
Quick Links
Advertisement
Table of Contents

Related Manuals for Nibe VVM 225 UK 1x230V


Summary of Contents for Nibe VVM 225 UK 1x230V
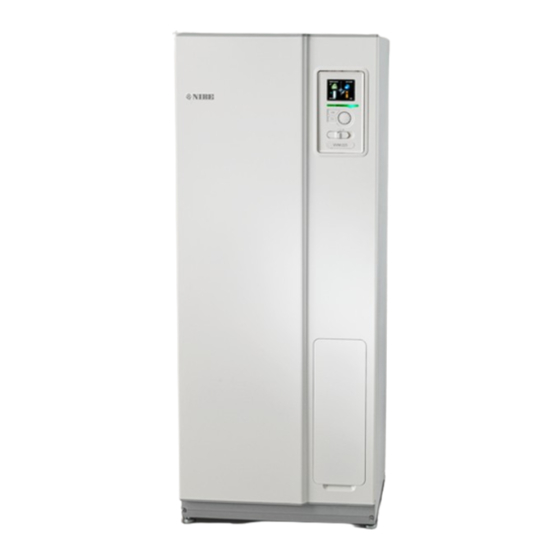
- Page 1 UHB EN 1901-1 USER MANUAL 431972 Indoor module NIBE VVM 225 UK 1x230V...
- Page 2 Quick guide Navigation Ok button (confirm/select) Back button (back/undo/exit) Control knob (move/increase/reduce) A detailed explanation of the button functions can be found on page How to scroll through menus and make different settings is described on page Set the indoor climate INDOOR CLIMATE HOT WATER MY INSTALLATION...
-
Page 3: Table Of Contents
3 VVM 225 – at your service Set the indoor climate Set the hot water capacity Get information Adjust the indoor module 4 Disturbances in comfort Info-menu Manage alarm Troubleshooting Add. heat only 5 Technical data 6 Glossary Item register NIBE VVM 225 Table of Contents... -
Page 4: Important Information
1.9.1 heating curve (curve slope) 1.9.3 min. flow line temp. Accessories Always state the serial number. Certification that the installation is carried out according to instructions in NIBE's installer manual and applicable regulations. Date __________________ Signed _________________________ Chapter 1 | Important information... -
Page 5: Safety Information
VVM 225 must be installed via an isolator switch. The cable area has to be dimensioned based on the fuse rating used. If the supply cable is damaged, only NIBE, its service representative or similar authorised person may replace it to prevent any danger and damage. -
Page 6: Symbols
The CE mark is obligatory for most products sold in the EU, regardless of where they are made. IPX1B Classification of enclosure of electro-technical equipment. Danger to person or machine. Read the User Manual. Chapter 1 | Important information NIBE VVM 225... -
Page 7: Serial Number
Authority of intention to install. Use only manufacturer’s recommended replacement parts. Nibe is a licensed member of the Benchmark Scheme which aims to improve the standards of installation and commissioning of domestic heating and hot water systems in the UK and to encourage regular ser- vicing to optimise safety, efficiency and performance. -
Page 8: Vvm 225 - An Excellent Choice
Easy to install The indoor module (VVM 225) is easy to install together with a compat- ible NIBE air/water heat pump. When installing together with NIBE air/water heat pump, the heat pump’s values can easily be read off from the indoor module’s display. -
Page 9: The Heating Installation - The Heart Of The House
-3 °C 2 °C -3 °C 0 °C Heat source Värmekälla The temperatures are only examples and may vary between different installations and time of year. NIBE VVM 225 Chapter 2 | The heating installation – the heart of the house... -
Page 10: Installation Function
The indoor module's integrated hot water heater is in the boiler section. The hot boiler water heats the hot water. The temperatures are only examples and may vary between different installations and time of year. Chapter 2 | The heating installation – the heart of the house NIBE VVM 225... -
Page 11: Contact With Vvm 225
Instructions, settings and operational information are shown on the display. You can easily navigate between the different menus and options to set the comfort or obtain the information you require. NIBE VVM 225 Chapter 2 | The heating installation – the heart of the house... - Page 12 In this mode, the compressor switches off and the im- mersion heater engages. The indoor module display is not illuminated and the status lamp illuminates yellow. Chapter 2 | The heating installation – the heart of the house NIBE VVM 225...
- Page 13 The USB port is used to update the software. Visit nibeuplink.com and click the "Software" tab to download the latest software for your installation. NIBE VVM 225 Chapter 2 | The heating installation – the heart of the house...
- Page 14 Display of temperature and other operating information and access to the alarm log. See page MY SYSTEM Menu 4 Setting time, date, language, display, operating mode etc. See page Chapter 2 | The heating installation – the heart of the house NIBE VVM 225...
- Page 15 This symbol appears if periodic increase or lux mode for the hot water is activated. This symbol indicates whether "holiday setting" is active in 4.7. This symbol indicates whether VVM 225 has contact with NIBE Uplink. This symbol indicates the actual speed of the fan if the speed has changed from the normal setting.
- Page 16 Mark the applicable option. One of the options is pre-selected (white). Press the OK button to confirm the selected option. The selec- ted option has a green tick. Chapter 2 | The heating installation – the heart of the house NIBE VVM 225...
- Page 17 Press the OK button to confirm the value you have set. To change and return to the original value, press the Back button. NIBE VVM 225 Chapter 2 | The heating installation – the heart of the house...
- Page 18 Back button. If a menu only has one character set the keyboard is displayed directly. When you have finished writing, mark "OK” and press the OK button. Chapter 2 | The heating installation – the heart of the house NIBE VVM 225...
- Page 19 Use the control knob to select the help symbol. Press the OK button. The help text often consists of several windows that you can scroll between using the control knob. NIBE VVM 225 Chapter 2 | The heating installation – the heart of the house...
-
Page 20: Maintenance Of Vvm 225
If anything unusual occurs, messages about the malfunction appear in the display in the form of various alarm texts. See alarm management in section "Alarm". Chapter 2 | The heating installation – the heart of the house NIBE VVM 225... - Page 21 Safety valve for climate system VVM 225 Safety valve for water heater NIBE VVM 225 Chapter 2 | The heating installation – the heart of the house...
- Page 22 Keep topping up and venting until all air has been removed and the pressure is correct. The climate system may require topping up after venting. Chapter 2 | The heating installation – the heart of the house NIBE VVM 225...
-
Page 23: Saving Tips
Energiförbrukning fördelat över året consumption April June July mars april juni juli Månad Month Increasing the indoor temperature one degree increases the energy consumption by approx. 5%. NIBE VVM 225 Chapter 2 | The heating installation – the heart of the house... - Page 24 WC, 2 bulbs in the bathroom, 4 bulbs in the kitchen, 3 bulbs outside, a washing machine, tumble drier, dishwasher, fridge, freezer, oven, vacuum cleaner, engine block heater = 6240 kWh domestic elec- tricity/year Chapter 2 | The heating installation – the heart of the house NIBE VVM 225...
- Page 25 NIBE VVM 225 Chapter 2 | The heating installation – the heart of the house...
-
Page 26: Vvm 225 - At Your Service
The value in the display appears as a temperature in °C if the climate system is controlled by a room sensor. Caution A slow heating system such as underfloor heating may not be suitable for control using the indoor module’s room sensors. Chapter 3 | VVM 225 – at your service NIBE VVM 225... - Page 27 An increase in the room temperature can be slowed by the thermostats for the radiators or under floor heating. Therefore, open the thermostats fully, except in those rooms where a cooler temperature is required, e.g. bedrooms. NIBE VVM 225 Chapter 3 | VVM 225 – at your service...
- Page 28 If necessary, the different return times can be changed in menu 1.9.6. The fan speed is shown in brackets (in percent) after each speed alternative. If longer time changes are required use the holiday function or scheduling. Chapter 3 | VVM 225 – at your service NIBE VVM 225...
- Page 29 Time period Adjusting Conflict Schedule: The schedule to be changed is selected here. Activated: Scheduling for the selected period is activated here. Set times are not affected at deactivation. NIBE VVM 225 Chapter 3 | VVM 225 – at your service...
- Page 30 COOLING (ACCESSORY REQUIRED) Menu 1.3.2 Here you can schedule when cooling is permitted in the accommodation for up to two different time periods per day. Chapter 3 | VVM 225 – at your service NIBE VVM 225...
- Page 31 Conflict: If two settings conflict with each other, a red exclamation mark is dis- played. If you wish to set similar scheduling for every day of the week start by filling in “all” and then changing the desired days. NIBE VVM 225 Chapter 3 | VVM 225 – at your service...
- Page 32 Time period: The start and stop time for the selected day for scheduling are se- lected here. Adjustment: The desired fan speed is set here. Chapter 3 | VVM 225 – at your service NIBE VVM 225...
- Page 33 Setting own curve for heating and cooling. point offset Setting the offset of the heating curve or cooling curve at a specific outdoor temperature. night cooling Setting night cooling. NIBE VVM 225 Chapter 3 | VVM 225 – at your service...
- Page 34 Select the heating curve and read off how the supply temperature changes at different outdoor temperatures here. If there is access to cooling the same settings can be made for the cooling curve. Chapter 3 | VVM 225 – at your service NIBE VVM 225...
- Page 35 5 °C at all outdoor tem- Outdoor temperature Utetemperatur peratures. A corresponding change (°C) to the cooling curve results in a reduc- tion of the supply temperature. NIBE VVM 225 Chapter 3 | VVM 225 – at your service...
- Page 36 Curve 0 means that own curve (menu 1.9.7) is used. Press the OK button to exit the setting. Chapter 3 | VVM 225 – at your service NIBE VVM 225...
- Page 37 “start cooling” in menu 4.9.2 The cooling settings for the climate system are adjusted in the indoor climate menu, menu 1. NIBE VVM 225 Chapter 3 | VVM 225 – at your service...
- Page 38 Factory setting: 18 °C climate system 4 °C min. flow line temp. cooling1.9.3.2 climate system 1 °C climate system 2 °C °C climate system 3 climate system 4 °C Chapter 3 | VVM 225 – at your service NIBE VVM 225...
- Page 39 The value can be increased if you have, for example, a cellar that you always want to heat, even in summer. You may also need to increase the value in "stop heating" menu 4.9.2 "auto mode setting". NIBE VVM 225 Chapter 3 | VVM 225 – at your service...
- Page 40 Too high a set value for "factor system" can (depending on your climate system) produce an unstable room temperature. If several climate systems are installed the above settings can be made for the relevant systems. Chapter 3 | VVM 225 – at your service NIBE VVM 225...
- Page 41 Setting range: 0.5 - 10.0 °C Default value: 1.0 cool at room over temp. Setting range: 0.5 - 10.0 °C Default value: 1.0 larm rumsgivare kyla Setting range: on/off Factory setting: off NIBE VVM 225 Chapter 3 | VVM 225 – at your service...
- Page 42 +20 °C. VVM 225 then attempts to get as close to the set tem- perature as possible. Chapter 3 | VVM 225 – at your service NIBE VVM 225...
- Page 43 VVM 225 and has been activated. Here you can set how far the room temperature can drop below the desired temperature before VVM 225 switches to heating operation. NIBE VVM 225 Chapter 3 | VVM 225 – at your service...
- Page 44 After a min or max value has been set, the system will automatically set the real value in relation to the number of compressors that are running cooling. Chapter 3 | VVM 225 – at your service NIBE VVM 225...
- Page 45 Here you select the return time for temporary speed change (speed 1-4) on the ventilation in menu 1.2. Return time is the time it takes before ventilation speed returns to normal. NIBE VVM 225 Chapter 3 | VVM 225 – at your service...
- Page 46 °C Default value: 0 °C change in curve °C change in curve flow temperature °C Setting range: -10 – 10 °C Default value: 0 °C outdoor temp. °C Chapter 3 | VVM 225 – at your service NIBE VVM 225...
- Page 47 ("min diff. outdoor-exhaust") and the exhaust air temperature is higher than the set value ("start temp. exhaust air") run the ventilation at speed 4 until one of the conditions is no longer met. NIBE VVM 225 Chapter 3 | VVM 225 – at your service...
- Page 48 +Adjust is to have on calculated supply temperature. The higher the value, the greater the effect. *Support for +Adjust required NOTE +Adjust must first be selected in menu 5.4 ”soft inputs/outputs”. Chapter 3 | VVM 225 – at your service NIBE VVM 225...
-
Page 49: Set The Hot Water Capacity
Select “off" to switch off temporary lux COMFORT MODE Menu comfort mode 2.2 Setting range: smart control, eco- nomy, normal, luxury smart control Factory setting: smart control economy normal luxury NIBE VVM 225 Chapter 3 | VVM 225 – at your service... - Page 50 Time period: The start and stop time for the selected day for scheduling are se- lected here. Adjustment: Set the hot water comfort that is to apply during scheduling here. Chapter 3 | VVM 225 – at your service NIBE VVM 225...
- Page 51 To prevent bacterial growth in the water heater, the heat pump and the immersion heater can increase the hot water temperature for a short time at regular intervals. NIBE VVM 225 Chapter 3 | VVM 225 – at your service...
- Page 52 "operating time" decide how long the hot water circulation pump must run per operating instance. "downtime" decide how long the hot water circulation pump must be stationary between operating instances. Chapter 3 | VVM 225 – at your service NIBE VVM 225...
-
Page 53: Get Information
No changes can be made. number of starts: The information is on several pages. Turn total operating time: 195 hrs the control knob to scroll between the pages. NIBE VVM 225 Chapter 3 | VVM 225 – at your service... - Page 54 OK button. alarm log 3.4 outdoor temp. condenser return condenser out addition hot water charging heat medium flow evaporator operating time op. mode Information about an alarm. Chapter 3 | VVM 225 – at your service NIBE VVM 225...
- Page 55 You can now select to take read outs for different weeks by turning the control knob to the right or left and read off the average temperature. Press the OK or Back button to exit read off mode. NIBE VVM 225 Chapter 3 | VVM 225 – at your service...
-
Page 56: Adjust The Indoor Module
VVM 225 starts pool heating. Untick "activated" to switch off the pool heating. Caution The start temperature cannot be set to a value that is higher than the stop temperature. Chapter 3 | VVM 225 – at your service NIBE VVM 225... - Page 57 Request new connection string To connect a user account on NIBE Uplink to your installation, you must request a unique connection code. Mark “request new connection string" and press the OK button. The installation now communicates with NIBE Uplink to create a connection code.
- Page 58 NOTE After disconnecting all users none of them can monitor or control your installation via NIBE Uplink without requesting a new connection string. TCP/IP SETTINGS Menu 4.1.3.8 You can set TCP/IP settings for your in- tcp/ip settings4.1.3.8 stallation here. Automatic setting (DHCP)
- Page 59 +46 XXXXXXXX. If you want to receive an SMS message in the event of the alarm mark the box to the right of the telephone number. NIBE VVM 225 Chapter 3 | VVM 225 – at your service...
- Page 60 With over capacity mode on "SG Ready" and cooling operation, the parallel offset for the indoor temperature is reduced by "-1". If a room sensor is installed and activated, the desired room temperature is instead reduced by 1 °C. Chapter 3 | VVM 225 – at your service NIBE VVM 225...
- Page 61 The greater the value, the greater the effect the electricity price has and the possible savings are larger, but at the same time there is an increased risk of affecting comfort. NIBE VVM 225 Chapter 3 | VVM 225 – at your service...
- Page 62 24 hours being retrieved via NIBE Uplink and therefore an internet connection and an account for NIBE Uplink are required. Deselect "activated" to switch off Smart price adaption™. SMART HOME (ACCESSORY IS REQUIRED) Menu 4.1.7...
- Page 63 Menu 4.1.8.1 settings 4.1.8.1 smart energy source™ Setting range: Off/On Factory setting: Off smart energy source control method control method Setting range: Price / CO Factory setting: Price NIBE VVM 225 Chapter 3 | VVM 225 – at your service...
- Page 64 The setting is made for each individual energy source. Spot price can only be used if you have an hourly tariff agreement with your electricity supplier. *The currency varies depending on the country selected. Chapter 3 | VVM 225 – at your service NIBE VVM 225...
- Page 65 (Monday to Friday) or four period different periods on weekends (Sat- period urdays and Sundays). NIBE VVM 225 Chapter 3 | VVM 225 – at your service...
- Page 66 (Monday to Friday) or four period different periods on weekends (Sat- period urdays and Sundays). Chapter 3 | VVM 225 – at your service NIBE VVM 225...
- Page 67 For EME 20, you can select whether you want domestic electricity to be priorit- ised ahead of room temperature and hot water, provided that VVM 225 is equipped with an external energy meter. NIBE VVM 225 Chapter 3 | VVM 225 – at your service...
- Page 68 If you choose mode "add. heat only" the compressor is deselected and there is a higher operating cost. Caution You cannot change from only additional heat if you do not have a heat pump connected (see Menu 5.2.2). Chapter 3 | VVM 225 – at your service NIBE VVM 225...
- Page 69 Time and date are set automat- month ically if the heat pump is con- year nected to NIBE Uplink. To ob- tain the correct time, the time zone must be set. NIBE VVM 225 Chapter 3 | VVM 225 – at your service...
- Page 70 Set the vacation setting in advance and activate just before departure in order to maintain the comfort. Chapter 3 | VVM 225 – at your service NIBE VVM 225...
- Page 71 The indicator marks where in the cycle the installation is. If 0 minutes is selected it means that requirement is not prioritised, but will only be activated when there is no other requirement. NIBE VVM 225 Chapter 3 | VVM 225 – at your service...
- Page 72 It cannot be set "stop additional heat" higher than "stop heating". filtering time: You can also set the time (filtering time) over which the average temperature is calculated. If you select 0, the current outdoor temperature is used. Chapter 3 | VVM 225 – at your service NIBE VVM 225...
- Page 73 Do you want to reset all user settings to factory settings? Caution After factory setting, personal settings such as heating curves must be reset. NIBE VVM 225 Chapter 3 | VVM 225 – at your service...
- Page 74 Blocking the compressor in the outdoor module. Blocking additional heat. If you wish to set similar scheduling for every day of the week start by filling in “all” and then changing the desired days. Chapter 3 | VVM 225 – at your service NIBE VVM 225...
- Page 75 Conflict Time period Schedule: The period to be changed is selected here. Activated: Scheduling for the selected period is activated here. Set times are not affected at deactivation. NIBE VVM 225 Chapter 3 | VVM 225 – at your service...
- Page 76 EB101 as a complement to defrosting, which is performed automatically. Activation takes fan de-icing place by ticking "de-icing fan” in the menu, after which de-icing is performed once. Chapter 3 | VVM 225 – at your service NIBE VVM 225...
-
Page 77: Disturbances In Comfort
In many cases, it is sufficient to select “reset alarm” in order for the product to revert to normal operation. If a green light comes on after selecting “reset alarm”, the alarm has been remedied. If a red light NIBE VVM 225 Chapter 4 | Disturbances in comfort... - Page 78 You need the product's (14 digit) serial number for servicing and support. You need the product's (14 digit) serial number for servicing and support. See chapter Serial number on page 7. Chapter 4 | Disturbances in comfort NIBE VVM 225...
-
Page 79: Troubleshooting
– If the hot water usage has been low, VVM 225 will produce less hot water than normal. Restart the product. • "Holiday mode" activated in menu 4.7. – Enter menu 4.7 and select "Off". Low room temperature • Closed thermostats in several rooms. NIBE VVM 225 Chapter 4 | Disturbances in comfort... - Page 80 – Check any external switches. Low system pressure • Not enough water in the climate system. – Fill the climate system with water and check for leaks. In event of repeated filling, contact the installer. Chapter 4 | Disturbances in comfort NIBE VVM 225...
-
Page 81: Add. Heat Only
SET THE INSTALLATION TO ADDITIONAL HEAT MODE Go to menu 4.2 op. mode. Mark ”add. heat only” using the control knob and then press the OK button. Return to the main menus by pressing the Back button. NIBE VVM 225 Chapter 4 | Disturbances in comfort... -
Page 82: Technical Data
5 Technical data Detailed technical specifications for this product can be found in the in- stallation manual (nibe.co.uk). Chapter 5 | Technical data NIBE VVM 225... -
Page 83: Glossary
In most cases, the indoor module notes operational interference and in- dicates this with alarms and shows instructions on how to rectify it in the display. NIBE VVM 225 Chapter 6 | Glossary... - Page 84 A sensor that is located outdoors. This sensor tells the indoor module how hot it is outdoors. RETURN PIPE The line in which the water is transported back to the indoor module from the house heating system (radiators/heating coils). Chapter 6 | Glossary NIBE VVM 225...
- Page 85 SUPPLY TEMPERATURE The temperature of the heated water that the indoor module sends out to the heating system. The colder the outdoor temperature, the higher the supply line temperature becomes. NIBE VVM 225 Chapter 6 | Glossary...
-
Page 86: Item Register
Only additional heat, 81 Setting a value, 17 Troubleshooting, 79 Use the virtual keyboard, 18 Get information, 53 OK button, 12 Glossary, 83 Only additional heat, 81 Operation, 16 Help menu, 19 Power consumption, 23 Item register NIBE VVM 225... - Page 87 Use the virtual keyboard, 18 VVM 225 – An excellent choice, 8 VVM 225 – at your service, 26 Adjust the installation, 56 Get information, 53 Set the hot water capacity, 49 Set the indoor climate, 26 NIBE VVM 225 Item register...
- Page 88 WS release date: 2019-02-26 07:12 Publish date: 2019-04-16 13:11 This manual is a publication from NIBE Energy Systems. All product illustrations, facts and data are based on the available information at the time of the publica- tion’s approval. NIBE Energy Systems makes reservations for any factual or printing errors in this manual.
Need help?
Do you have a question about the VVM 225 UK 1x230V and is the answer not in the manual?
Questions and answers