Page 1
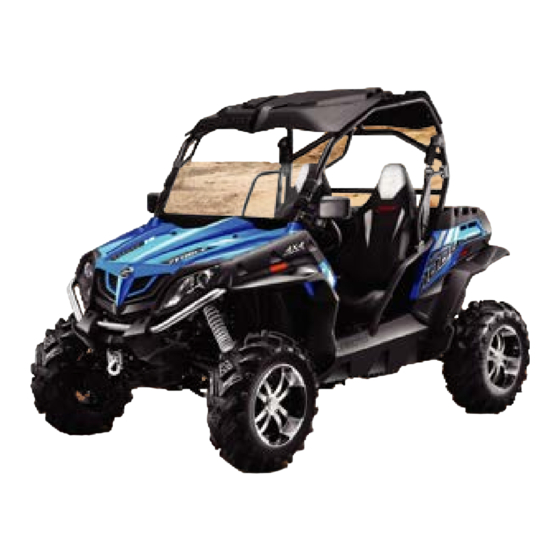
ZFORCE SERIES ZFORCE 800EX ZFORCE 500TRAIL ZFORCE 1000 ZFORCE 800TRAIL OWNER'S MANUAL READ THIS MANUAL CAREFULLY It contains important safety information This ROV should not be ridden by anyone under 16 years of age. Passenger under 12 are prohibited.
TABLE OF CONTENTS Foreword Foreword ..........................................1 1 Welcome Welcome ..................................................1 1 EVAP System (Evaporative Emission Control System) EVAP System (Evaporative Emission Control System) ...................... 2 2 Catalytic Converter Catalytic Converter ............................................2 2 Signal Words Signal Words ........................
Page 3
CVT System CVT System ..............................................85 Engine Braking System (EBS) - 800cc Engines Only Engine Braking System (EBS) - 800cc Engines Only ......................86 How To Avoid CVT Drive Belt and Component Failure How To Avoid CVT Drive Belt and Component Failure ....................
FOREWORD Foreword Welcome Thank you for purchasing a CFMOTO vehicle, and welcome to our world-wide family of CFMOTO enthusiasts. Be sure to visit us online at www.cfmoto.com for the latest news, new product introductions, upcoming events, and more. CFMOTO is an international company that specializes in the development, manufacture, and marketing of all-terrain vehicles, utility vehicles, large displacement motorcycles, and their core components.
FOREWORD WARNING The engine exhaust from this product contains chemicals known to the State of California to cause cancer, birth defects or other reproductive harm. EVAP System (Evaporative Emission Control System) (If equipped) When required by environmental emissions regulations, this vehicle is manufactured with a fuel evaporation system (EVAP) to prevent fuel vapors entering the atmosphere from the fuel tank and fuel system.
FOREWORD Signal Words A signal word calls attention to a safety message or messages, a property damage message or messages, and designates a degree or level of hazard seriousness. The standard signal words in this manual are WARNING, CAUTION and NOTE or NOTICE. The following signal words and symbols appear throughout this manual and on your vehicle.
Page 8
FOREWORD NEVER: Operate without proper training or instruction. Operate on public roads. A collision can occur with another vehicle. Operate on paved roads. Pavement may seriously affect handling and control. Operate at speeds too fast for your skill, conditions, or the terrain. Carry multiple passengers, SSVs are designed for a single passenger only.
Page 9
FOREWORD READ THE OWNER’S MANUAL FOLLOW ALL INSTRUCTIONS AND WARNINGS WARNING Read, understand, and follow all of the instructions and safety precautions in this manual and on all product labels. Failure to follow the safety precautions could result in serious injury or death. WARNING The engine exhaust gas from this product contains CO, which is deadly gas and could cause headaches, giddy, or lose consciousness, even death.
INTRODUCTION Introduction Thank you for purchasing a CFMOTO vehicle, and welcome to our world-wide family of CFMOTO enthusiasts. For safe and enjoyable operation of your vehicle, be sure to follow the instructions and recommendations in this owner’s manual. Information about major repairs are outlined in the CFMOTO Service Manual, and should only be performed by a CFMOTO service dealer and technician.
INTRODUCTION Vehicle Identification Numbers Record your vehicle’s identification numbers in the spaces provided. RH Frame RH Engine Vehicle Identification Number: Engine Serial Number: Ignition Keys Remove the spare ignition key and store in a safe place. Your key can be duplicated only by mating a CFMOTO key blank with one of your existing keys.
SPECIFICATIONS ZFORCE 1000 Specifications ZFORCE 1000 Specification Item CF1000US-2 Overall Length 112.9 in. (2870 mm) Overall Width 59.4 in (1510 mm) Overall Height 72.6 in. (1845 mm) Wheel Base 80.3 in. (2040 mm) Minimum ground clearance 12.2 in. (310 mm) Min.
Page 13
SPECIFICATIONS ZFORCE 1000 Specification Item CF1000US-2 Bore × Stroke 3.5 x 2.42 in (91 x 74 mm) x 2 Displacement 962.6 cc Compression ratio 10.6:1 Starting type Electric start Lubrication type Splash /pressure feed Engine coolant: Type Commercially available – Safe for aluminum engines Capacity 3.1 qt.
Page 14
SPECIFICATIONS ZFORCE 1000 Specification Item CF1000US-2 Rear differential oil: Type SAE 80W-90 GL-5 Volume 13.5 oz.(400mL) Front differential oil: Type SAE 80W-90 GL-5 Volume 11.2 oz. (330mL) Air filter Paper filter element with foam pre-filter Fuel type Fuel tank capacity 89 Octane minimum unleaded gasoline Fuel reserve amount at fuel gauge 7.1 gallons (27 L)
Page 15
SPECIFICATIONS ZFORCE 1000 Specification Item CF1000US-2 Spark plug: type DCPR8E (NGK) Spark plug gap 0.035 in. ~ 0.045 in. (0.8 mm~0.9 mm) Transmission CVT + Gear shift Gear shift/order Manual / L-H-N-R-P CVT ratio 0.70~2.88 Transmission Gear Low Gear 43/17=2.529 High Gear 32/28=1.143 ratio...
Page 16
SPECIFICATIONS ZFORCE 1000 Specification Item CF1000US-2 Tire pressure: Front 10.1 psi (70 kPa) Rear 14.5 psi (100 kPa) Brake system: Front axles: Double-disc / Rear axles: Double-disc Foot Operated Four wheel disc Foot brake Type / Operation Operated by hand Rear discs only Parking brake Type / Operation Brake Fluid Type...
Page 17
SPECIFICATIONS ZFORCE 1000 Specification Item CF1000US-2 Shock absorber: Front shock absorber Coil spring/Gas and Oil dampened Rear shock absorber Coil spring/Gas and Oil dampened Wheel travel: Front wheel travel 6.3 in. (160 mm) Rear wheel travel 7.8 in. (200 mm) Electrical system: Ignition Electronic...
Page 18
SPECIFICATIONS ZFORCE 1000 Specification Item CF1000US-2 Light system: Head lamp, low beam H3 12V 55W×2 Head lamp, high beam H7 12V 55W×2 Front position light Tail light/Brake light License plate light Incandescent - 5Wx1 Dashboard LED and LCD -- Non-serviceable Fuses Main –...
SPECIFICATIONS ZFORCE 800 EX Specifications ZFORCE 800 EX Specification Item CF800 Overall Length 112.9 in. (2870 mm) Overall Width 59.4 in (1510 mm) Overall Height 72.0 in. (1830 mm) Wheel Base 80.3 in. (2040 mm) Minimum ground clearance 12.2 in. (310 mm) Min.
Page 20
INTRODUCTION ZFORCE 800 EX Specification Item CF800 Bore × Stroke 3.5 x 2.42 in (91 x 61.5 mm) x 2 Displacement 800 cc Compression ratio 10.3:1 Starting type Electric start Lubrication type Splash /pressure feed Engine coolant: Type Commercially available – Safe for aluminum engines Capacity 3.1 qt.
Page 21
INTRODUCTION ZFORCE 800 EX Specification Item CF800 Rear differential oil: Type SAE 80W-90 GL-5 Volume 13.5 oz.(400mL) Front differential oil: Type SAE 80W-90 GL-5 Volume 11.2 oz. (330mL) Air filter Paper filter element with foam pre-filter Fuel type Fuel tank capacity 89 Octane minimum unleaded gasoline Fuel reserve amount at fuel gauge 6.9 gallons (26 L)
Page 22
SPECIFICATIONS ZFORCE 800 EX Specification Item CF800 Spark plug: type DCPR8E (NGK) Spark plug gap .035 in.~.045 in. (0.8 mm~0.9 mm) Transmission CVT + Gear shift Gear shift/order Manual / L-H-N-R-P CVT ratio 0.70~2.88 Transmission Gear Low Gear 43/17=2.529 High Gear 32/28=1.143 ratio Reverse...
Page 23
SPECIFICATIONS ZFORCE 800 EX Specification Item CF800 Tire pressure: Front 10.1 psi (70 kPa) Rear 14.5 psi (100 kPa) Brake system: Front axles: Double-disc / Rear axles: Double-disc Foot Operated Four wheel disc Foot brake Type / Operation Operated by hand Rear discs only Parking brake Type / Operation Brake Fluid Type...
Page 24
SPECIFICATIONS ZFORCE 800 EX Specification Item CF800 Shock absorber: Front shock absorber Coil spring/Gas and Oil dampened Rear shock absorber Coil spring/Gas and Oil dampened Wheel travel: Front wheel travel 6.3 in. (160 mm) Rear wheel travel 7.8 in. (200 mm) Electrical system: Ignition Electronic...
Page 25
SPECIFICATIONS ZFORCE 800 EX Specification Item CF800 Light system: Head lamp, low beam H3 12V 55W×2 Head lamp, high beam H7 12V 55W×2 Front position light Tail light/Brake light License plate light Incandescent - 5Wx1 Dashboard LED and LCD -- Non-serviceable Fuses Main –...
SPECIFICATIONS ZFORCE 800 Trail Specifications ZFORCE 800 Trail Specification Item CF800US-A Overall Length 112.9 in. (2870 mm) Overall Width 50.0 in (1270 mm) Overall Height 70.5 in. (1790 mm) Wheel Base 80.3 in. (2040 mm) Minimum ground clearance 12.2 in. (310 mm) Min.
Page 27
SPECIFICATIONS ZFORCE 800 Trail Specification Item CF800US-A Bore × Stroke 3.5in. x 2.42 in. (91mm x 61.5 mm) x 2 Displacement 800 cc Compression ratio 10.3:1 Starting type Electric start Lubrication type Splash /pressure feed Engine coolant: Type Commercially available – Safe for aluminum engines Capacity 3.1 qt.
Page 28
SPECIFICATIONS ZFORCE 800 Trail Specification Item CF800US-A Rear differential oil: Type SAE 80W-90 GL-5 Volume 13.5 oz.(400mL) Front differential oil: Type SAE 80W-90 GL-5 Volume 11.2 oz. (330mL) Air filter Paper filter element with foam pre-filter Fuel type Fuel tank capacity 89 Octane minimum unleaded gasoline Fuel reserve amount at fuel gauge 7.1 gallons (27 L)
Page 29
SPECIFICATIONS ZFORCE 800 Trail Specification Item CF800US-A Spark plug: type DCPR8E (NGK) Spark plug gap .035 in.~.045 in. (0.8 mm~0.9 mm) Transmission CVT + Gear shift Gear shift/order Manual / L-H-N-R-P CVT ratio 0.70~2.88 Transmission Gear Low Gear 43/17=2.529 High Gear 32/28=1.143 ratio Reverse...
Page 30
SPECIFICATIONS ZFORCE 800 Trail Specification Item CF800US-A Tire pressure: Front 10.1 psi (70 kPa) Rear 14.5 psi (100 kPa) Brake system: Front axles: Double-disc / Rear axles: Double-disc Foot Operated Four wheel disc Foot brake Type / Operation Operated by hand Rear discs only Parking brake Type / Operation Brake Fluid Type...
Page 31
SPECIFICATIONS ZFORCE 800 Trail Specification Item CF800US-A Shock absorber: Front shock absorber Coil spring/Gas and Oil dampened Rear shock absorber Coil spring/Gas and Oil dampened Wheel travel: Front wheel travel 6.3 in. (160 mm) Rear wheel travel 7.8 in. (200 mm) Electrical system: Ignition Electronic...
Page 32
SPECIFICATIONS ZFORCE 800 Trail Specification Item CF800US-A Light system: Head lamp, low beam H3 12V 55W×2 Head lamp, high beam H7 12V 55W×2 Front position light Tail light/Brake light License plate light Incandescent - 5Wx1 Dashboard LED and LCD -- Non-serviceable Fuses Main –...
SPECIFICATIONS ZFORCE 500 Trail Specifications ZFORCE 500 Trail Specification Item CF500US Overall Length 112.9 in. (2870 mm) Overall Width 50.0 in (1270 mm) Overall Height 70.5 in. (1790 mm) Wheel Base 80.3 in. (2040 mm) Minimum ground clearance 11.3 in. (287 mm) Min.
Page 34
SPECIFICATIONS ZFORCE 500 Trail Specification Item CF500US Bore × Stroke 3.5 in. x 3.0 in (91 mm x 76.2 mm) Displacement 495 cc Compression ratio 10.3:1 Starting type Electric start Lubrication type Splash /pressure feed Engine coolant: Type Commercially available – Safe for aluminum engines Capacity 3.1 qt.
Page 35
SPECIFICATIONS ZFORCE 500 Trail Specification Item CF500US Rear differential oil: Type SAE 80W-90 GL-5 Volume 13.5 oz.(400mL) Front differential oil: Type SAE 80W-90 GL-5 Volume 11.2 oz. (330mL) Air filter Paper filter element with foam pre-filter Fuel type Fuel tank capacity 89 Octane minimum unleaded gasoline Fuel reserve amount at fuel gauge 7.1 gallons (25 L)
Page 36
SPECIFICATIONS ZFORCE 500 Trail Specification Item CF500US Spark plug: type DCPR8E (NGK) Spark plug gap .035 in.~.045 in. (0.8 mm~0.9 mm) Transmission CVT + Gear shift Gear shift/order Manual / L-H-N-R-P CVT ratio 0.67~3.02 Transmission Gear Low Gear 38/15=2.533 High Gear 27/20=1.350 ratio Reverse...
Page 37
SPECIFICATIONS ZFORCE 500 Trail Specification Item CF500US Tire pressure: Front 10.1 psi (70 kPa) Rear 14.5 psi (100 kPa) Brake system: Front axles: Double-disc / Rear axles: Double-disc Foot Operated Four wheel disc Foot brake Type / Operation Operated by hand Rear discs only Parking brake Type / Operation Brake Fluid Type...
Page 38
SPECIFICATIONS ZFORCE 500 Trail Specification Item CF500US Shock absorber: Front shock absorber Coil spring/Gas and Oil dampened Rear shock absorber Coil spring/Gas and Oil dampened Wheel travel: Front wheel travel 6.3 in. (160 mm) Rear wheel travel 7.8 in. (200 mm) Electrical system: Ignition Electronic...
Page 39
SPECIFICATIONS ZFORCE 500 Trail Specification Item CF500US Light system: Head lamp, low beam H3 12V 55W×2 Head lamp, high beam H7 12V 55W×2 Front position light Tail light/Brake light License plate light Incandescent - 5Wx1 Dashboard LED and LCD -- Non-serviceable Fuses Main –...
OPERATOR SAFETY Operator Safety General Safety Precautions WARNING Failure to respect the warnings contained in this manual can result in serious injury or death. This vehicle is not a toy and can be hazardous to operate. This vehicle handles differently from other vehicles, such as cars. A collision or rollover can occur quickly, even during routine maneuvers like turning or driving over obstacles, if you fail to take proper precautions.
Page 41
OPERATOR SAFETY Equipment Modifications CFMOTO is concerned with the safety of our customers and for the general public. Therefore, we strongly recommend that consumers do not install on a vehicle, any equipment that may increase the speed or power of the vehicle, or make any other modifications to the vehicle for these purposes. Any modifications to the original equipment of the vehicle create a substantial safety hazard and increase the risk of body injury.
Page 42
OPERATOR SAFETY Avoid Carbon Monoxide Poisoning All engine exhaust contains carbon monoxide, a deadly gas. Breathing carbon monoxide can cause headaches, dizziness, drowsiness, nausea, confusion and eventually death. Carbon monoxide is a colorless, odorless, tasteless gas that may be present even if you do not see or smell any engine exhaust.
OPERATOR SAFETY • If you swallow gasoline, get any in your eye(s), or inhale gasoline vapor, see a doctor immediately. • If gasoline spills on you, wash with soap and water and change your clothes. Avoid Burns from Hot Parts The exhaust system and engine become hot during operation.
Page 44
OPERATOR SAFETY Carrying a Passenger • Only carry one passenger. The passenger must be properly seated in the passenger seat. • The passenger must be at least 12 years old and tall enough to always be properly seated against the backrest with the seat belt fastened, holding both handholds, and feet firmly planted;...
Page 45
OPERATOR SAFETY • Always be sure there are no obstacles or people behind the vehicle when reversing. Pay attention to blind spots. When it is safe to proceed in reverse, go slowly. • Never exceed the stated load limits for this vehicle. Cargo must be properly secured. Reduce speed, allow for greater braking distance and follow other instructions in this manual.
Page 46
OPERATOR SAFETY • Never operate this vehicle on hills too steep for the vehicle or your abilities. Practice on small inclines. • Always follow proper procedures for climbing or going down hills. Never go over the top of any hill at high speed.
Page 47
OPERATOR SAFETY Safe Riding Gear Always wear clothing suited to the type of riding. Operating this vehicle requires special protective clothing for comfort and to reduce the chance of injury: 1. A helmet is the most important piece of protective gear for safe riding.
OPERATOR SAFETY Safety Labels, Locations and Warnings Warning labels have been placed on the vehicle for your protection. Read and follow the instructions on each decal carefully. If a decal becomes illegible or comes off, contact your dealer to purchase a replacement. Read and follow the safety warnings in this manual.
OPERATOR SAFETY Potential Hazard Warnings WARNING POTENTIAL HAZARD: Operating this vehicle without proper instruction. WHAT CAN HAPPEN: The risk of an accident is greatly increased if the operator does not know how to operate the vehicle properly in different situations and on different types of terrain. HOW TO AVOID THE HAZARD: Beginning and inexperienced operators should complete a safety training course if offered by dealer.
Page 54
OPERATOR SAFETY WARNING POTENTIAL HAZARD: Failure to follow the age recommendations for this vehicle. WHAT CAN HAPPEN: Severe injury and/or death could occur if a child under the minimum age recommendation operates this vehicle. Even though a child may be within the recommended age group for operating, he/she may not have the skills, abilities, or judgment needed to operate safely and could be susceptible to accident or injury.
Page 55
OPERATOR SAFETY WARNING POTENTIAL HAZARD: Carrying more passengers than the rated capacity. WHAT CAN HAPPEN: A passenger not seated in the vehicle could be ejected from the vehicle unexpectedly or make contact with moving components, both of which can result in severe injury or death. Carrying 2 or more passengers is prohibited.
Page 56
OPERATOR SAFETY WARNING POTENTIAL HAZARD: Operating this vehicle without wearing approved helmet, eye protection, and protective clothing. WHAT CAN HAPPEN: Operating without an approved helmet increases the risk of a severe head injury or death in the event of an accident.
Page 57
OPERATOR SAFETY WARNING POTENTIAL HAZARD: Operating the vehicle after consuming alcohol or drugs. WHAT CAN HAPPEN: Consumption of alcohol and/or drugs could seriously affect operator judgment. Reaction time may be slower and operator balance and perception could be affected. Consumption of alcohol and/or drugs before or while operating a vehicle could result in an accident causing severe injury or death.
Page 58
OPERATOR SAFETY WARNING POTENTIAL HAZARD: Operating at excessive speeds. WHAT CAN HAPPEN: Excessive speed increases the operator’s chance of losing control, which can result in an accident. HOW TO AVOID THE HAZARD: Always operate at a speed that’s proper for the terrain, visibility and operating conditions, and your experience.
Page 59
OPERATOR SAFETY WARNING POTENTIAL HAZARD: Failure to inspect the vehicle before operating. Failure to properly maintain the vehicle. WHAT CAN HAPPEN: Poor maintenance increases the possibility of an accident or equipment damage. HOW TO AVOID THE HAZARD: Always inspect your vehicle before each use to make sure it’s in safe operating condition. Always follow the inspection and maintenance procedures and schedules described in the owner’s manual.
Page 60
OPERATOR SAFETY WARNING POTENTIAL HAZARD: Failure to use extra caution when operating on unfamiliar terrain. WHAT CAN HAPPEN: Unfamiliar terrain may contain hidden rocks, bumps, or holes that could cause loss of control or overturn. HOW TO AVOID THE HAZARD: Travel slowly and use extra caution when operating on unfamiliar terrain.
Page 61
OPERATOR SAFETY WARNING POTENTIAL HAZARD: Failure to use extra caution when operating on excessively rough, slippery or loose terrain. WHAT CAN HAPPEN: Operating on excessively rough, slippery or loose terrain could cause loss of traction or loss of control, which could result in an accident or overturn.
Page 62
OPERATOR SAFETY WARNING POTENTIAL HAZARD: Climbing excessively steep hills or climbing hills improperly. WHAT CAN HAPPEN: Improper hill climbing could cause loss of control or overturn. HOW TO AVOID THE HAZARD: Never operate on hills too steep for the vehicle or for your abilities. Practice on smaller hills before attempting large hills.
Page 63
OPERATOR SAFETY WARNING POTENTIAL HAZARD: Traveling down excessively steep hills. WHAT CAN HAPPEN: Improper downhill travel could cause loss of control or overturn. HOW TO AVOID THE HAZARD: Never operate on hills too steep for the vehicle or for your abilities. Practice on smaller hills before attempting large hills.
Page 64
OPERATOR SAFETY WARNING POTENTIAL HAZARD: Improperly crossing hills and turning on hills. WHAT CAN HAPPEN: Improperly crossing or turning on hills could cause loss of control or overturn. HOW TO AVOID THE HAZARD: Use extra caution when turning on any hill. Avoid crossing the side of a steep hill. WHEN CROSSING THE SIDE OF A HILL: Always follow proper procedures as described in the owner's manual.
Page 65
OPERATOR SAFETY WARNING POTENTIAL HAZARD: Stalling, rolling backwards while climbing a hill. WHAT CAN HAPPEN: The vehicle could overturn. HOW TO AVOID THE HAZARD: Maintain a steady speed when climbing a hill. IF ALL FORWARD SPEED IS LOST: Close the throttle. Apply the brake. When fully stopped, shift the gear selector to the park position. IF THE VEHICLE BEGINS ROLLING: Never apply engine power.
Page 66
OPERATOR SAFETY WARNING POTENTIAL HAZARD: Improperly operating over obstacles. WHAT CAN HAPPEN: Operating over obstacles could cause loss of control or overturn. HOW TO AVOID THE HAZARD: Before operating in a new area, check for obstacles. Avoid operating over large obstacles such as rocks and fallen trees when possible.
Page 67
OPERATOR SAFETY WARNING POTENTIAL HAZARD: Overloading the vehicle or carrying/towing cargo improperly. WHAT CAN HAPPEN: Overloading and towing can cause changes in vehicle handling, which could lead to loss of control or an accident. HOW TO AVOID THE HAZARD: Never exceed the stated load capacity for this vehicle. Cargo should be properly distributed and securely attached.
Page 68
OPERATOR SAFETY WARNING POTENTIAL HAZARD: Operation the vehicle through deep or fast-flowing water. WHAT CAN HAPPEN: The tires may float, causing loss of traction and loss of control, which can lead to an accident or overturn. HOW TO AVOID THE HAZARD: Avoid operating through deep or fast-flowing water.
Page 69
OPERATOR SAFETY WARNING POTENTIAL HAZARD: Improperly operating in reverse. WHAT CAN HAPPEN: The vehicle could collide with an obstacle or person, resulting in severe injury. HOW TO AVOID THE HAZARD: Before shifting into reverse gear, always check for obstacles or people behind the vehicle. When it's safe to proceed, back slowly.
Page 70
OPERATOR SAFETY WARNING POTENTIAL HAZARD: Operating the vehicle with improper modifications. WHAT CAN HAPPEN: Improper installation of accessories or modification of the vehicle may cause changes in handling which could lead to an accident. HOW TO AVOID THE HAZARD: Never modify the vehicle through improper installation or use of accessories. All parts and accessories added to the vehicle must be genuine parts or equivalent components designed for use on this vehicle, and they should be installed and used according to approved instructions.
Page 71
OPERATOR SAFETY WARNING POTENTIAL HAZARD: Operating on frozen bodies of water. WHAT CAN HAPPEN: Severe injury or death can result if the vehicle falls through the ice. HOW TO AVOID THE HAZARD: Never operate the vehicle on a frozen body of water. WARNING Leaving the keys in the ignition can lead to unauthorized use of the vehicle, resulting in serious injury or death.
Page 72
OPERATOR SAFETY WARNING Safe operation of this vehicle requires good judgment and physical skills. Persons with cognitive or physical disabilities who operate this vehicle have an increased risk of overturn and loss of control, which could result in severe injury or death. WARNING Exhaust system components are very hot during and after use of the vehicle.
CONTROLS AND FEATURES Controls and Features Primary Controls Steering Wheel - The steering wheel is located in front of the driver’s seat. Tilt Lever - The tilt feature allows the steering wheel to be adjusted to fit the operator. Throttle Pedal - The throttle pedal is located to the right of the brake pedal.
Page 74
CONTROLS AND FEATURES Brake Pedal - The brake pedal is located to the left of the throttle pedal. Release the throttle pedal and press the brake pedal with your foot to slow or stop the vehicle. Shift Lever - The shift lever is located to the right of the driver’s seat. The shift lever is used to change the transmission gear selection: Shift Button - Press the shift button before shifting the gear.
Page 75
CONTROLS AND FEATURES NOTE: In reverse operation, the engine RPM is limited, thus limiting the vehicle reverse speed under 20km/h±5km/h (12.4mile/h±3.1mile/h). WARNING Use extreme caution driving downhill in reverse. Gravity can increase the vehicle speed above the set limited reverse speed. P –...
CONTROLS AND FEATURES Secondary Controls Ignition Key Switch and Engine Stop Switch - The ignition key switch and engine stop switch are located on the bottom left of the dashboard. The ignition switch has 3 positions. Use the key to control the ignition switch and start the engine.
Page 77
CONTROLS AND FEATURES WARNING Do not leave the ignition key inserted when the operator is away. An unauthorized use of the vehicle by others may result in serious injury or death. Always remember to remove the ignition key when the vehicle is not in use.
Page 78
CONTROLS AND FEATURES Horn Button - Press the button “ ”. The horn will sound. Low Beam / High Beam Switch - High Beam is selected when the switch is in this position. Low Beam is selected when the switch is in this position. Main Light Switch - The main light switch consists of 3 positions: Head lights and tail lights ‘ON’...
Page 79
CONTROLS AND FEATURES Hazard Switch - (Available only in select countries) When using the hazard switch function, the front and rear turn signal lights will flash. Also, the hazard switch indicator light in the dashboard will light up. 2WD / 4WD Switch - This vehicle is equipped with an on-command “2WD”/”4WD”...
Page 80
CONTROLS AND FEATURES On-Command 2WD / 4WD / 4WD-LOCK Switch Operation To change from 2WD to 4WD: Stop the vehicle. Verify the mode lever is moved to the left, and then press the switch to “4WD”. The 4WD indicator “ ” will display in the dashboard. To change from 4WD to 2WD: Stop the vehicle.
Page 81
CONTROLS AND FEATURES Hand Brake - This vehicle is equipped with an auxiliary hand brake, which is located to the right of the driver’s seat. Pull back on the lever to apply the rear brakes and prevent the vehicle from rolling when parked on an incline.
Page 84
CONTROLS AND FEATURES Feature Descriptions Footrests - This vehicle is equipped with driver and passenger footrests to allow firmly planting of feet on the vehicle floor, which helps minimize the risk of leg or foot injury and maintain proper body position while riding. Always wear appropriate footwear.
Page 85
CONTROLS AND FEATURES Driver Seat - The driver’s seat offers fore and aft adjustments. To adjust the seat, move the seat lever to unlock the seat. Release the lever to lock the seat into desired position. Passenger Seat - The passenger seat is not adjustable. Hand Brake - Press the release button and pull up lever to engage the hand brake.
Page 86
CONTROLS AND FEATURES Fuel Tank Fill Cap - The fuel tank fill cap is located on the passenger side of the vehicle near the passenger seat. To fill the tank, grasp the fuel cap firmly, then turn counter-clockwise and remove it. Reinstall the fuel cap securely after fuel tank fill is completed.
Page 87
CONTROLS AND FEATURES Fuel Minimum Octane Rating and Safety Warnings The recommended fuel for your vehicle is 89 Octane minimum, premium or mid-grade fuel (a maximum blend of 10% ethanol is allowed). Non-oxygenated (ethanol-free) fuel is recommended for best performance in all conditions.
Page 88
CONTROLS AND FEATURES 12 Volt Accessory Power An auxiliary 12Vdc power outlet is provided on the right side dashboard for operating accessories such as hand held spot lights and charging electronic devices. Please consult with your dealer on the use of powered accessories with your vehicle.
CONTROLS AND FEATURES CVT System This vehicle has a Continuously Variable Transmission (CVT) system that utilizes a drive belt and clutch pulleys to automatically vary transmission drive ratios, allowing infinite variability between the highest and lowest vehicle speeds with no discrete steps or shifts.
CONTROLS AND FEATURES Engine Braking System (EBS) - 800cc Engines Only Vehicles with an 800cc engine are equipped with an engine braking system. The primary wet clutch assembly inside the engine uses a one-way bearing to create engine braking, which occurs when the throttle is completely closed and the vehicle is at speed.
CONTROLS AND FEATURES How To Avoid CVT Drive Belt and Component Failure CVT clutch and belt life can be dramatically extended by avoiding these common operating mistakes: Causes CVT damage Solution Attempting to load the vehicle onto a truck bed or tall Shift transmission to low gear during loading of the trailer in high gear.
Page 92
CONTROLS AND FEATURES Causes CVT damage Solution Stuck in mud or snow. Shift the transmission to low gear, and carefully use fast, aggressive throttle application to engage CVT. WARNING: Excessive throttle may cause loss of control and vehicle overturn. Climbing over large objects from a stopped position. Shift the transmission to low gear, and carefully use fast, brief, aggressive throttle application to engage the CVT.
CONTROLS AND FEATURES Dashboard Indicators and Warnings 3 4 5 *Available only in select countries 1 Parking Brake ‘ON’ 6 Reverse 11 4WD Mode 16 Engine Temp 2 High Beam ‘ON’ 7 Parking 12 Oil Pressure 17 Seatbelt 3 Low Gear 8 EFI Fault 13 Fuel Gauge 18 Rider Information...
Page 94
CONTROLS AND FEATURES Indicators and Warnings - Hand brake ‘ON’. Illuminates when the hand brake lever is pulled. - High Beam ‘ON’. Illuminates when the headlight switch is in this position. - ‘L’= Low Gear Position. This indicator displays when the transmission is in Low. - ‘H’= High Gear Position;...
Page 95
CONTROLS AND FEATURES - Tail Light ‘ON’. This indicator displays when the main headlight switch is set to this position. - 4WD Indicator. This dashboard section corresponds to the drive method chosen. The front differential gear case contains the synchronizing component that signals the display. - Fuel Gauge.
Page 96
CONTROLS AND FEATURES temperature, ‘H’ is high temperature. Both over-low and over-high are abnormal. Idle the vehicle to warm the engine when it is too cold, and park the vehicle when it is too hot to prevent the coolant from boiling. Keep the coolant temperature in a normal range.
Page 97
CONTROLS AND FEATURES Navigating Dashboard Settings / Adjustments Item Displays SEL / ADJ Button Result Odometer / Trip Distance / ODO→TRIP→RPM→H Mode Toggle Engine RPM / Engine Hours / Short Press SEL Button →V→Brightness Battery Voltage/ Brightness Long Press SEL Button and Metric / Standard Metric ↔...
OPERATING YOUR VEHICLE Operating Your Vehicle Break-In Period The break-in period for a new engine is very important. Careful treatment of a new engine at the beginning of ownership will result in more efficient performance and longer life. Perform the following procedures carefully: 1.
Page 99
OPERATING YOUR VEHICLE CAUTION During the break-in period: • Do not operate at sustained full throttle. Damage to engine parts or decrease engine life may result if excessive wide open throttle is used during the first 20 hours of use. •...
OPERATING YOUR VEHICLE Pre-Ride Inspection Before each use of the vehicle, a best practice is to complete the pre-ride inspection checklist. WARNING If a proper inspection is not done before each use, severe damage to the vehicle, severe injury, or death could result.
OPERATING YOUR VEHICLE Starting the Engine WARNING Never run an engine in an enclosed area. Engine exhaust contains poisonous carbon monoxide and can cause loss of consciousness, resulting in severe injury or death. Starting a cold engine 1. Verify the gear selector is shifted to the Park or Neutral position. 2.
OPERATING YOUR VEHICLE CAUTION Allow the engine to warm up for a short period before operating the vehicle. Operating the vehicle immediately after starting could cause engine damage. Shifting the Transmission CAUTION To avoid transmission damage, return the throttle to the closed position, stop the vehicle, and apply the foot brake before shifting.
Page 103
OPERATING YOUR VEHICLE Shifting: High Gear to Low Gear 1. Verify the throttle is closed and the vehicle is stopped completely. 2. Apply the foot brake. 3. Shift to ‘L’ by moving the gear selector along the shift guide. Shifting: Low Gear to High Gear 1.
Page 104
OPERATING YOUR VEHICLE Shifting: to Park 1. Verify the throttle is closed and the vehicle is stopped completely. 2. Apply the foot brake and press the gear selector button. 3. Shift to ‘P’ by moving the gear selector along the shift guide. Shake the vehicle forward and backward to verify that parking is engaged.
SAFE OPERATION - DRIVING SAFELY Safe Operation - Driving Safely Responsibilities of the Operator As the operator of this vehicle, your common sense, judgment, and abilities are the only factors that will prevent injury to yourself, to others around you, and/or damage to the vehicle or environment. Recreational, group, and distance riding One of the benefits of this vehicle is that it can take you off-road away from most communities.
Page 106
SAFE OPERATION - DRIVING SAFELY A rollover or other accident can occur quickly during abrupt maneuvers such as: • Sharp turns or hard acceleration. • Deceleration when turning. • When driving on hills or over obstacles. Abrupt maneuvers or aggressive driving can cause rollovers or loss of control even in flat open areas. If the vehicle rolls over, any part of your body (such as arms, legs, or head) outside of the cockpit can be crushed and trapped by the cage or other parts of the vehicle.
Page 107
SAFE OPERATION - DRIVING SAFELY This vehicle can roll over sideways, or tip over forward or backwards on slopes or uneven terrain: • Avoid side hilling (driving along the slope rather than up or down a hill). When possible, drive straight up and down inclines rather than across them.
Page 108
SAFE OPERATION - DRIVING SAFELY Avoiding Collisions At higher speeds, there is an increased risk of losing control, particularly in challenging off-road conditions, and the risk of injury in a collision is greater. Never operate at excessive speeds. Always go at a speed that is proper for the terrain, visibility, and operating conditions, and your experience.
SAFE OPERATION - DRIVING SAFELY Practice Exercises Before you go out for a ride, it is very important to familiarize yourself with the handling of your vehicle by practicing in a controlled environment. Find a suitable area to practice and perform the following exercises. It should be at least 147 ft.
Page 110
SAFE OPERATION - DRIVING SAFELY Note how your vehicle reacts in these different exercises. CFMOTO recommends releasing the throttle before entering a turn to help initiate directional change. You will feel the lateral force increasing with the speed and with your steering input. The lateral force should be maintained as low as possible to make sure it does not cause the vehicle to roll over.
Page 111
SAFE OPERATION - DRIVING SAFELY Reverse Exercise Practice using the reverse: • Place 1 cone marker on both sides of the vehicle beside each rear wheel. • Move the vehicle forward until you can see the cone markers behind you, then stop the vehicle. Acknowledge the distance required to see obstacles behind you.
SAFE OPERATION - DRIVING SAFELY Operating Your Vehicle Off-Road Operation The very nature of off-road operation is dangerous. Any terrain which has not been specially prepared to carry vehicles presents an inherent danger where terrain substance, shape, and steepness are unpredictable.
Page 113
SAFE OPERATION - DRIVING SAFELY WARNING When driving downhill in reverse, gravity can increase the vehicle speed above the set limited reverse speed. Failure to use caution when operating in reverse can result in serious injury or death. NOTE: This vehicle is equipped with a reverse speed limiter function. In reverse operation, the engine RPM is limited, thus limiting the vehicle reverse speed.
Page 114
SAFE OPERATION - DRIVING SAFELY Shallow Water Crossing Water can be a unique hazard. If it is too deep the vehicle may “float” and topple. Check the water depth and current before you attempt to cross any water. Water should not exceed depth equal to the bottom of the floor board to safely cross.
Page 115
SAFE OPERATION - DRIVING SAFELY Riding on Sand Sand and riding on sand dunes is a unique experience, but there are some basic precautions that should be observed. Wet, deep, or fine sand may create a loss of traction and cause the vehicle to slide, drop off or become “bogged”...
Page 116
SAFE OPERATION - DRIVING SAFELY Hill Driving Conditions When driving on hills or slopes, two things are highly important: be prepared for slippery surfaces or terrain variations, obstacles, and brace yourself properly inside vehicle. If you climb or descend a hill that is too slippery or has too loose a surface, you can lose control.
SAFE OPERATION - DRIVING SAFELY Hauling and Towing Loads Your vehicle can help you perform a number of different light tasks ranging from snow removal, to pulling wood, or carrying cargo. This can change the vehicle handling. To prevent possible injury, follow the instructions and warnings in this manual and on the vehicle.
Page 118
SAFE OPERATION - DRIVING SAFELY Vehicle Settings When Carrying Loads If the total load approaches 782 lb. (355 kg), including weight of operator, passenger, cargo, accessories and trailer tongue weight: • Inflate the tires to maximum pressure 10 PSI (70 kPa) Front, 14 PSI (100 kPa) Rear. •...
Page 119
SAFE OPERATION - DRIVING SAFELY Pulling or Towing Your vehicle is equipped with a hitch receiver and winch for towing or pulling. Pulling a Load • Never pull a load by attaching it to the cage. This can cause the vehicle to tip over. Use only the trailer hitch or winch (if installed) to pull a load.
Page 120
SAFE OPERATION - DRIVING SAFELY Towing a Load If a trailer is towed behind the vehicle, make sure that its hitch is compatible with the one on the vehicle. Make sure the trailer is horizontal with the vehicle. Use safety chains or cables that keep the trailer secured to the vehicle in the event of a hitch failure.
Page 121
SAFE OPERATION - DRIVING SAFELY • When operating with loads extending beyond the cargo area, stability and maneuverability may be adversely affected, causing the machine to overturn. • Towing a load while carrying cargo may cause an imbalanced condition that increases the possibility of vehicle overturn.
SAFE OPERATION - DRIVING SAFELY Winch Operation (Select Markets) Your vehicle may be equipped with a winch that can pull certain capacities and types of loads. It is useful for vehicle self-recovery when stuck, assisting another vehicle in recovery, moving fallen trees, removing brush, etc.
Page 123
SAFE OPERATION - DRIVING SAFELY • Never winch up or down, or to the sides at sharp angles. This can destabilize the winching vehicle and possibly cause it to move without warning. • Never attempt to winch loads that weigh more than the winch capacity rating. • Never touch, push, pull, or straddle the cable while winching a load.
Page 124
SAFE OPERATION - DRIVING SAFELY • If winching at an angle is unavoidable, follow these precautions while operating: A. Look at the winch drum occasionally. Never let the winch cable “stack” or accumulate at one end of the drum. Too much cable at one end of the drum can damage the winch and cable. B. If cable stacking occurs, stop winching.
Page 125
SAFE OPERATION - DRIVING SAFELY BEFORE YOU BEGIN - Realize that each winching situation is unique: • Take your time to think through the winch operation you are about to perform. • Proceed slowly and deliberately. • Never hurry or rush during winching. • Always pay attention to your surroundings.
Page 126
SAFE OPERATION - DRIVING SAFELY WARNING: Never use a ‘recovery strap’ for winching. Recovery straps are designed to stretch and could release excessive energy that can result in SEVERE INJURY or DEATH if the strap or winch cable breaks. Use only undamaged tow straps or chains that do not stretch. 5.
Page 127
SAFE OPERATION - DRIVING SAFELY Vehicle Recovery Methods Vehicle Self-Recovery: • A. Release the winch drum and pull out the required length of cable. • B. Whenever possible, pick an anchor point that aligns the winch cable to the vehicle’s centerline as close as possible.
Page 128
SAFE OPERATION - DRIVING SAFELY Recovery of Another Vehicle: • A. Release the winch drum and pull out the necessary length of cable. • B. Attach the winch hook to the vehicle. Whenever possible, pick an anchor point on the stuck vehicle that aligns the winch cable to the winching vehicle’s centerline as close as possible.
Page 129
SAFE OPERATION - DRIVING SAFELY • A kinked winch cable made of wire rope that has been “straightened out”, even though it may look usable, has been permanently and severely damaged. It can no longer achieve its load capacity rating. Promptly discontinue use of a winch cable in this condition. • A winch cable made of synthetic rope should be inspected for signs of fraying.
Page 130
SAFE OPERATION - DRIVING SAFELY • B. Pull out the winch cable that is wrapped unevenly onto the drum. • C. Re-engage the winch drum. • D. Have an assistant pull the winch cable hook strap tightly to apply about 100 lbs. (45 kg) of tension. • E.
Page 131
SAFE OPERATION - DRIVING SAFELY • Never use recovery straps with your winch. This is a form of shock loading. Recovery straps are designed to stretch and can store energy. Stored energy in the recovery strap is released if a failure occurs, making the event even more hazardous.
MAINTENANCE Maintenance Following the maintenance schedule in your owner’s manual will help keep your vehicle in the safest, most reliable condition. Inspection, adjustment, and lubrication of important components are explained in the maintenance schedules Inspect, clean, lubricate, adjust, and replace parts as necessary. When inspection reveals the need for replacement parts, always use genuine parts available from your dealer.
MAINTENANCE Severe Use Definition CFMOTO defines severe vehicle use as: • Frequent immersion in mud, water or sand • Racing or race-style high RPM use • Prolonged low speed, heavy load operation • Extended engine idle • Short trip cold weather operation •...
MAINTENANCE Periodic Maintenance Schedule and Icon Key Maintenance intervals in the following schedules are based upon average riding conditions and an average operating speed of approximately 12.4 mph (20 km/h). Vehicles subjected to severe or commercial use must be inspected and serviced more frequently. The following icon keys are used to note special circumstances: ►...
Page 135
MAINTENANCE General Recommended Lubrication Check all components at the intervals outlined in the Periodic Maintenance Schedule. Items not listed in the schedule should be lubricated at the general lubrication interval. • Change lubricants more often under severe use, such as wet or dusty conditions. • Use All Season Grease on pivot points.
Page 136
MAINTENANCE Pre-Ride Maintenance Checklist Perform these inspections before operating the vehicle: Maintenance before operation Item Hour Calendar Miles (km) Remarks Pre-Ride ■ Steering system Pre-Ride ■ Throttle return Pre-Ride Front suspension and axles Visually inspect, test, Pre-Ride Rear suspension and axles or check components.
Page 137
MAINTENANCE Maintenance before operation Item Hour Calendar Miles (km) Remarks Inspect. If deposits are visible, clean intake Pre-Ride ► Air box sediment tube tubes, air box, and replace air filter. Inspect. If deposits are visible, drain / clean Pre-Ride ► CVT sediment tube the CVT or have it serviced by a dealer.
Page 138
MAINTENANCE Break-In Maintenance Checklist Perform these maintenance items when the vehicle break-in is completed: Break-in Maintenance (Perform at the interval that arrives first) Item Hour Calendar Miles (km) Remarks Lubricate all grease points, 200 (320) General lubrication pivots, cables, etc. Engine oil / oil filter / Change oil and filter.
Page 139
MAINTENANCE Break-in Maintenance (Perform at the interval that arrives first) Item Hour Calendar Miles (km) Remarks 200 (320) ► Brake pads Inspect pad thickness. Check terminals, clean, test 200 (320) Battery battery condition if required. Inspect for proper rpm. See 200 (320) ■...
Page 140
MAINTENANCE Periodic Maintenance Schedule Perform maintenance at the interval that arrives first after the break-in period: Periodic Maintenance Intervals (Perform at the interval that arrives first) Item Hour Calendar Miles (km) Remarks Monthly 100 (160) ► Brake pads Inspect pad thickness. Check terminals.
Page 141
MAINTENANCE Periodic Maintenance Intervals Item (Perform at the interval that arrives first) Hour Calendar Miles (km) Remarks Inspect level. Change yearly if 100h 1000 (1600) ► Front gear case oil hours or distance interval is not met. Inspect level. Change yearly if 100h 1000 (1600) ►...
Page 142
MAINTENANCE Periodic Maintenance Intervals (Perform at the interval that arrives first) Item Hour Calendar Miles (km) Remarks Inspect; clean external surfaces. Clean more 500 (800) ► Radiator frequently if subjected to severe use. 500 (800) Inspect. Lubricate. ■ Steering system L u b r i c a t e .
Page 143
MAINTENANCE Periodic Maintenance Intervals (Perform at the interval that arrives first) Item Hour Calendar Miles (km) Remarks Inspect. Replace 100h 1000 (1600) ► ■ CVT drive belt as necessary. See dealer for service. Clean and Inspect pulleys. Replace 100h 1000 (1600) ■...
Page 144
MAINTENANCE Periodic Maintenance Intervals (Perform at the interval that arrives first) Item Hour Calendar Miles (km) Remarks Inspect fuel tank, cap, ● 100h 500 (800) Fuel system fuel pump and fuel pump relay. Inspect; Replace if 100h 2000 (3200) Spark plug worn or fouled.
Page 145
MAINTENANCE Periodic Maintenance Intervals Item (Perform at the interval that arrives first) Hour Calendar Miles (km) Remarks Inspect for noise or 100h 1500 (2400) ► ■ Wheel bearings looseness. Replace as necessary. Visually inspect belts and test latches. Clean latch 100h 2000 (3200) ►...
Page 146
MAINTENANCE Periodic Maintenance Intervals (Perform at the interval that arrives first) Item Hour Calendar Miles (km) Remarks Inspect fluid for color 200h 1000 (1600) ► Brake fluid change. Change fluid every two years. Inspect for proper rpm. See dealer for Idle condition service if out of spec or erratic.
Page 147
MAINTENANCE Maintenance Procedures Air filter Check and change the air filter at the intervals outlined in the Maintenance Schedule. The air filter element should be cleaned or replaced more often if the vehicle is used in extremely dusty or wet areas.
Page 148
MAINTENANCE Air filter maintenance 1. Remove the cover panel, located in the right rear fender well. 2. Remove the cover spring clips and remove the filter housing cover 3. Loosen the air filter clamp and remove the air filter 4. Remove the foam pre-filter from the air filter.
Page 149
MAINTENANCE Drying the air filter housing after submersion If water has been ingested into the air filter housing, Drain the air filter housing, remove the air filter, and thoroughly dry the components. Do not use compressed air on the paper air filter. Contact your dealer if vehicle performance issues exist.
Page 150
MAINTENANCE Engine oil maintenance – 500/800 only Always check and change the engine oil at the intervals outlined in the Maintenance Schedule. Change oil more frequently under severe use conditions. Oil level check (500/800) 1. Place the vehicle on a level surface. 2.
Page 151
MAINTENANCE Oil and filter change (500/800) 1. Place the vehicle on a level surface. 2. If the engine was running, wait a sufficient amount of time for the oil to settle and cool. 3. Place an oil pan under the engine to collect the used oil. 4.
Page 152
MAINTENANCE 9. Remove the oil filter cover fasteners and cover from the crankcase. 10. Remove the oil filter cartridge from the crankcase housing. 11. Install a new oil filter cartridge in the crankcase housing. 12. Inspect and verify the cover O-ring is okay to reuse, and then install it into the groove of the crankcase housing correctly.
Page 153
MAINTENANCE Engine oil maintenance- 1000 engine only NOTE: The 1000 engine has separate engine and transmission oil drain / fill locations. It also has an internal sump strainer behind a cover that can be checked and cleaned during an oil change. Oil level check (1000) 1.
Page 154
MAINTENANCE 4. Remove the engine oil drain bolt from the bottom of the crankcase and drain the oil. 5. Place a new sealing washer on the drain bolt, then assemble and tighten the drain bolt to 22 ft-lb. (30 N•m).Remove the oil filter cover fasteners and cover from the crankcase.
Page 155
MAINTENANCE Transmission oil maintenance- 1000 engine only Oil level check (1000) 1. Place the vehicle on a level surface. 2. If the engine was running, wait a sufficient amount of time for the oil to settle and cool. 3. Unscrew the transmission oil dipstick , remove it, and wipe off with a clean cloth.
Page 156
MAINTENANCE Engine valve clearance adjustment The intake and exhaust valve clearances change with use of the vehicle, which can result in improper fuel/air supply or engine noise. To prevent this, the valve clearances must be adjusted according to the maintenance schedule.
Page 157
MAINTENANCE Front and rear gear case The front and rear gear case must be checked for oil leaks before operating. If any leaks are found, have your dealer check and repair the vehicle. Front gear case oil check 1. Place the vehicle on a level surface. 2.
Page 158
MAINTENANCE Front gear case oil change 4. Place the vehicle on a level surface. 5. Place an oil pan under the gear case to collect the used oil. 6. Remove the oil drain bolt at the bottom of the gear case and drain the oil.
Page 159
MAINTENANCE Rear gear case oil check 1. Place the vehicle on a level surface. 2. Remove the oil filler bolt and check the oil level. The level should be up to the brim of the hole. If the level is low, add sufficient oil to raise it to the specified level.
Page 160
MAINTENANCE Front and rear axle boots The front and rear axle boots must be checked for holes or wear before operating. If any damage is found, have your dealer repair the vehicle.
Page 161
MAINTENANCE CVT air outlet check hose There is a check hose at the bottom of the CVT cooling outlet duct, located at the rear of the engine. If dust or water can be viewed in this hose, empty the hose and clean or drain the CVT housing.
Page 162
MAINTENANCE Cooling system Coolant level inspection 1. Place the vehicle on a level surface. 2. Inspect the coolant level in the reservoir , which can be viewed through the left side inner fender area. 3. If the coolant is at or below the lower limit mark; remove the access cover and the reservoir cap .
Page 163
MAINTENANCE Change the coolant CAUTION After running the engine, never remove the radiator cap immediately. Wait for the engine to cool down before removing the radiator cap. Hot coolant can cause serious burns. 1. Place the vehicle on a level surface. 2.
Page 164
MAINTENANCE 5. Place a container under the engine, and then remove the coolant drain bolt 6. Disconnect the hose from the coolant reservoir, and drain the coolant into a container. 7. After draining the system, thoroughly flush the system with clean tap water.
Page 165
MAINTENANCE 13. Fill the coolant reservoir with coolant up to the upper limit. 14. Install the coolant reservoir cap and check for coolant leaks. If any leaks are found, have your dealer check the cooling system. 15. Reinstall the front access cover. NOTE: Recommended antifreeze: Any high quality ethylene glycol antifreeze containing corrosion inhibitors for aluminum engines.
Page 166
MAINTENANCE Spark plug(s) The spark plug is an important engine component that is easy to Spark Plug – #1 Cylinder 1000/800/500 inspect. The color and condition of the spark plug can indicate the condition of the engine. The ideal color on the insulator around the center electrode is a medium-to-light tan color for an engine that is being operated normally.
Page 167
MAINTENANCE 4. Use the spark plug socket and wrench from the tool kit to remove the spark plug. 5. Check the spark plug gap using a thickness gauge. Adjust the gap if necessary. NOTE: Specified spark plug: DCPR8E (NGK) Spark plug gap: 0.035 in ~ 0.045 in. (0.8 mm ~ 0.9 mm) 6.
Page 168
MAINTENANCE Spark plug removal to expel water from the engine If water has been ingested into the engine, it is important to remove the water as soon as possible by removing the spark plug(s) and using the starter system to rotate the engine for a short period to expel water out of the cylinder(s).
Page 169
MAINTENANCE Exhaust spark arrestor Clean carbon deposits from the spark arrester periodically while the muffler and exhaust are at normal air temperature. CAUTION Ensure that the exhaust pipe and muffler are fully cooled down before servicing the spark arrestor. 1. Remove the fasteners 2.
Page 170
MAINTENANCE Battery This vehicle is equipped with a 12 volt/30 Amp-hour, sealed low-maintenance battery, which is located behind the left rear cover panel. Therefore, it is not necessary to check the electrolyte or add distilled water to the battery. If the battery seems to have discharged, consult your dealer. Verify that the battery connections are clean and secured during routine maintenance.
Page 171
MAINTENANCE Brake Brake fluid level inspection Before riding, check that the brake fluid level is above the low mark and replenish whenever necessary. Insufficient brake fluid may let air enter the brake system, possibly causing the brakes to become ineffective. The brake fluid master cylinder reservoir levels (A) can be viewed from the left side inner fender well.
Page 172
MAINTENANCE Brake pad inspection Inspect the front and rear brake pads and discs for damage and wear. If the pad thickness is less than 0.059 in. (1.5mm) or the disc thickness is less than 0.118 in. (3.0mm), have your dealer replace them. Replacement of brake components requires professional knowledge.
Page 173
MAINTENANCE Brake fluid change Complete brake system fluid replacement should be performed only by trained service personnel. Have your dealer replace the following components during periodic maintenance, or when they are damaged or leaking: • Replace the seals every two (2) years. •...
Page 174
MAINTENANCE Suspension Some front suspension components of the vehicle do not require maintenance or lubrication. Ensure these components are cleaned regularly, and are not loose or damaged before operating the vehicle. Pivot Lubrication Lubricate the upper and lower pivots of the front and rear suspension: 1.
Page 175
MAINTENANCE Shock preload and damping adjustment The front and rear shock spring preload and damping can be adjusted to for rider weight, cargo, and riding conditions. Always adjust the shock absorbers on the left and right side to the same setting.
Page 176
MAINTENANCE Wheels Tire pressure Inspect the tire pressure before operation: Front: 10.1 psi (70kPa) Rear: 14.5 psi (100kPa) Tread depth Inspect the tread depth regularly and replace the tires if the minimum tread depth is less than: Minimum tread depth: 3/32 in. (3.0mm) Wheel Bearings 1.
Page 177
MAINTENANCE Wheel Removal 1. Ensure vehicle is in park. 2. Loosen the wheel fasteners. 3. Elevate the vehicle and place a suitable support stand under the frame. 4. Remove the fasteners from the wheel. 5. Remove the wheel. Wheel Installation 1.
Page 178
MAINTENANCE Electrical Fuses The fuses are located under the front access cover. Removal of the inner storage compartment is required to gain access. If a fuse is blown, turn off the main switch and install a new fuse of the specified amperage. Turn on the main switch.
Page 179
MAINTENANCE Main Fuse and EPS Fuse The Main fuse and EPS fuse are located under the driver’s seat access panel. If the fuse is blown, turn off the main switch and install a new fuse of the specified amperage. Turn on the main switch.
Page 180
MAINTENANCE Relay Control Functions: High Beam Relay Low Beam Relay Fan Relay Fuel Pump Relay 2x4 Relay 4x4 LOCK Relay Main Relay Auxiliary Start Relay Flash Relay (if equipped) Head light adjustment To adjust the head lights: • Turn screws to adjust the high beam direction beam vertically and horizontally.
Page 181
MAINTENANCE Head light replacement 1. Access the headlight lamp: • Remove the cover from the headlight assembly turning it counter-clockwise. • Remove the cover to expose the headlight lamp. 2. Remove the headlight lamp lock spring. 3. Disconnect the failed bulb, pull it out, and replace it with a new bulb.
Page 182
MAINTENANCE Tail/brake, position, and turn signal lamp replacement Brake/tail lights, front position lights, and turn signals (if equipped) are LED type. Have your dealer replace the entire assembly if an LED is damaged or has failed. License plate lamp replacement If the license plate lamp has failed: 1.
Page 183
MAINTENANCE Fuel Evaporation System (EVAP) Your vehicle contains a fuel evaporation system (EVAP) that prevents fuel vapors from entering the atmosphere from the fuel tank and fuel system. Never modify any part of this system, which will violate fuel evaporation emission regulations. During routine maintenance, visually inspect all connections for leaks and blockage, and inspect the hoses for kinks or damage.
Page 184
CLEANING AND STORAGE Cleaning and Storage Washing the vehicle Keeping your vehicle clean will not only improve its appearance, but it can also extend the life of various components. With a few precautions, your vehicle can be cleaned much like an automobile: •...
Page 185
CLEANING AND STORAGE CAUTION Certain products, including insect repellants and other chemicals, will damage plastic surfaces. Use caution when using these products near plastic surfaces. Perform repairs Make necessary repairs to your vehicle before storing to prevent further damage the next time you operate it. Check the tires Inspect the tire treads and overall condition.
Page 186
CLEANING AND STORAGE Check fluid levels Inspect the following fluid levels and change if necessary: • Front gear case • Rear gear case • Brake fluid (change every two years or as required if fluid looks dark or contaminated) • Coolant (change every two years or as required if coolant looks contaminated) •...
Page 187
‘Fog’ the engine 1. Remove the cargo box panel to access the spark plug(s). 2. Remove the spark plug(s), rotate the piston to the bottom of its stroke, and pour approximately 2.0 oz. (15mL~20mL) of engine oil into the opening. NOTE: Do this carefully! If you miss the spark plug hole, oil will drain from the spark plug cavity, and appear to be an oil leak.
Page 188
Transporting the vehicle Follow these procedures when transporting the vehicle on a flatbed trailer: • Turn off the engine and remove the key to prevent loss during transporting. • Place the gear shift into any position except the parking position, then block the front and rear wheels to prevent the vehicle from moving.
Page 189
VEHICLE DIAGNOSIS Vehicle Issue Diagnosis This section is intended to guide an average owner to simple items that could cause operating problems. Diagnosis of vehicle issues may require the experience of a dealership technician. Please contact your dealer if a solution is not apparent. Engine starter doesn’t turn on Possible Cause Solution...
Page 190
VEHICLE DIAGNOSIS Engine stops or loses power Possible Cause Solution Clean radiator screen and external core; clean engine Overheated engine exterior; See your dealer Out of fuel Refuel with minimum 89 octane unleaded fuel Kinked or plugged fuel tank vent line Inspect and replace;...
Page 191
VEHICLE DIAGNOSIS Engine turns over, Fails to start Possible Cause Solution Out of Fuel Refuel Clogged fuel filter Inspect and replace as necessary Water is present in fuel Replace with 89 minimum octane unleaded fuel Fuel pump is inoperative Inspect pump and fuse; Replace as necessary Old or non-recommended fuel Replace with 89 minimum octane unleaded fuel Fouled or defective spark plug(s)
Page 192
VEHICLE DIAGNOSIS Engine backfires Possible Cause Solution Weak spark from spark plugs Inspect and replace spark plugs as necessary Incorrect spark plug gap or heat range Set gap to specs or replace plugs Old or non-recommended fuel Replace with minimum 89 octane unleaded fuel Incorrectly installed spark plug wires See your dealer Incorrect ignition timing...
Page 193
VEHICLE DIAGNOSIS Possible Cause Solution Electronic throttle control malfunction See your dealer Other mechanical failure See your dealer Possible Lean or Rich fuel mixture See your dealer Low or contaminated fuel Add or change fuel, clean the fuel system Low octane fuel Replace with minimum 89 octane unleaded fuel Clogged fuel filter Replace filter...
Page 194
VEHICLE DIAGNOSIS EFI Malfunction Indicator Light The Electronic Fuel Injection system on your vehicle contains a self-diagnostic feature that will illuminate the malfunction indicator light ( M IL ) if it detects a problem. When this indicator is on,please contact your dealer for diagnosing.
Page 195
VEHICLE DIAGNOSIS EPS Malfunction Indicator Light The Electronic Power Steering system on your vehicle contains a self-diagnostic feature that will illuminate the malfunction indicator light (MIL) if it detects a problem. In normal operation, the EPS indicator will be on after the ignition switch is turned to ON, but EPS will not work.
Page 196
VEHICLE DIAGNOSIS Times of long flash represent the tens digit. Times of short flash represent the single digit. Duration of long flash: 2 sec. Duration of short flash: 1 sec. Flash interval: 1 sec. The flash cycle will repeat after EPS MIL indicator light turns off for 3 seconds Stop operating the vehicle and contact your dealer immediately if the EPS system MIL is flashing or there is a loss of steering assist with the engine running.
Page 197
VEHICLE DIAGNOSIS Electronic Power Steering (EPS) fault diagnosis and solution Failure Probable Reason Solution 1. Check whether wire 1. Wire Connectors have bad contact or are connectors and pins disconnected are fully inserted 2. The fuse blew out Steering without assistance 2.
Page 198
CFMOTO LIMITED WARRANTY FOR USA CFMOTO Limited Warranty Dear Customer: Thank you for purchasing a CFMOTO product, if any component on your vehicle is found to be defective in materials or workmanship within the terms and conditions of this Limited Warranty, the defective component will be repaired or replaced (at the option of CFMOTO) without charge for parts and/or labor at any authorized dealer located within the United States.
Page 199
CFMOTO LIMITED WARRANTY FOR USA A. A 30-DAY WARRANTY coverage period applies to all new CFMOTO vehicles in relation to the vehicle’s: • Battery • Spark Plugs • Air Filters • Oil and Fuel Filters B. A 90-DAY WARRANTY coverage period applies to all new CFMOTO vehicles in relation to the vehicle’s: •...
Page 200
CFMOTO LIMITED WARRANTY FOR USA 3. EXCLUSIONS FROM WARRANTY COVERAGE: Any Damage resulting from the following acts or circumstances is not covered by the CFMOTO POWERSPORTS, Inc., Limited Warranty: • Fire • Collision • Theft • Unavoidable natural disasters • Improper storage or transportation •...
Page 201
CFMOTO LIMITED WARRANTY FOR USA 5. TRANSFER OR CONTINUATION OF WARRANTY: This warranty is transferable only under the following conditions: • Transfer information must be provided to an authorized CFMOTO POWERSPORTS, Inc. dealer, who will then forward the information to CFMOTO POWERSPORTS, Inc.; •...
Page 202
CFMOTO LIMITED WARRANTY FOR USA 8. CUSTOMER ASSISTANCE: Any questions or concerns regarding your CFMOTO vehicle or related products should be directed to an authorized CFMOTO dealer. However, if a dealer is unable to address customer concerns or a product issue, CFMOTO POWERSPORTS Customer Service can be contacted directly at (763) 398-2690 or by e-mail: info@cfmotousa.com.
Page 203
CFMOTO LIMITED WARRANTY FOR USA 12. INTEGRATION: This limited warranty supersedes any and all oral, express, or written warranties, statements, or undertakings that may previously have been made, and contains the entire agreement of the parties with respect to the warranty of CFMOTO vehicles. Any and all warranties not contained in this Agreement are specifically excluded.
Page 204
CFMOTO LIMITED WARRANTY FOR USA CALIFORNIA EVAPORATIVE EMISSIONS CONTROL WARRANTY STATEMENT YOUR WARRANTY RIGHTS AND OBLIGATIONS INTRODUCTION: The California Air Resources Board (CARB) and CFMOTO Powersports, Inc. (CFMOTO) are pleased to explain the evaporative emissions control system warranty on your 2020 and later-model year off-highway recreation vehicles (OHRVs).
Page 205
CFMOTO LIMITED WARRANTY FOR USA As an owner, you are responsible for presenting your OHRV to a CFMOTO dealer as soon as a problem exists. The warranty repairs should be completed in a reasonable amount of time, not to exceed 30 days. As an OHRV owner, you should also be aware that CFMOTO may deny you warranty coverage if your OHRV or a part has failed due to abuse, neglect, improper maintenance or unapproved modifications.
Page 206
CFMOTO LIMITED WARRANTY FOR USA U.S.A. EPA and CARB Emissions Control Limited Warranty This emissions limited warranty is in addition to the CFMOTO Powersports, Inc. standard limited warranty for your vehicle. CFMOTO Powersports, Inc. warrants that at the time it is first purchased, this emissions- certified vehicle is designed, built and equipped so it conforms to applicable U.S.
Page 207
CFMOTO LIMITED WARRANTY FOR USA For exhaust emissions, emission-related components include any engine parts related to the following systems: • Air-induction system (excludes filters) • Ignition system (excludes spark plugs) • Fuel system (excludes filters) • Exhaust gas recirculation systems The following parts are also considered emission-related components for exhaust emissions: •...
Page 208
CFMOTO LIMITED WARRANTY FOR USA The exclusive remedy for breach of this limited warranty shall be, at the exclusive option of CFMOTO Powersports, Inc., repair or replacement of any defective materials, components or products. THE REMEDIES SET FORTH IN THIS LIMITED WARRANTY ARE THE ONLY REMEDIES AVAILABLE TO ANY PERSON FOR BREACH OF THIS WARRANTY.
Page 209
CFMOTO LIMITED WARRANTY FOR USA ALL IMPLIED WARRANTIES (INCLUDING BUT NOT LIMITED TO ANY IMPLIED WARRANTIES OF MERCHANTABILITY AND FITNESS FOR A PARTICULAR PURPOSE ARE LIMITED IN DURATION TO THE WARRANTY PERIOD DESCRIBED HEREIN. CFMOTO POWERSPORTS, INC. DISCLAIMS ALL EXPRESS WARRANTIES NOT STATED IN THIS WARRANTY.
Page 210
CFMOTO LIMITED WARRANTY FOR USA Noise Control System and Tampering Warranty time period: 1,865 miles (3000 km) Federal law prohibits the following acts or causing thereof: (1) The removal or rendering inoperative by any person other than for purposes of maintenance, repair, or replacement, of any device or element of design incorporated into any new vehicle for the purpose of noise control prior to its sale or delivery to the ultimate purchaser or while it is in use or;...
Page 211
CFMOTO LIMITED WARRANTY FOR USA Change of Ownership If you sell your vehicle, any valid remainder of the warranty can be transferred to the new owner. Please record the details of the exchange below and inform an authorized CFMOTO dealer: Change of Ownership Original Purchaser Owner Owner...
Page 212
5BRV-380101-1400-13 US215 DISTRIBUTED BY MANUFACTURED BY: DISTRIBUTED BY: CFMOTO POWERSPORTS INC. CANADA MOTOR IMPORT INC. ZHEJIANG CFMOTO POWER CO., LTD. 3555 Holly Lane N. Suite #30, Plymouth MN, 55447, USA 24 rue Industrielle, Saint-Benoît Labre, Add:NO.116,Wuzhou Road, Yuhang Economic Development Québec, Canada, G0M 1P0 Zone,Hangzhou 311100,Zhejiang Province,China Toll free: (888) 8-CFMOTO (823-6686)
Need help?
Do you have a question about the ZFORCE 800EX and is the answer not in the manual?
Questions and answers
What type of JASO oil for z force 800
The recommended JASO oil type for the CF MOTO ZFORCE 800EX is JASO-certified engine oil suitable for wet clutches, commonly sold as motorcycle oil.
This answer is automatically generated
Где находится номер двигателя?