Advertisement
Quick Links
Advertisement

Related Manuals for Kogan KAPR6FHDWAA


Summary of Contents for Kogan KAPR6FHDWAA
- Page 1 600 ANSI FULL HD WI-FI PROJECTOR (W6) KAPR6FHDWAA...
- Page 2 Safety & Warnings Components Overview Operation Troubleshooting Specifications Notes...
-
Page 3: Safety And Warnings
• Do not attempt to repair this product yourself. If the product or its power supply experiences any malfunction or damage, cease use immediately and contact help.Kogan.com for support. • Ensure the projector is a safe distance from any heat-emitting devices or the service life of the projector may be shortened. - Page 4 COMPONENTS Projector Remote AV Cable HDMI Cable Power Cable User Guide...
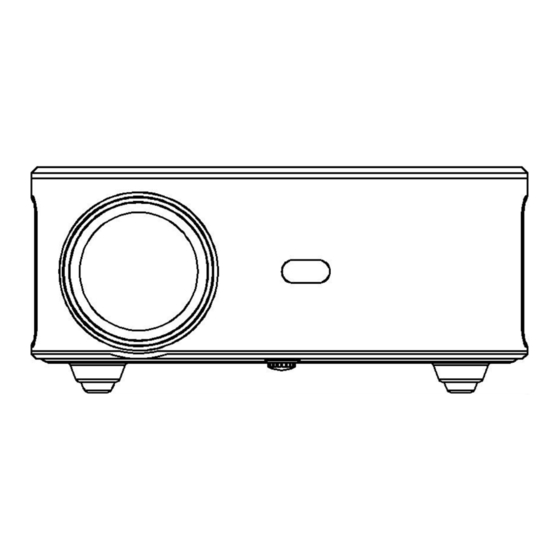
- Page 5 OVERVIEW...
- Page 6 Focus lens Removable dust cover release Adjusting knob USB port IR receiver HDMI 1 port 3.5mm port for audio output HDMI 2 port AV port Power switch Speaker Focussing ring IR receiver Removable dust cover Removable dust cover...
- Page 7 Adjusting knob (lifting nut) Remote Control Power Switch Signal Source Direction Button Confirm Button Home Button Back Button Menu Button Pause/Play Button Volume + Fast forward Volume - Previous Mute...
-
Page 8: Operation
OPERATION Placement and Mounting Before using the projector, select an appropriate area that has reduced brightness to allow for the best viewing results. If the projector will be mounted to the ceiling, this projector supports most universal mounts (sold separately). 1. - Page 9 Ceiling Mounting Rubber pads Ceiling mounting Purchase a universal projector ceiling mount. Remove the four rubber pads on the underside of the projector, you will see the screw holes. Use the M4x10mm screws to install the ceiling mount. Following the instructions included with your mounting kit to mount the projector. Projection Size and Distance Follow the data in chart below, to adjust the image size and the distance.
- Page 10 Power Connection Connect the power cord as shown below and turn on the power outlet. Remove the lens cover and press the power button on the remote control to turn on the projector. Focus The initial projection may be blurry and out of focus. Use the focus dial on the projector until the projection becomes clear.
- Page 11 Keystone Adjustment Vertical keystone correction: Press the “Setting” button on the remote or on the projector to enter the settings menu. Select “Projection” settings and press “OK” to enter. Turn off “Auto Trapezoid” to enter the manual adjustment mode. Select “4-side Trapezoid”, press OK to enter the keystone adjustment page, use the remote control or the direction buttons of the projector to adjust the vertical parameters in the manual keystone option until you get a vertical picture.
- Page 12 4-point Keystone Correction Horizontal and vertical keystone correction: When the projected image is not rectangular, it can be adjusted using 4-point keystone correction. Use the remote control or projector buttons to enter the settings menu. Select “Projection” settings and press “OK” to enter. Turn off “Auto Trapezoid”...
- Page 13 Input Source HDMI: Connect the projector and equipment using the HDMI cable. Press and hold the source button on the projector or remote control to enter the input source interface or use the direction buttons to select HDMI on the main interface of the projector.
- Page 14 USB: Insert a USB storage device into the USB Port on the projector. Select “USB” form the main menu. Select from Movie, Music, Photo or Text options. Confirm the file you want to play. Connecting to Wi-Fi Use the remote control or the projector buttons to enter the settings menu. Select the “WIFI”...
- Page 15 Screen Mirroring iOS devices (streaming using Wi-Fi): Ensure both the projector and your phone are connected to the same Wi-Fi network. On the projector's main menu, use the remote control to select “IOS Cast”. On the iOS device, slide up to enter the options interface then select Screen Mirroring.
- Page 16 MacBooks Ensure both the projector and your Macbook are connected to the same Wi-Fi network. On the projector's main menu, use the remote control to select “IOS Cast”. Open the settings on your MacBook and find the Airplay option, click and search for the projector.
- Page 17 Windows PC (Wireless Miracast support Window 7.8.10 system): Ensure the PC and projector are connected to the same Wi-Fi network. Enter the URL “http://h.eshare.app” in a browser on your computer and select the (Eshare for Windows) option to download. After the download is complete, open the Eshare APP, select one-click screen sharing to connect to the projector.
- Page 18 Connect the projector to phone via Bluetooth Find the “BT Speaker” icon on the main menu and press “OK” to enter. Enable Bluetooth of your phone, select “Projector” from the list of Bluetooth devices and click Pair to connect.
-
Page 19: Troubleshooting
TROUBLESHOOTING Q1. Blurry Image • Make sure the projection distance is farther than the minimum projection distance of 1.3m. • Adjust focus ring. Q2. The projector image shows no signal • Ensure all cables are connected to the projector properly. •... -
Page 20: Specifications
SPECIFICATIONS Display Technology Aspect Ratio 16:9/4:3/Auto Keystone ±30° Speaker 5Wx2 Dimensions 256.9x219.6x101.5 Supported Photo Formats JPG/JPEG/PNG/BMP Supported Video Formats 3GP/AVI/FLV/MP4/MPG/VOB/TS/M2TS/RMVB/MKV Light Source Focus Manual Projection Mode Front/Rear/Ceiling Power Rating AC 100-240V, 50/60Hz Net Weight 2.6kg Audio Format Supported MP3/AAC/FLAC/OGG/WAV/WMA/MID/DTS/M4A Ports HDMI (x2) / USB 2.0 / Audio in / AV... - Page 21 NOTES...
- Page 24 Need more information? We hope that this user guide has given you the assistance needed for a simple set-up. For the most up-to-date guide for your product, as well as any additional assistance you may require, head online to help.kogan.com...
Need help?
Do you have a question about the KAPR6FHDWAA and is the answer not in the manual?
Questions and answers